
This page walks you through a simple demonstration of how CockroachDB remains available during, and recovers after, failure. Starting with a 3-node local cluster, you'll remove a node and see how the cluster continues uninterrupted. You'll then write some data while the node is offline, rejoin the node, and see how it catches up with the rest of the cluster. Finally, you'll add a fourth node, remove a node again, and see how missing replicas eventually re-replicate to the new node.
Before you begin
Make sure you have already installed CockroachDB.
Step 1. Start a 3-node cluster
Use the cockroach start command to start 3 nodes:
# In a new terminal, start node 1:
$ cockroach start \
--insecure \
--store=fault-node1 \
--listen-addr=localhost:26257 \
--http-addr=localhost:8080 \
--join=localhost:26257,localhost:26258,localhost:26259
# In a new terminal, start node 2:
$ cockroach start \
--insecure \
--store=fault-node2 \
--listen-addr=localhost:26258 \
--http-addr=localhost:8081 \
--join=localhost:26257,localhost:26258,localhost:26259
# In a new terminal, start node 3:
$ cockroach start \
--insecure \
--store=fault-node3 \
--listen-addr=localhost:26259 \
--http-addr=localhost:8082 \
--join=localhost:26257,localhost:26258,localhost:26259
Step 2. Initialize the cluster
In a new terminal, use the cockroach init command to perform a one-time initialization of the cluster:
$ cockroach init \
--insecure \
--host=localhost:26257
Step 3. Verify that the cluster is live
In a new terminal, use the cockroach sql command to connect the built-in SQL shell to any node:
$ cockroach sql --insecure --host=localhost:26257
> SHOW DATABASES;
  database_name
+---------------+
  defaultdb
  postgres
  system
(3 rows)
Exit the SQL shell:
> \q
Step 4. Remove a node temporarily
In the terminal running node 2, press CTRL-C to stop the node.
Alternatively, you can open a new terminal and run the cockroach quit command against port 26258:
$ cockroach quit --insecure --host=localhost:26258
initiating graceful shutdown of server
ok
Step 5. Verify that the cluster remains available
Switch to the terminal for the built-in SQL shell and reconnect the shell to node 1 (port 26257) or node 3 (port 26259):
$ cockroach sql --insecure --host=localhost:26259
> SHOW DATABASES;
  database_name
+---------------+
  defaultdb
  postgres
  system
(3 rows)
As you see, despite one node being offline, the cluster continues uninterrupted because a majority of replicas (2/3) remains available. If you were to remove another node, however, leaving only one node live, the cluster would be unresponsive until another node was brought back online.
Exit the SQL shell:
> \q
Step 6. Write data while the node is offline
In the same terminal, use the cockroach workload command to generate an example startrek database:
$ cockroach workload init startrek \
'postgresql://root@localhost:26257?sslmode=disable'
Then reconnect the SQL shell to node 1 (port 26257) or node 3 (port 26259) and verify that the new startrek database was added with two tables, episodes and quotes:
$ cockroach sql --insecure --host=localhost:26259
> SHOW DATABASES;
  database_name
+---------------+
  defaultdb
  postgres
  startrek
  system
(4 rows)
> SHOW TABLES FROM startrek;
  table_name
+------------+
  episodes
  quotes
> SELECT * FROM startrek.episodes WHERE stardate > 5500;
  id | season | num |               title               | stardate
+----+--------+-----+-----------------------------------+----------+
  60 |      3 |   5 | Is There in Truth No Beauty?      |   5630.7
  62 |      3 |   7 | Day of the Dove                   |   5630.3
  64 |      3 |   9 | The Tholian Web                   |   5693.2
  65 |      3 |  10 | Plato's Stepchildren              |   5784.2
  66 |      3 |  11 | Wink of an Eye                    |   5710.5
  69 |      3 |  14 | Whom Gods Destroy                 |   5718.3
  70 |      3 |  15 | Let That Be Your Last Battlefield |   5730.2
  73 |      3 |  18 | The Lights of Zetar               |   5725.3
  74 |      3 |  19 | Requiem for Methuselah            |   5843.7
  75 |      3 |  20 | The Way to Eden                   |   5832.3
  76 |      3 |  21 | The Cloud Minders                 |   5818.4
  77 |      3 |  22 | The Savage Curtain                |   5906.4
  78 |      3 |  23 | All Our Yesterdays                |   5943.7
  79 |      3 |  24 | Turnabout Intruder                |   5928.5
(14 rows)
Exit the SQL shell:
> \q
Step 7. Rejoin the node to the cluster
Switch to the terminal for node 2, and rejoin the node to the cluster, using the same command that you used in step 1:
$ cockroach start --insecure \
--store=fault-node2 \
--listen-addr=localhost:26258 \
--http-addr=localhost:8081 \
--join=localhost:26257
CockroachDB node starting at
build:      CCL v2.1.11 @ 2020-01-29 00:00:00
admin:      http://localhost:8081
sql:        postgresql://root@localhost:26258?sslmode=disable
logs:       node2/logs
store[0]:   path=fault-node2
status:     restarted pre-existing node
clusterID:  {5638ba53-fb77-4424-ada9-8a23fbce0ae9}
nodeID:     2
Step 8. Verify that the rejoined node has caught up
Switch to the terminal for the built-in SQL shell, connect the shell to the rejoined node 2 (port 26258), and check for the startrek data that was added while the node was offline:
$ cockroach sql --insecure --host=localhost:26258
> SELECT * FROM startrek.episodes WHERE stardate > 5500;
  id | season | num |               title               | stardate
+----+--------+-----+-----------------------------------+----------+
  60 |      3 |   5 | Is There in Truth No Beauty?      |   5630.7
  62 |      3 |   7 | Day of the Dove                   |   5630.3
  64 |      3 |   9 | The Tholian Web                   |   5693.2
  65 |      3 |  10 | Plato's Stepchildren              |   5784.2
  66 |      3 |  11 | Wink of an Eye                    |   5710.5
  69 |      3 |  14 | Whom Gods Destroy                 |   5718.3
  70 |      3 |  15 | Let That Be Your Last Battlefield |   5730.2
  73 |      3 |  18 | The Lights of Zetar               |   5725.3
  74 |      3 |  19 | Requiem for Methuselah            |   5843.7
  75 |      3 |  20 | The Way to Eden                   |   5832.3
  76 |      3 |  21 | The Cloud Minders                 |   5818.4
  77 |      3 |  22 | The Savage Curtain                |   5906.4
  78 |      3 |  23 | All Our Yesterdays                |   5943.7
  79 |      3 |  24 | Turnabout Intruder                |   5928.5
(14 rows)
At first, while node 2 is catching up, it acts as a proxy to one of the other nodes with the data. This shows that even when a copy of the data is not local to the node, it has seamless access.
Soon enough, node 2 catches up entirely. To verify, open the Admin UI at http://localhost:8080 to see that all three nodes are listed, and the replica count is identical for each. This means that all data in the cluster has been replicated 3 times; there's a copy of every piece of data on each node.

Step 9. Add another node
Now, to prepare the cluster for a permanent node failure, open a new terminal and add a fourth node:
$ cockroach start \
--insecure \
--store=fault-node4 \
--listen-addr=localhost:26260 \
--http-addr=localhost:8083 \
--join=localhost:26257,localhost:26258,localhost:26259
CockroachDB node starting at
build:      CCL v2.1.11 @ 2020-01-29 00:00:00
admin:      http://localhost:8083
sql:        postgresql://root@localhost:26260?sslmode=disable
logs:       node4/logs
store[0]:   path=fault-node4
status:     initialized new node, joined pre-existing cluster
clusterID:  {5638ba53-fb77-4424-ada9-8a23fbce0ae9}
nodeID:     4
Step 10. Remove a node permanently
Again, switch to the terminal running node 2 and press CTRL-C to stop it.
Alternatively, you can open a new terminal and run the cockroach quit command against port 26258:
$ cockroach quit --insecure --host=localhost:26258
initiating graceful shutdown of server
ok
server drained and shutdown completed
Step 11. Verify that the cluster re-replicates missing replicas
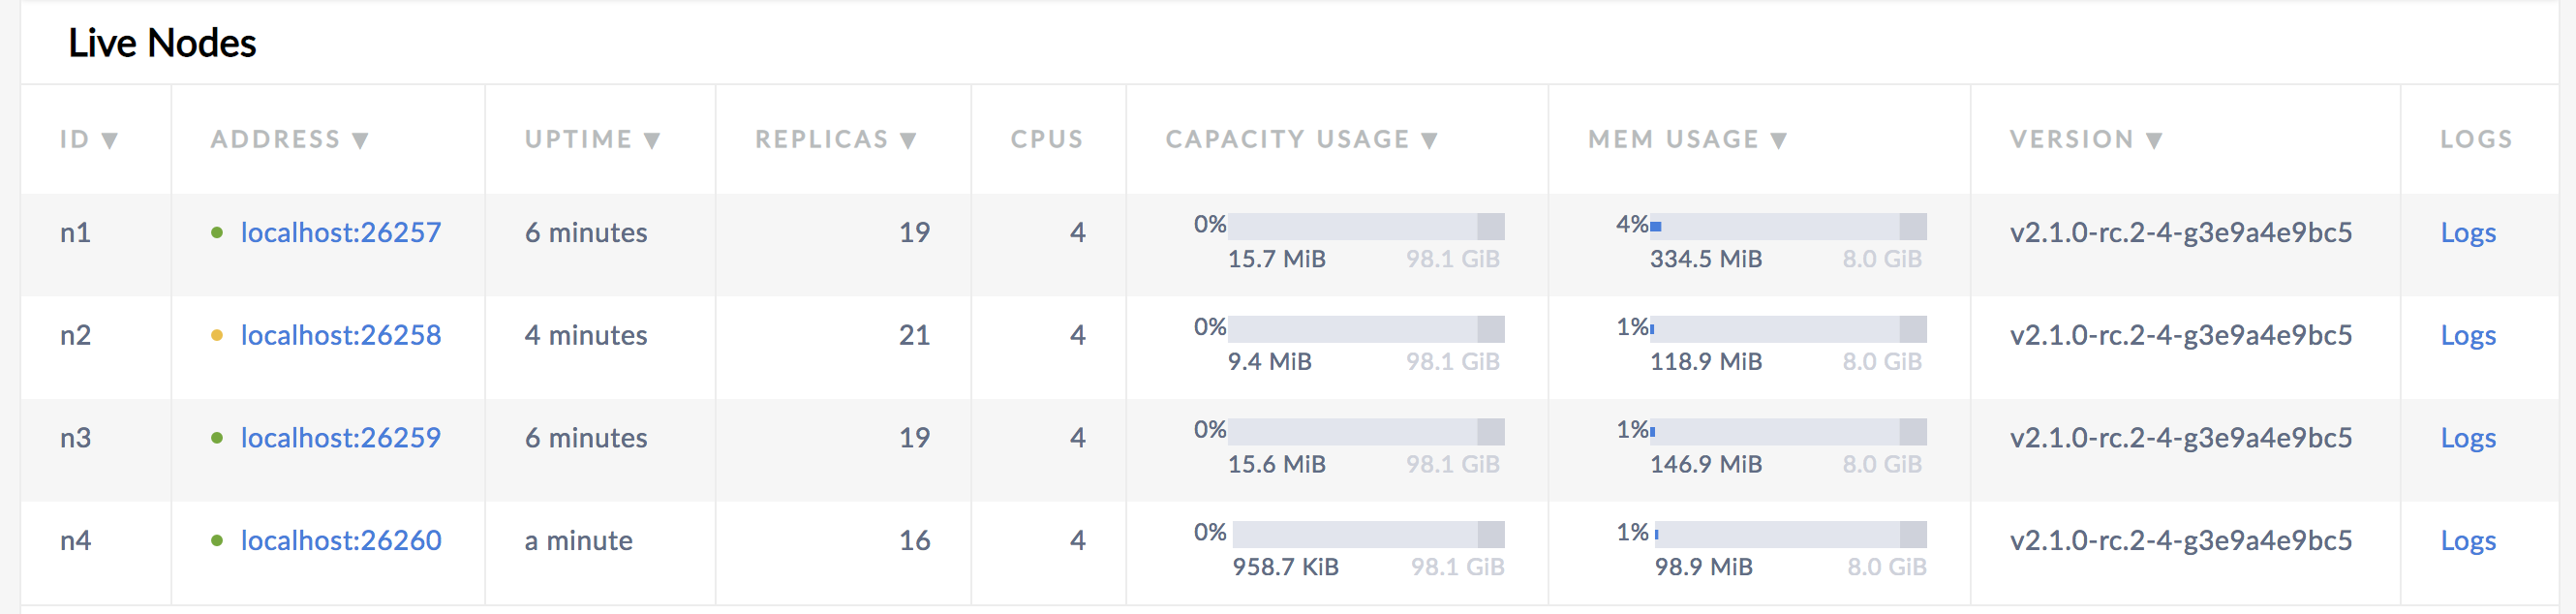
Back in the Admin UI, you'll see 4 nodes listed. After about 1 minute, the dot next to node 2 will turn yellow, indicating that the node is not responding.
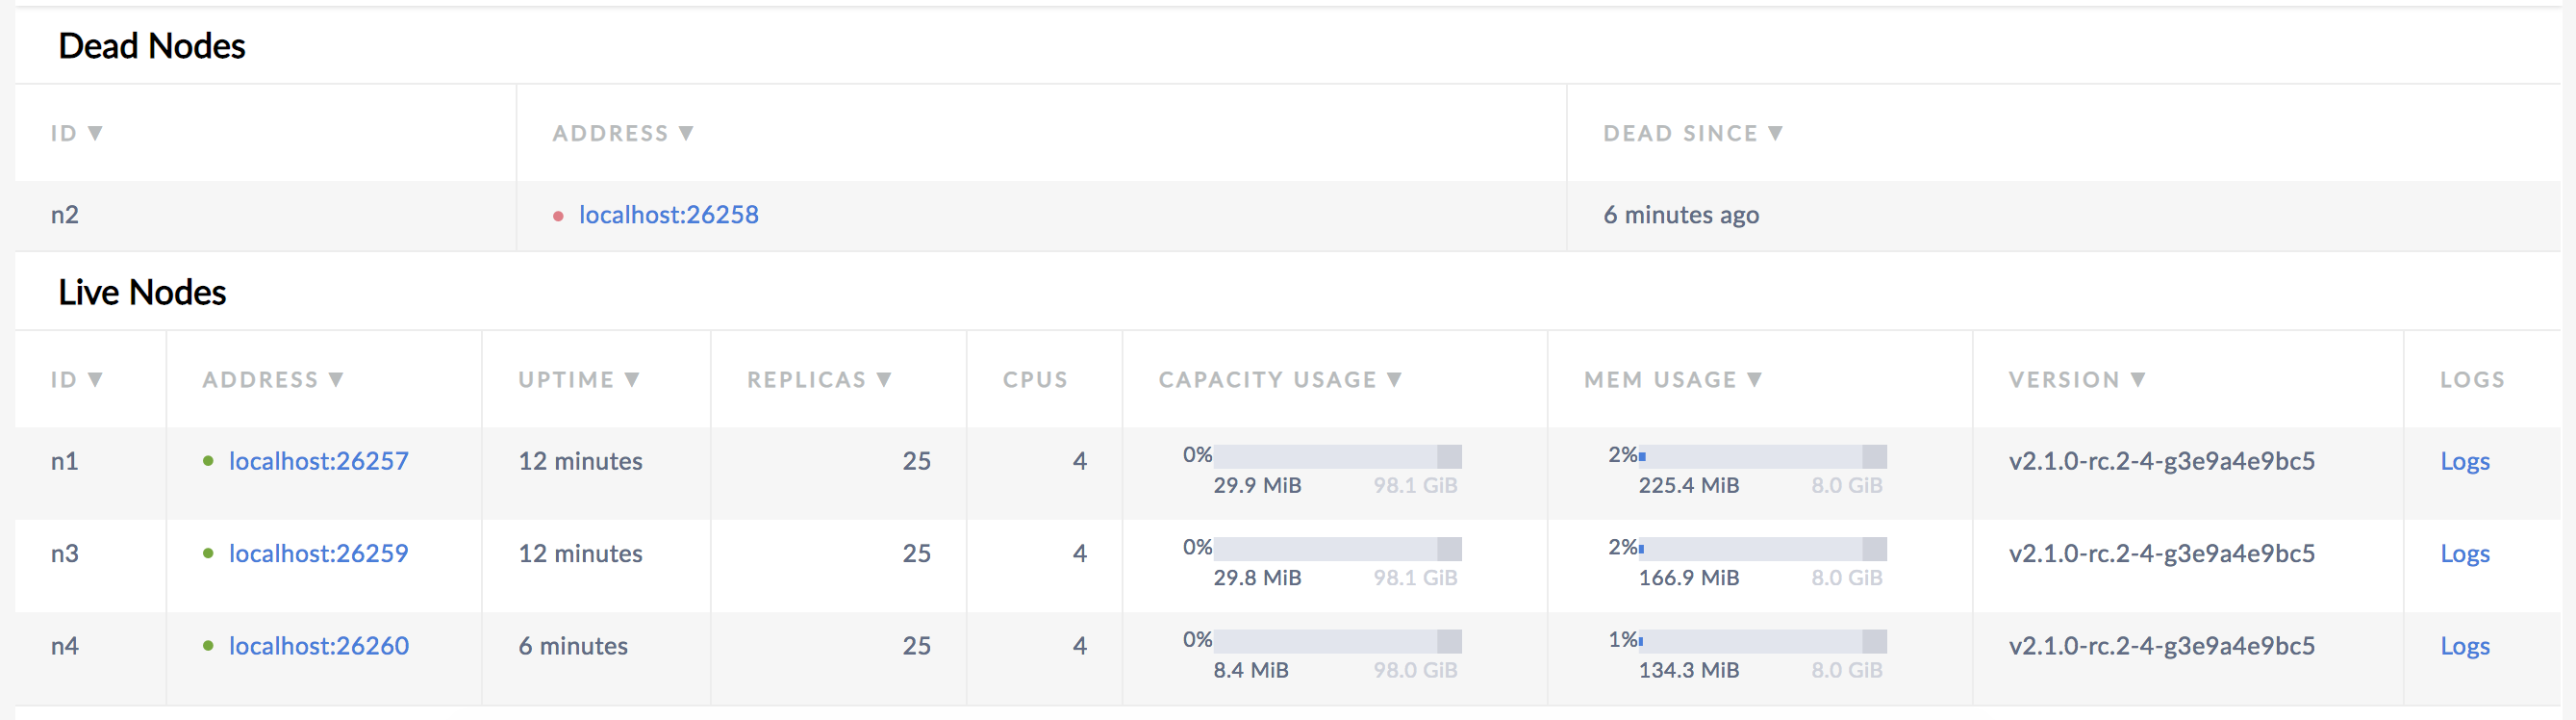
After about 10 minutes, node 2 will move into a Dead Nodes section, indicating that the node is not expected to come back. At this point, in the Live Nodes section, you should also see that the Replicas count for node 4 matches the count for node 1 and 3, the other live nodes. This indicates that all missing replicas (those that were on node 2) have been re-replicated to node 4.
Step 12. Stop the cluster
Once you're done with your test cluster, stop each node by switching to its terminal and pressing CTRL-C.
If you do not plan to restart the cluster, you may want to remove the nodes' data stores:
$ rm -rf fault-node1 fault-node2 fault-node3 fault-node4 fault-node5
What's next?
Explore other core CockroachDB benefits and features:
