
Once you've installed the official CockroachDB Docker image, it's simple to run an insecure multi-node cluster across multiple Docker containers on a single host, using Docker volumes to persist node data.
To try CockroachDB Cloud instead of running CockroachDB yourself, refer to the Cloud Quickstart.
The --insecure flag used in this tutorial is intended for non-production testing only. To run CockroachDB in production, use a secure cluster instead.
Before you begin
- Make sure you have already installed the official CockroachDB Docker image.
- For quick SQL testing or app development, consider running a single-node cluster instead.
- Note that running multiple nodes on a single host is useful for testing CockroachDB, but it's not suitable for production. To run a physically distributed cluster in containers, use an orchestration tool like Kubernetes. See Orchestration for more details, and review the Production Checklist.
Step 1. Create a bridge network
Since you'll be running multiple Docker containers on a single host, with one CockroachDB node per container, you need to create what Docker refers to as a bridge network. The bridge network will enable the containers to communicate as a single cluster while keeping them isolated from external networks.
PS C:\Users\username> docker network create -d bridge roachnet
We've used roachnet as the network name here and in subsequent steps, but feel free to give your network any name you like.
Step 2. Start the cluster
Start the first node:
Note:Be sure to replace<username>in the-vflag with your actual username.PS C:\Users\username> docker run -d ` --name=roach1 ` --hostname=roach1 ` --net=roachnet ` -p 26257:26257 -p 8080:8080 ` -v "//c/Users/<username>/cockroach-data/roach1:/cockroach/cockroach-data" ` cockroachdb/cockroach:v21.2.17 start ` --insecure ` --join=roach1,roach2,roach3This command creates a container and starts the first CockroachDB node inside it. Take a moment to understand each part:
docker run: The Docker command to start a new container.-d: This flag runs the container in the background so you can continue the next steps in the same shell.--name: The name for the container. This is optional, but a custom name makes it significantly easier to reference the container in other commands, for example, when opening a Bash session in the container or stopping the container.--hostname: The hostname for the container. You will use this to join other containers/nodes to the cluster.--net: The bridge network for the container to join. See step 1 for more details.-p 26257:26257 -p 8080:8080: These flags map the default port for inter-node and client-node communication (26257) and the default port for HTTP requests to the DB Console (8080) from the container to the host. This enables inter-container communication and makes it possible to call up the DB Console from a browser.-v "//c/Users/<username>/cockroach-data/roach1:/cockroach/cockroach-data": This flag mounts a host directory as a data volume. This means that data and logs for this node will be stored inUsers/<username>/cockroach-data/roach1on the host and will persist after the container is stopped or deleted. For more details, see Docker's Bind Mounts topic.cockroachdb/cockroach:v21.2.17 start --insecure --join: The CockroachDB command to start a node in the container in insecure mode. The--joinflag specifies thehostnameof each node that will initially comprise your cluster. Otherwise, allcockroach startdefaults are accepted. Note that since each node is in a unique container, using identical default ports won’t cause conflicts.
Start two more nodes:
Note:Again, be sure to replace<username>in the-vflag with your actual username.PS C:\Users\username> docker run -d ` --name=roach2 ` --hostname=roach2 ` --net=roachnet ` -v "//c/Users/<username>/cockroach-data/roach2:/cockroach/cockroach-data" ` cockroachdb/cockroach:v21.2.17 start ` --insecure ` --join=roach1,roach2,roach3PS C:\Users\username> docker run -d ` --name=roach3 ` --hostname=roach3 ` --net=roachnet ` -v "//c/Users/<username>/cockroach-data/roach3:/cockroach/cockroach-data" ` cockroachdb/cockroach:v21.2.17 start ` --insecure ` --join=roach1,roach2,roach3Perform a one-time initialization of the cluster:
PS C:\Users\username> docker exec -it roach1 ./cockroach init --insecureYou'll see the following message:
Cluster successfully initialized
Step 3. Use the built-in SQL client
Now that your cluster is live, you can use any node as a SQL gateway. To test this out, let's use the docker exec command to start the built-in SQL shell in the first container.
Start the SQL shell in the first container:
PS C:\Users\username> docker exec -it roach1 ./cockroach sql --insecureRun some basic CockroachDB SQL statements:
> CREATE DATABASE bank;> CREATE TABLE bank.accounts (id INT PRIMARY KEY, balance DECIMAL);> INSERT INTO bank.accounts VALUES (1, 1000.50);> SELECT * FROM bank.accounts;id | balance +----+---------+ 1 | 1000.50 (1 row)Now exit the SQL shell on node 1 and open a new shell on node 2:
> \qPS C:\Users\username> docker exec -it roach2 ./cockroach sql --insecureRun the same
SELECTquery as before:> SELECT * FROM bank.accounts;id | balance +----+---------+ 1 | 1000.50 (1 row)As you can see, node 1 and node 2 behaved identically as SQL gateways.
Exit the SQL shell on node 2:
> \q
Step 4. Run a sample workload
CockroachDB also comes with a number of built-in workloads for simulating client traffic. Let's run the workload based on CockroachDB's sample vehicle-sharing application, MovR.
Load the initial dataset:
PS C:\Users\username> docker exec -it roach1 ./cockroach workload init movr \
'postgresql://root@roach1:26257?sslmode=disable'
Run the workload for 5 minutes:
PS C:\Users\username> docker exec -it roach1 ./cockroach workload run movr \
--duration=5m \
'postgresql://root@roach1:26257?sslmode=disable'
Step 5. Access the DB Console
The CockroachDB DB Console gives you insight into the overall health of your cluster as well as the performance of the client workload.
When you started the first container/node, you mapped the node's default HTTP port
8080to port8080on the host, so go to http://localhost:8080.On the Cluster Overview, notice that three nodes are live, with an identical replica count on each node:
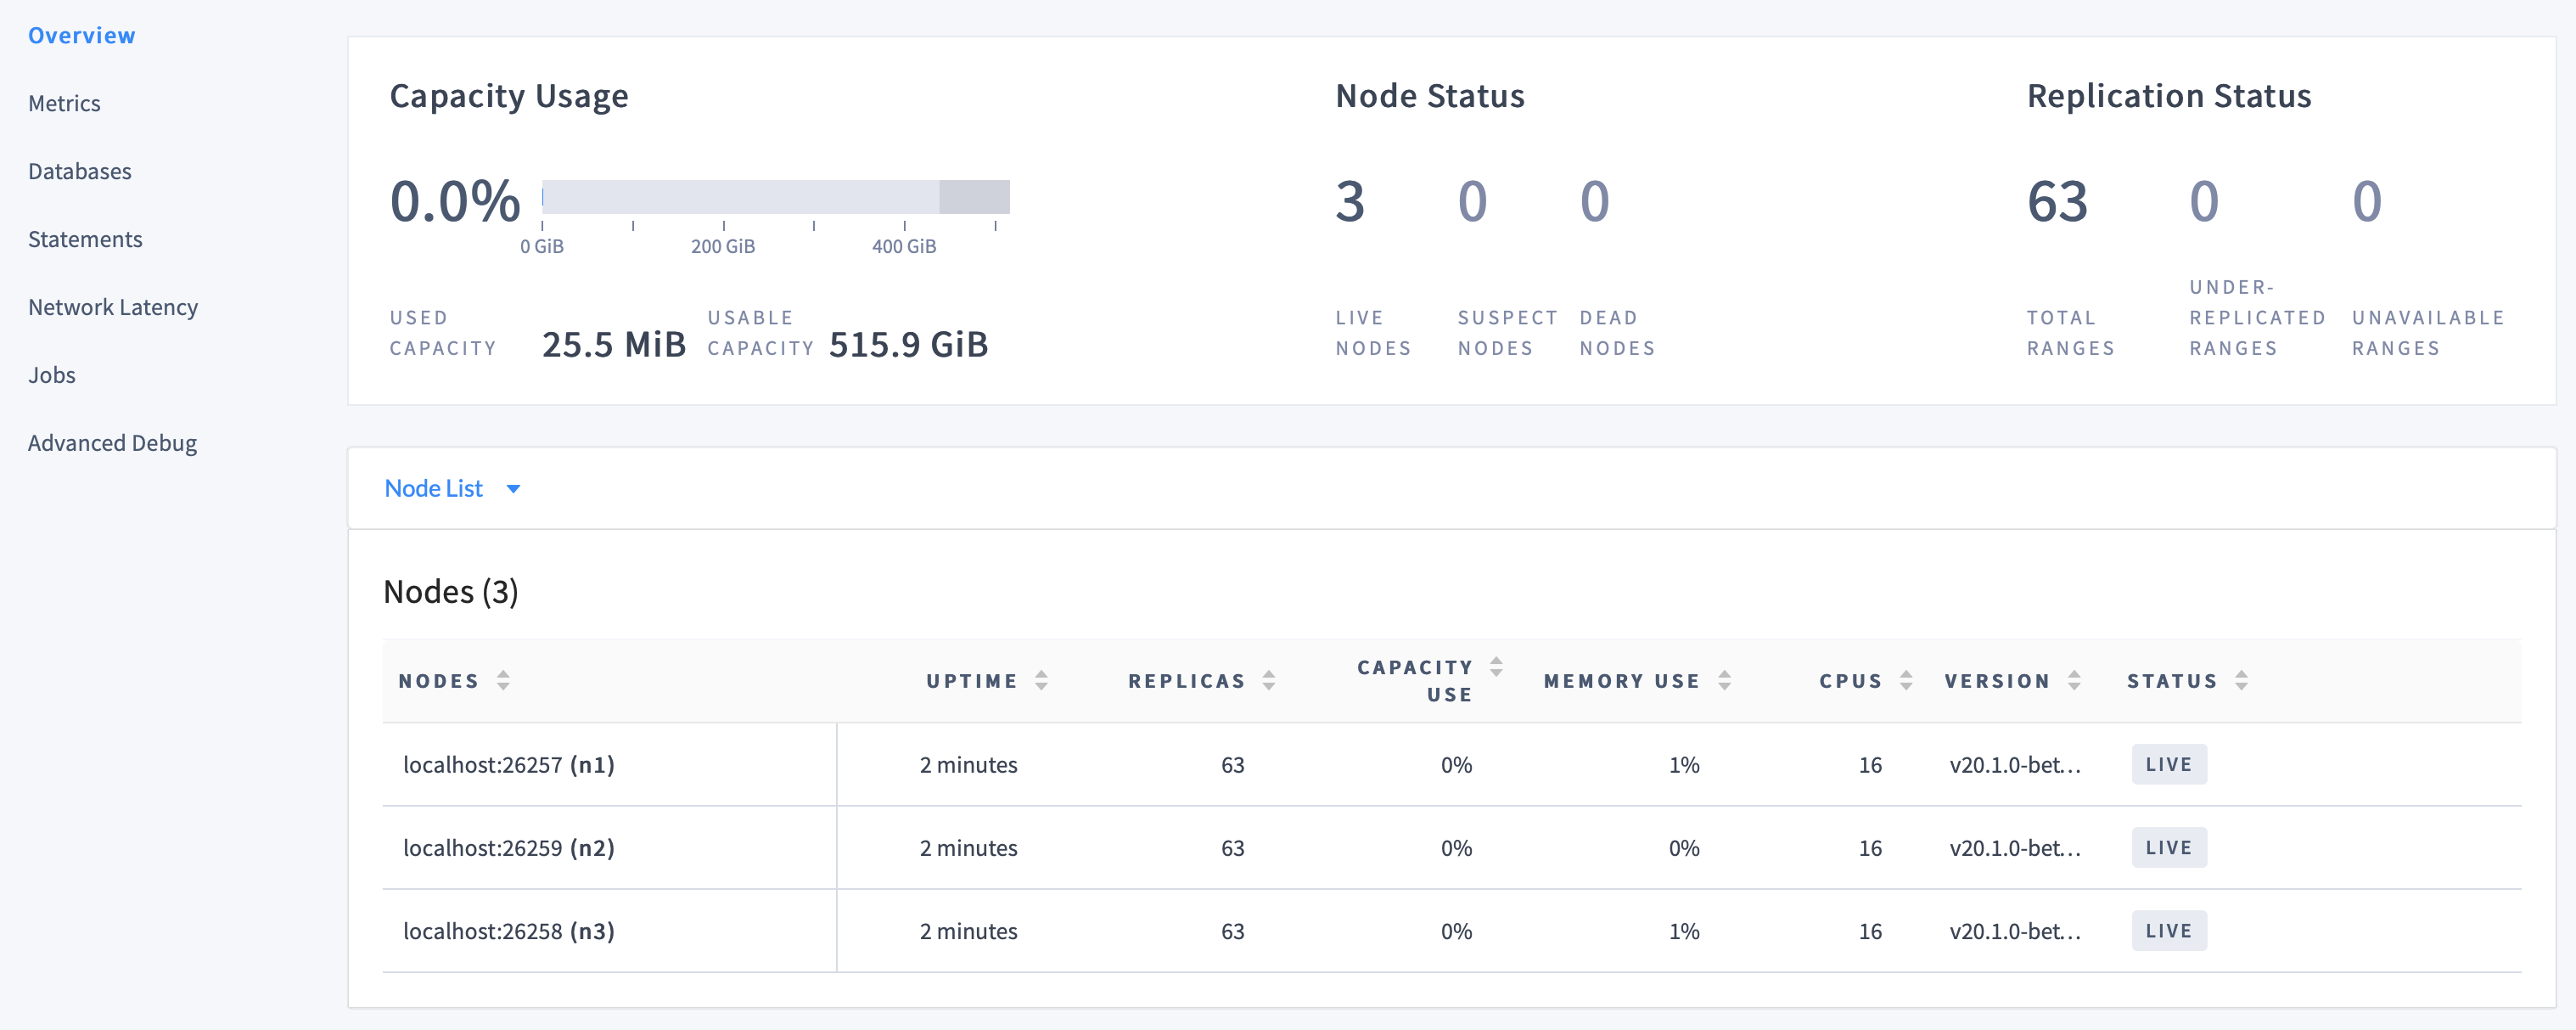
This demonstrates CockroachDB's automated replication of data via the Raft consensus protocol.
Note:Capacity metrics can be incorrect when running multiple nodes on a single machine. For more details, see this limitation.
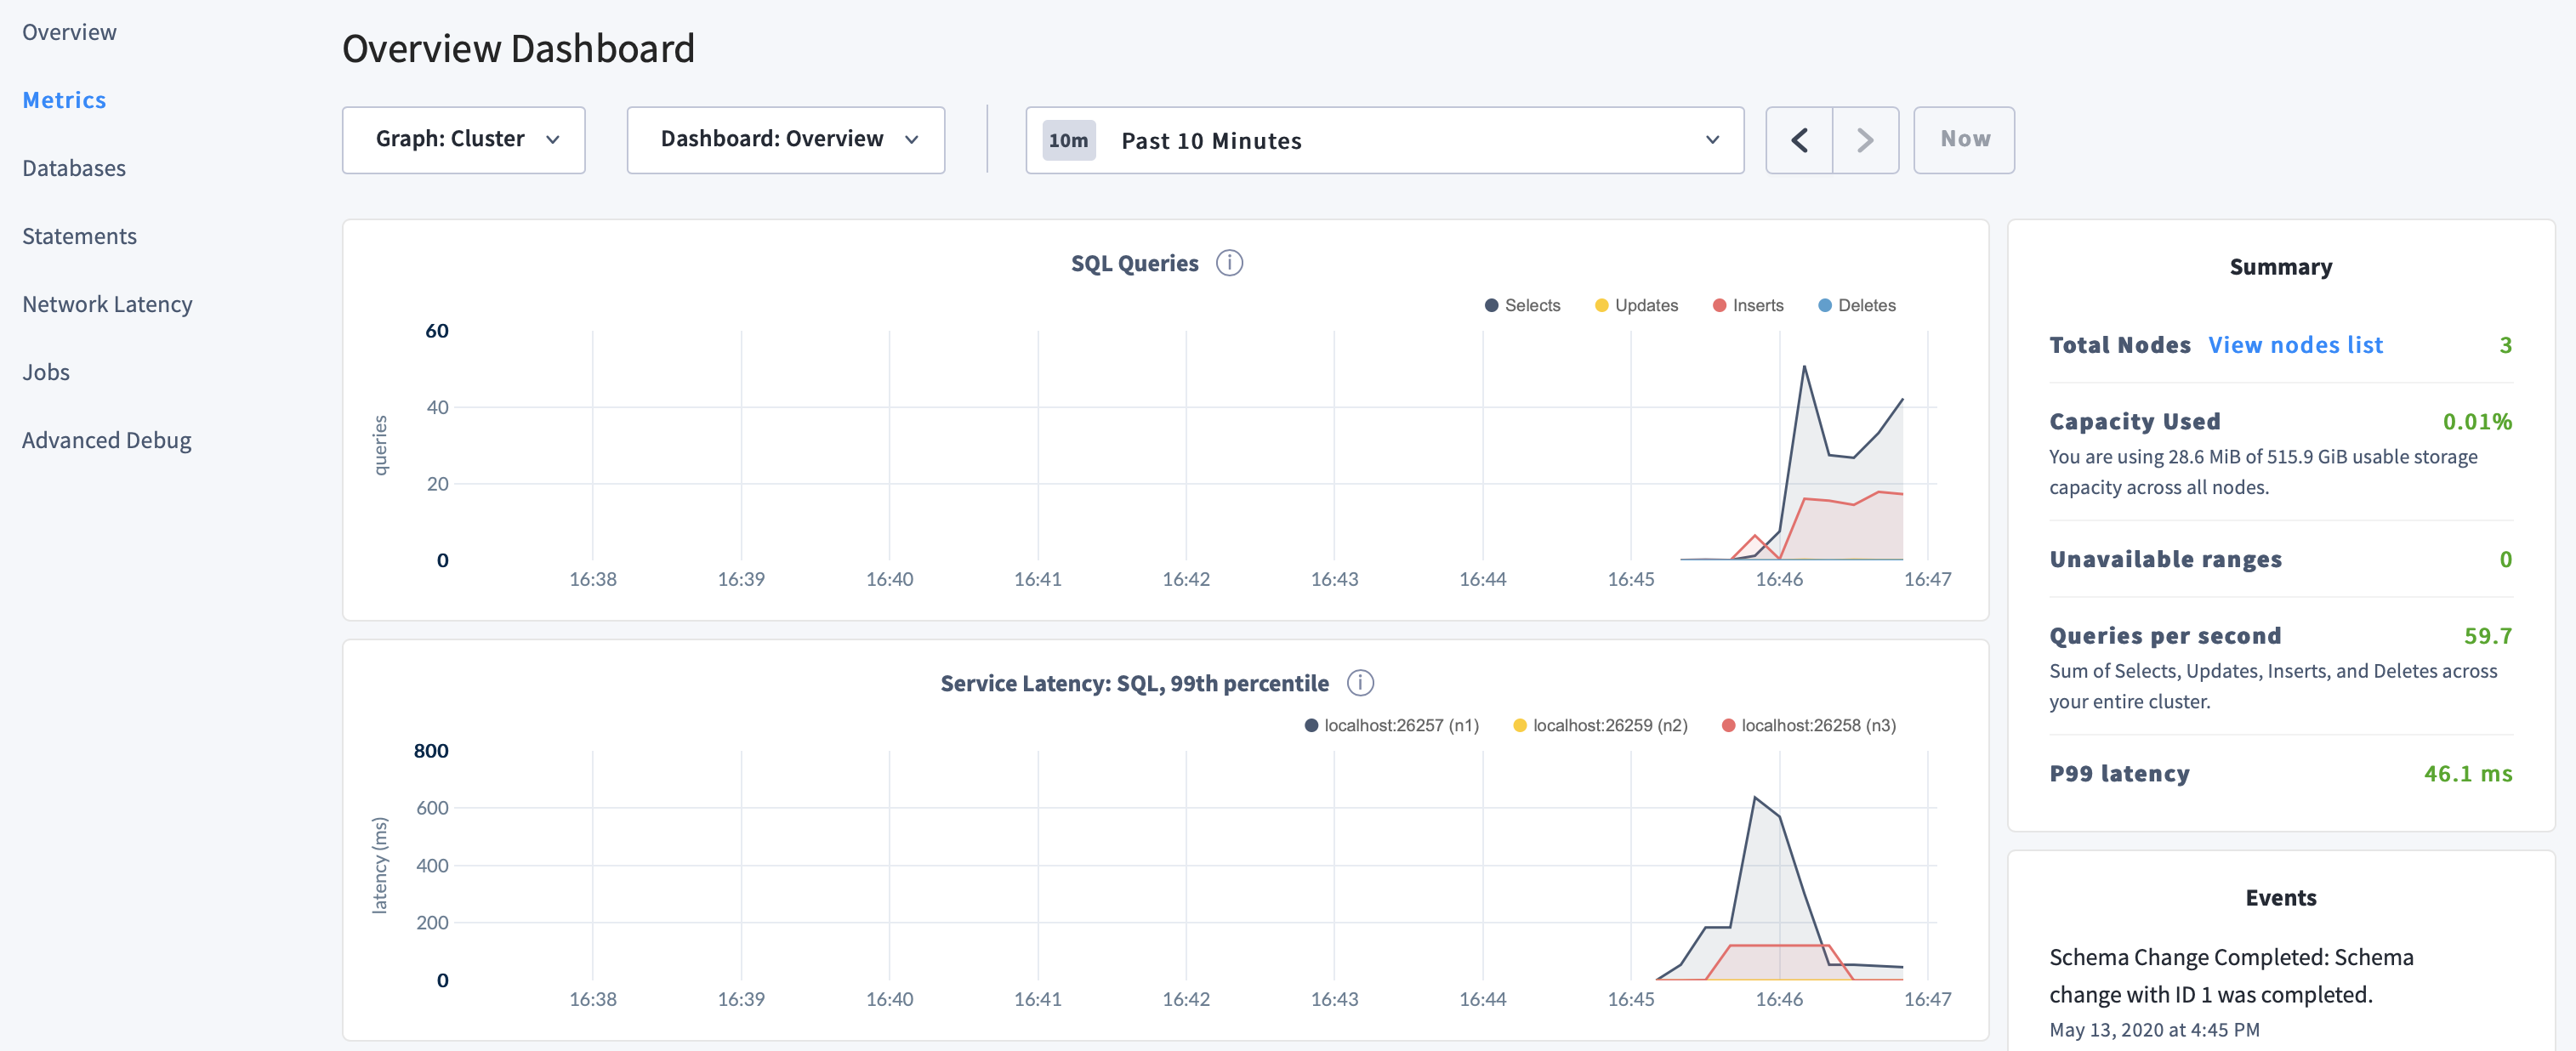
Click Metrics to access a variety of time series dashboards, including graphs of SQL queries and service latency over time:
Use the Databases, Statements, and Jobs pages to view details about your databases and tables, to assess the performance of specific queries, and to monitor the status of long-running operations like schema changes, respectively.
Step 6. Stop the cluster
Use the docker stop and docker rm commands to stop and remove the containers (and therefore the cluster):
PS C:\Users\username> docker stop roach1 roach2 roach3
PS C:\Users\username> docker rm roach1 roach2 roach3
If you do not plan to restart the cluster, you may want to remove the nodes' data stores:
PS C:\Users\username> Remove-Item cockroach-data -recurse
What's next?
- Learn more about CockroachDB SQL and the built-in SQL client
- Install the client driver for your preferred language
- Build an app with CockroachDB
- Further explore CockroachDB capabilities like fault tolerance and automated repair, multi-region performance, serializable transactions, and JSON support
