
This page shows you how to start and stop a secure 3-node CockroachDB cluster on the Red Hat OpenShift platform, using the CockroachDB Kubernetes Operator.
If you have already deployed a CockroachDB cluster on OpenShift, see Operate CockroachDB on Kubernetes for details on configuring, scaling, and upgrading the cluster.
Prerequisites
- A running OpenShift cluster
This article assumes you have already installed the OpenShift Container Platform as your Kubernetes cluster. For details on this, see the OpenShift documentation.
Step 1. Create a CockroachDB namespace
Create a
cockroachdbnamespace. You will create the CockroachDB cluster in this namespace:Note:ocrunskubectlcommands on OpenShift clusters, using the same syntax.oc create namespace cockroachdbnamespace/cockroachdb createdSet
cockroachdbas the default namespace:oc config set-context --current --namespace=cockroachdbContext "admin" modified.Validate that this was successful:
oc config view --minify | grep namespace:namespace: cockroachdbThis lets you issue
occommands without having to specify the namespace each time.
Step 2. Install the Operator
Navigate to your OpenShift web console and click OperatorHub.
Enter "cockroach" in the search box. There are two tiles called CockroachDB Operator. Find the tile without the
Marketplacelabel (which requires a subscription).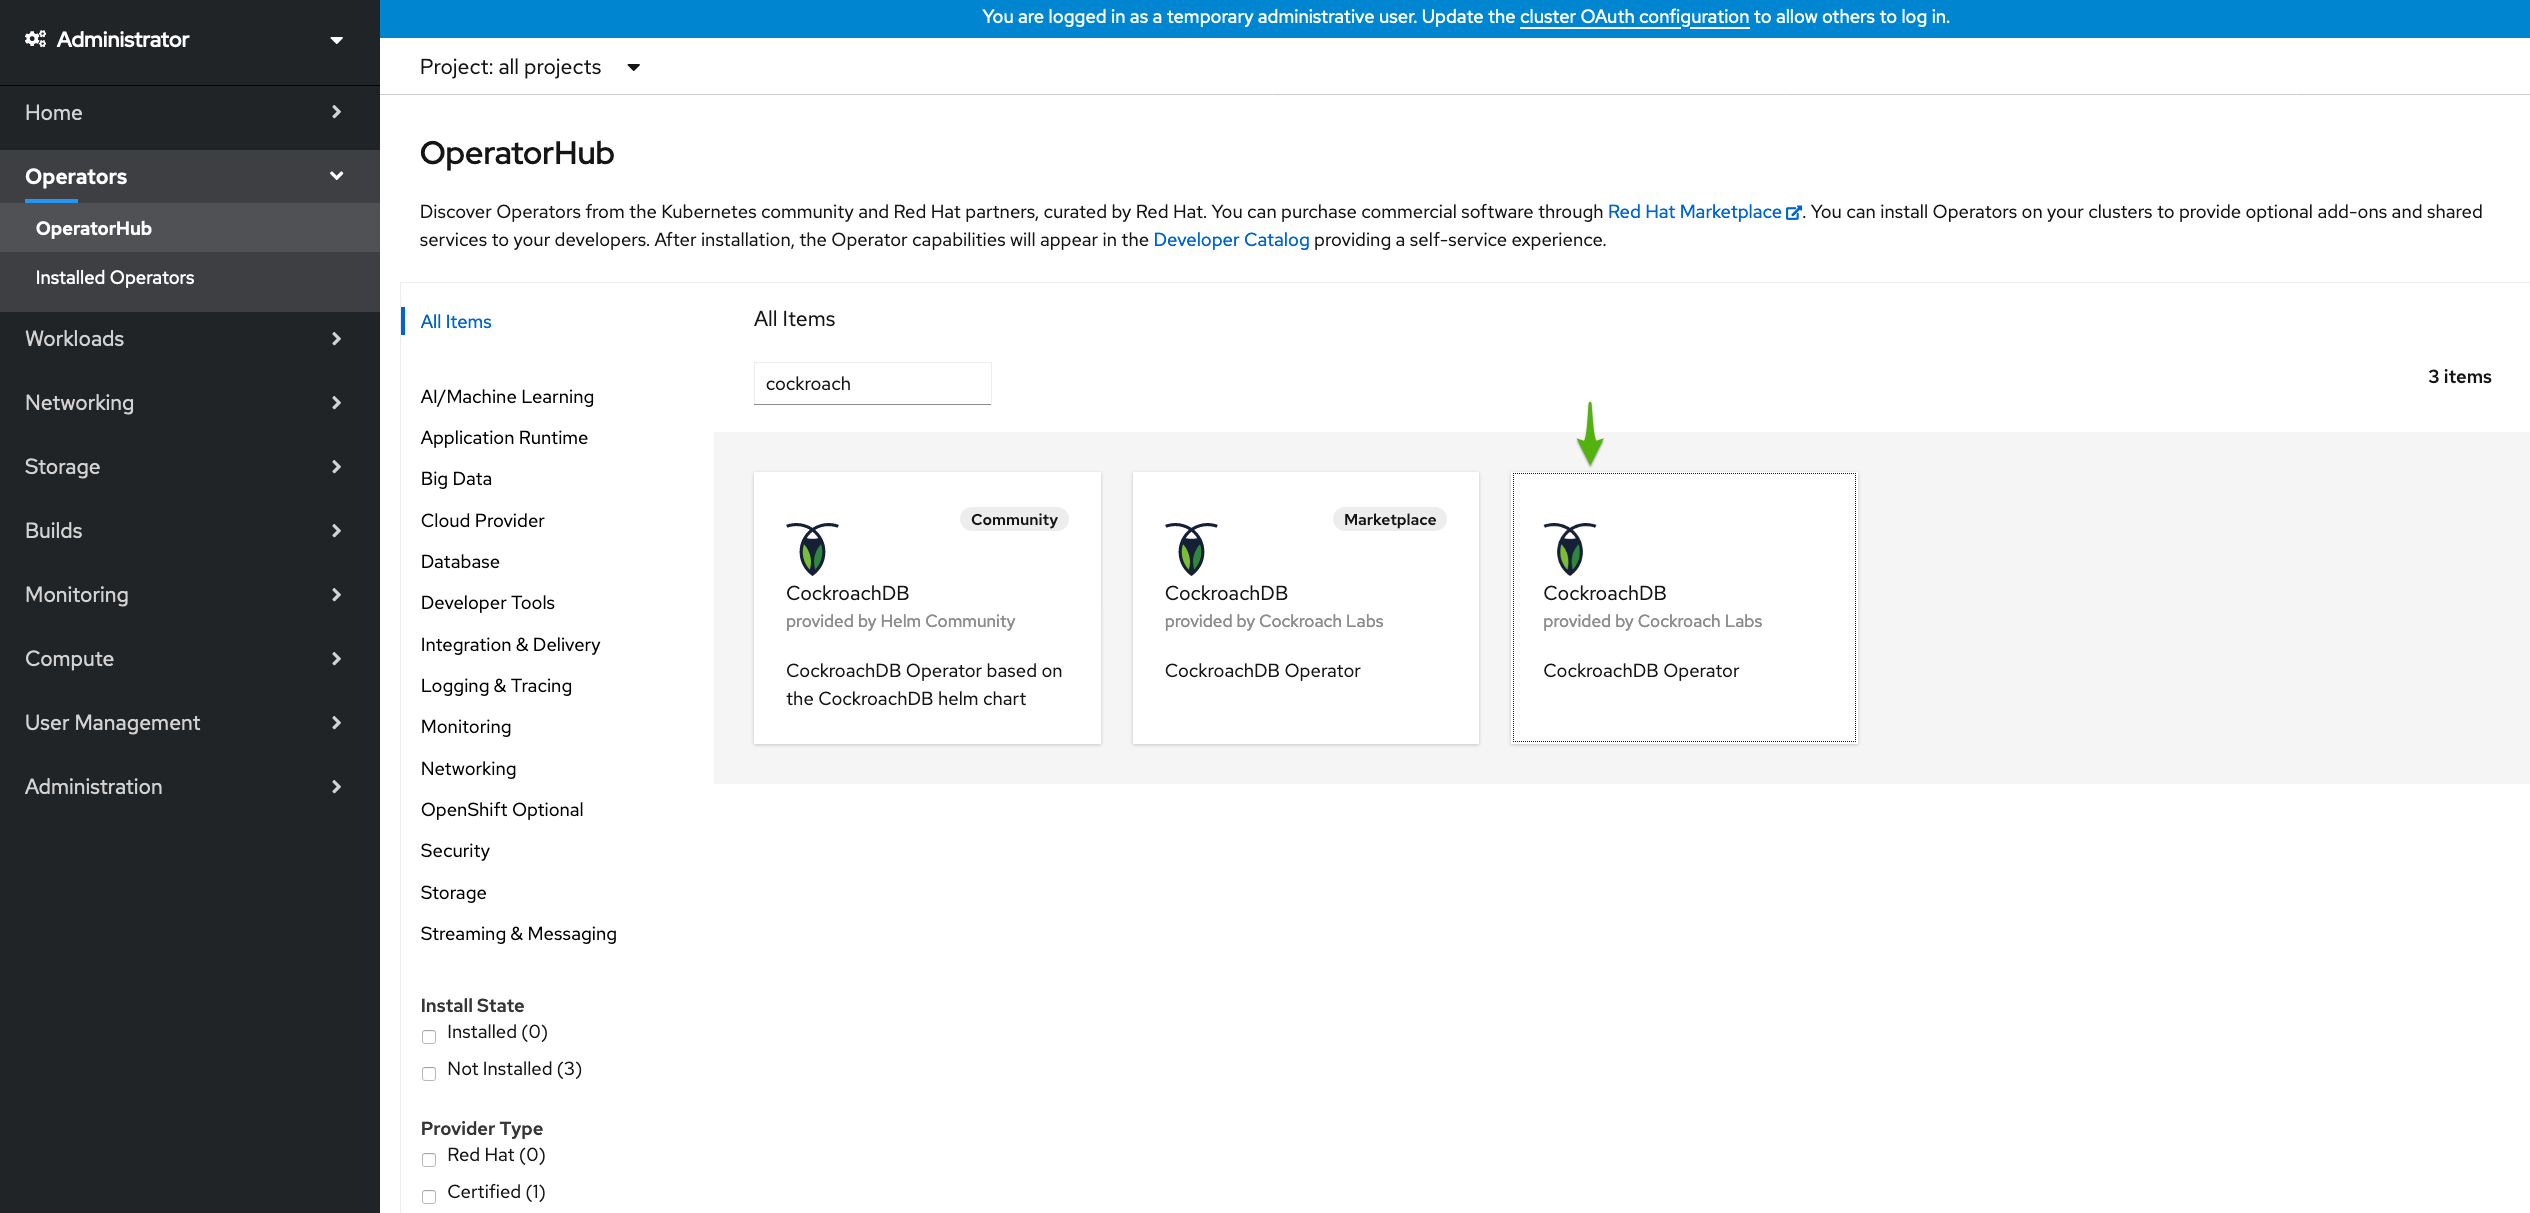
Click the CockroachDB Operator tile and then Install.
On the Install Operator page, select
cockroachdbin the Installed Namespace dropdown and click Install.Confirm that the Operator is running:
$ oc get podsNAME READY STATUS RESTARTS AGE cockroach-operator-65c4f6df45-h5r5n 1/1 Running 0 51s
Step 3. Start CockroachDB
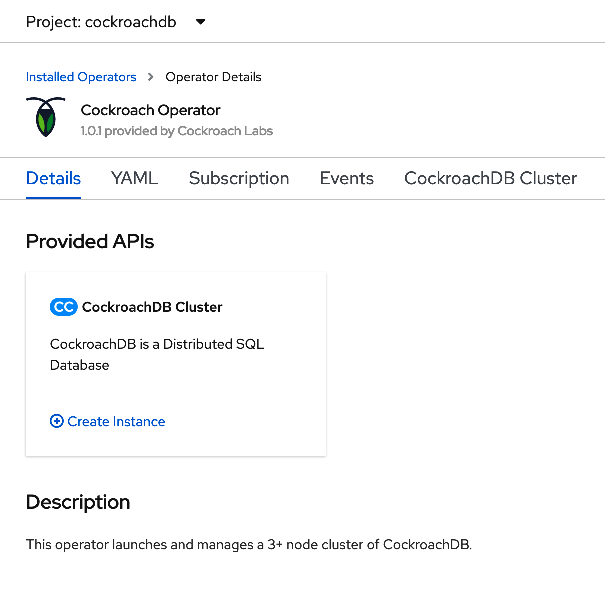
When the Operator is ready, click View Operator to navigate to the Installed Operators page.
In the CockroachDB Operator tile, click Create instance.
Make sure CockroachDB Version is set to a valid CockroachDB version. For a list of compatible image names, see
spec.containers.envin the Operator manifest on GitHub.This will open the Create CrdbCluster page. By default, this deploys a 3-node secure cluster. Leave the other fields unchanged and click Create.
Navigate to Workloads > Pods and observe the pods being created:
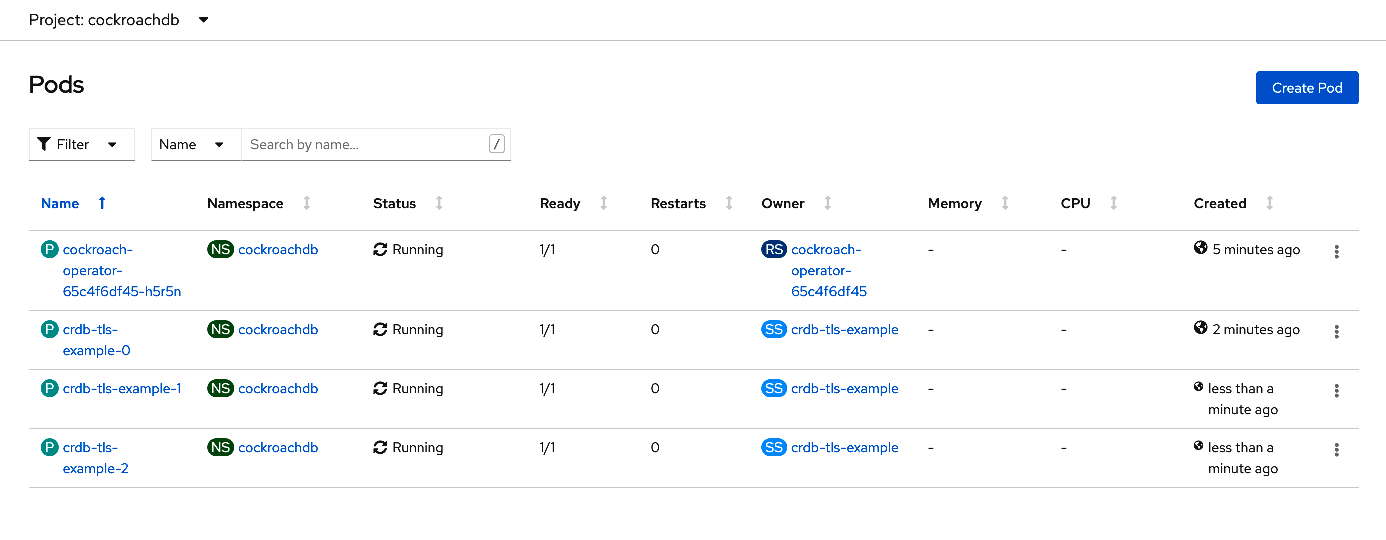
You can also use the command line to view the pods:
oc get podsNAME READY STATUS RESTARTS AGE cockroach-operator-65c4f6df45-h5r5n 1/1 Running 0 6m11s crdb-tls-example-0 1/1 Running 0 3m15s crdb-tls-example-1 1/1 Running 0 103s crdb-tls-example-2 1/1 Running 0 89s
Step 4. Create a secure client pod
To use the CockroachDB SQL client, first launch a secure pod running the cockroach binary.
This can be defined with the following YAML, which mounts the Operator's generated certificates:
spec.containers.image should match the Image value that is displayed under the Containers section on the Pods page when you select a CockroachDB pod. Be sure to select a CockroachDB pod and not the Operator pod.
Note that OpenShift may display the image SHA instead of the tag. In this case, you should use the SHA for spec.containers.image.
apiVersion: v1
kind: Pod
metadata:
  name: crdb-client-secure
  labels:
    app.kubernetes.io/component: database
    app.kubernetes.io/instance: crdb-tls-example
    app.kubernetes.io/name: cockroachdb
spec:
  serviceAccountName: cockroach-operator-sa
  containers:
  - name: crdb-client-secure
    image: registry.connect.redhat.com/cockroachdb/cockroach:v20.2.8
    imagePullPolicy: IfNotPresent
    volumeMounts:
    - name: client-certs
      mountPath: /cockroach/cockroach-certs/
    command:
    - sleep
    - "2147483648" # 2^31
  terminationGracePeriodSeconds: 0
  volumes:
  - name: client-certs
    projected:
        sources:
          - secret:
              name: crdb-tls-example-node
              items:
                - key: ca.crt
                  path: ca.crt
          - secret:
              name: crdb-tls-example-root
              items:
                - key: tls.crt
                  path: client.root.crt
                - key: tls.key
                  path: client.root.key
        defaultMode: 256
On the Pods page, click Create Pod and replace the existing YAML with the above manifest.
Click Create. Return to the Pods page and check that the client pod
crdb-client-secureis running. This is also visible on the command-line:oc get podsNAME READY STATUS RESTARTS AGE cockroach-operator-65c4f6df45-h5r5n 1/1 Running 0 6m11s crdb-client-secure 1/1 Running 0 14m crdb-tls-example-0 1/1 Running 0 3m15s crdb-tls-example-1 1/1 Running 0 103s crdb-tls-example-2 1/1 Running 0 89s
Step 5. Use the CockroachDB SQL client
Start the CockroachDB built-in SQL client from the client pod:
oc exec -it crdb-client-secure -- ./cockroach sql --certs-dir=/cockroach/cockroach-certs/ --host=crdb-tls-example-public# # Welcome to the CockroachDB SQL shell. # All statements must be terminated by a semicolon. # To exit, type: \q. # # Server version: CockroachDB CCL v20.2.8 (x86_64-unknown-linux-gnu, built 2021/04/23 13:54:57, go1.13.14) (same version as client) # Cluster ID: 0813c343-c86b-4be8-9ad0-477cdb5db749 # # Enter \? for a brief introduction. # root@crdb-tls-example-public:26257/defaultdb>Now you can run SQL commands against the cluster.
Run some basic CockroachDB SQL statements:
> CREATE DATABASE bank;> CREATE TABLE bank.accounts (id INT PRIMARY KEY, balance DECIMAL);> INSERT INTO bank.accounts VALUES (1, 1000.50);> SELECT * FROM bank.accounts;id | balance +----+---------+ 1 | 1000.50 (1 row)Create a user with a password:
> CREATE USER roach WITH PASSWORD 'Q7gc8rEdS';You will need this username and password to access the DB Console later.
Exit the SQL shell and pod:
> \q
Note: If you cannot access the SQL client, this may be related to your --certs-dir or --host flags.
Shell into the client pod and check for the necessary certs in the
--certs-dirdirectory:Tip:You can also access the client pod by selecting it on the Pods page and clicking Terminal.
oc exec -it crdb-client-secure sh# cd /cockroach/cockroach-certs # lsca.crt client.root.key client.root.crtCheck the name of the
publicservice to use with the--hostflag:oc get servicesNAME TYPE CLUSTER-IP EXTERNAL-IP PORT(S) AGE crdb-tls-example ClusterIP None <none> 26257/TCP,8080/TCP 14m crdb-tls-example-public ClusterIP 172.25.180.197 <none> 26257/TCP,8080/TCP 14m
Step 6. Access the DB Console
To access the CockroachDB cluster's DB Console:
On secure clusters, certain pages of the DB Console can only be accessed by
adminusers.Start the CockroachDB built-in SQL client from the client pod:
oc exec -it crdb-client-secure -- ./cockroach sql --certs-dir=/cockroach/cockroach-certs/ --host=crdb-tls-example-publicAssign
roachto theadminrole (you only need to do this once):> GRANT admin TO roach;Exit the SQL shell and pod:
> \qIn a new terminal window, port-forward from your local machine to the
crdb-tls-example-publicservice:oc port-forward service/crdb-tls-example-public 8080Forwarding from [::1]:8080 -> 8080Go to https://localhost:8080 and log in with the username and password you created earlier.
Note:If you are using Google Chrome, and you are getting an error about not being able to reach
localhostbecause its certificate has been revoked, go to chrome://flags/#allow-insecure-localhost, enable "Allow invalid certificates for resources loaded from localhost", and then restart the browser. Enabling this Chrome feature degrades security for all sites running onlocalhost, not just CockroachDB's DB Console, so be sure to enable the feature only temporarily.
Step 7. Run a sample workload
To run a sample CockroachDB workload:
Use the secure client pod to load the
movrschema on one of the CockroachDB pods:oc exec -it crdb-client-secure -- ./cockroach workload init movr 'postgresql://root@crdb-tls-example-0.crdb-tls-example.cockroachdb:26257?sslcert=%2Fcockroach%2Fcockroach-certs%2Fclient.root.crt&sslkey=%2Fcockroach%2Fcockroach-certs%2Fclient.root.key&sslmode=verify-full&sslrootcert=%2Fcockroach%2Fcockroach-certs%2Fca.crt'Initialize and run the workload for 3 minutes:
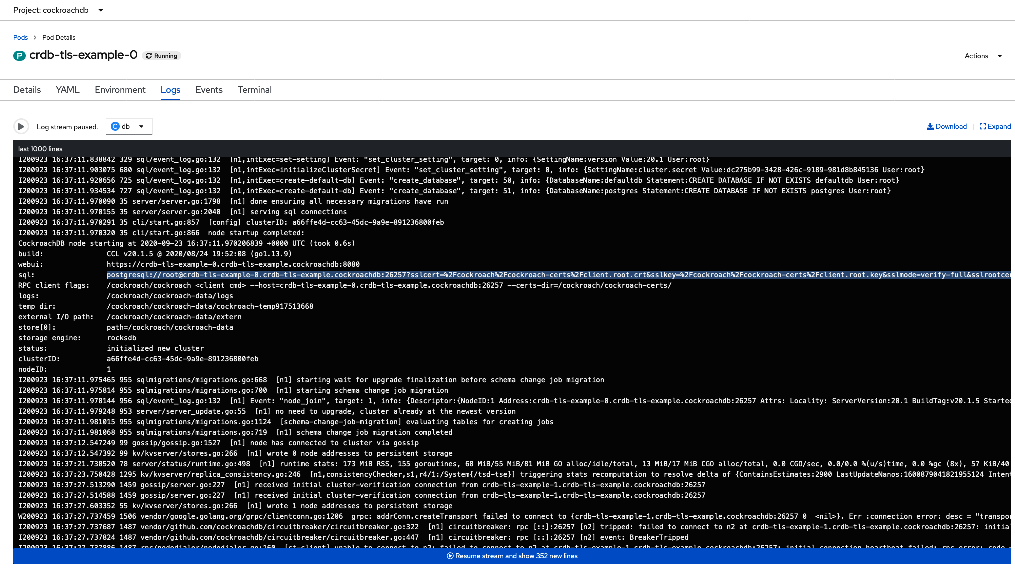
oc exec -it crdb-client-secure -- ./cockroach workload run movr --duration=3m --tolerate-errors --max-rate=20 --concurrency=1 --display-every=10s 'postgresql://root@crdb-tls-example-0.crdb-tls-example.cockroachdb:26257?sslcert=%2Fcockroach%2Fcockroach-certs%2Fclient.root.crt&sslkey=%2Fcockroach%2Fcockroach-certs%2Fclient.root.key&sslmode=verify-full&sslrootcert=%2Fcockroach%2Fcockroach-certs%2Fca.crt'Select one of the CockroachDB pods on the Pods page and click Logs. This will reveal the JDBC URL that your application can use to connect to CockroachDB:
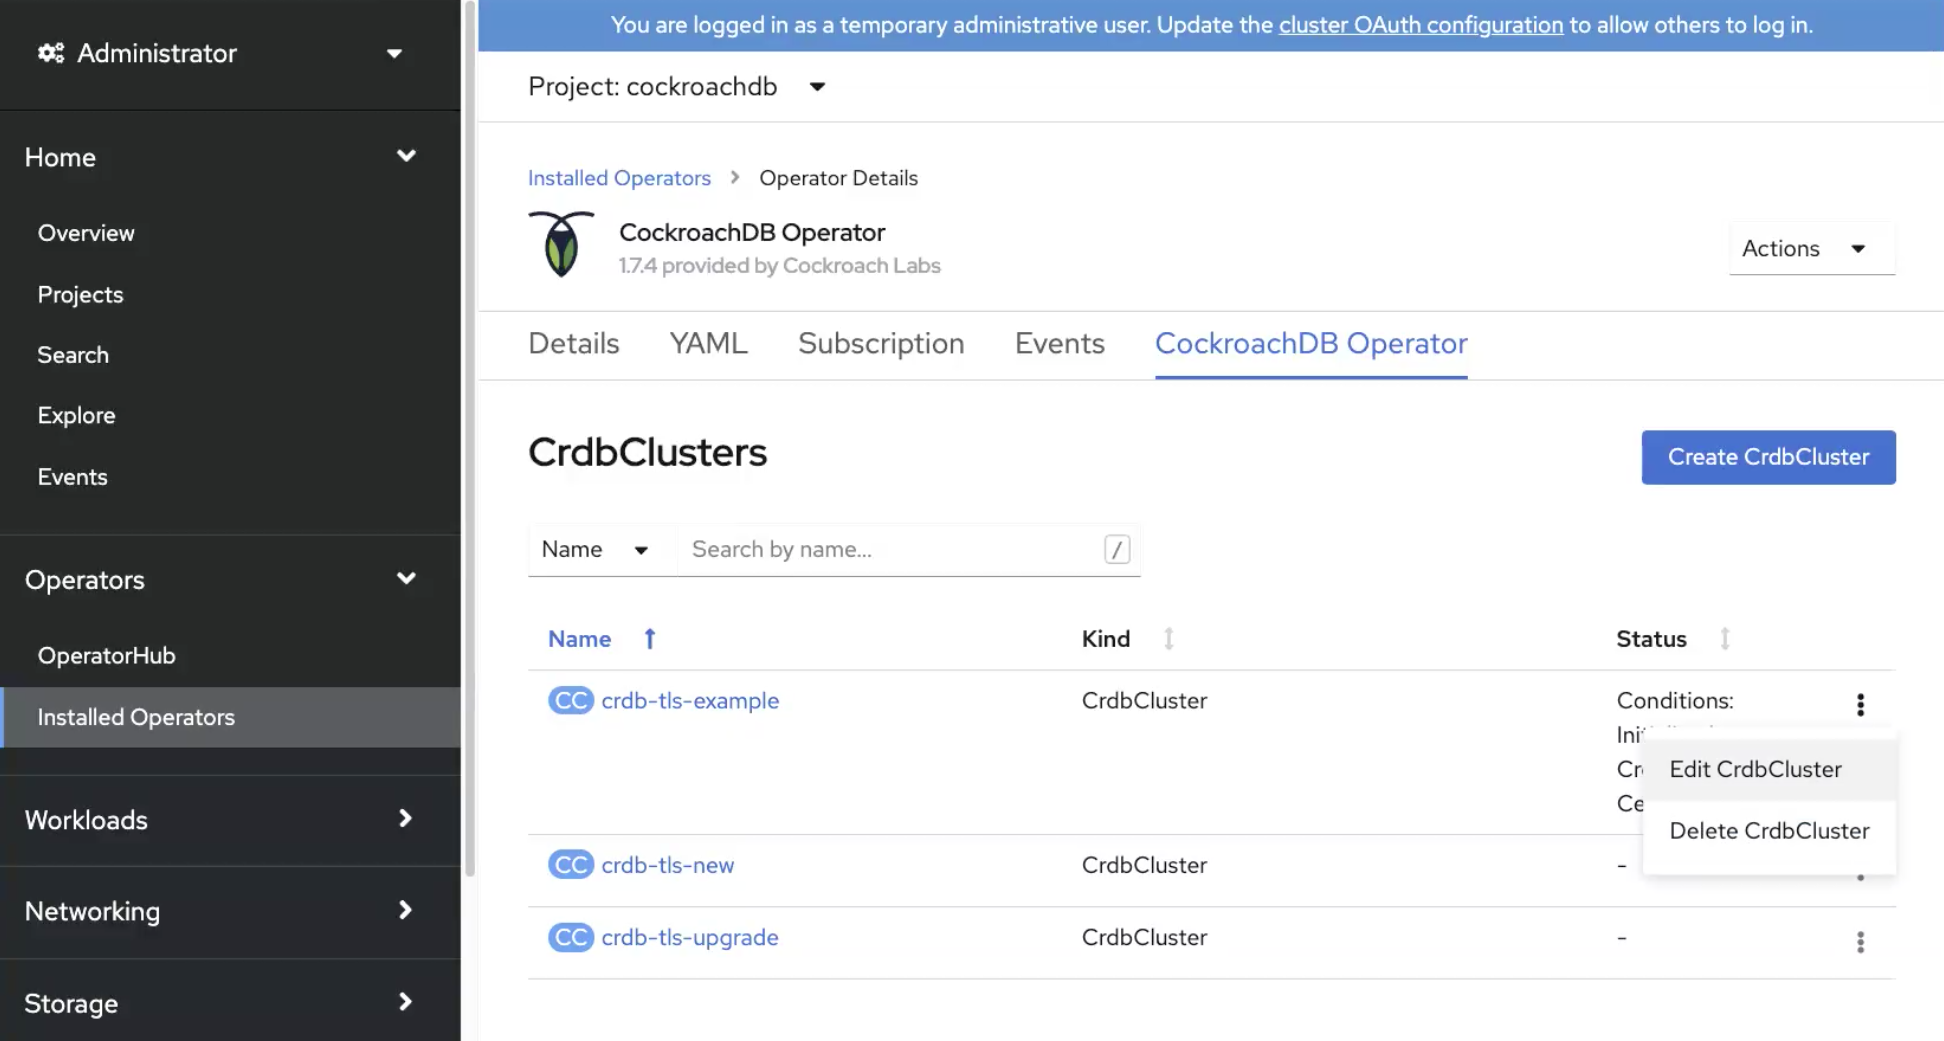
Step 8. Delete the cluster
If you want to continue using this cluster, see Operate CockroachDB on Kubernetes for details on configuring, scaling, and upgrading the cluster.
Go to the Installed Operators page and find the cluster name of the CockroachDB cluster. Select Delete CrdbCluster from the menu.
This will delete the CockroachDB cluster being run by the Operator. It will not delete:
- The persistent volumes that were attached to the pods. This can be done by deleting the PVCs via Storage > Persistent Volume Claims.
- The opaque secrets used to authenticate the cluster. This can be done via Workloads > Secrets.
If you want to delete the persistent volumes and free up the storage used by CockroachDB, be sure you have a backup copy of your data. Data cannot be recovered once the persistent volumes are deleted. For more information, see the Kubernetes documentation.
For more information on managing secrets, see the Kubernetes documentation.
