
Reader’s Note: This post references CockroachDB Serverless and/or CockroachDB Dedicated which, as of September 26 2024, have been renamed and incorporated within the new CockroachDB Cloud platform, which you can read more about here.
Distributed, cloud-native databases are the future, but setting one up is complicated, right?
It doesn’t have to be! In fact, you can register for free and set up a new CockroachDB Dedicated database in the time it takes to make a bowl of ramen:
Note: Although free-tier CockroachDB Dedicated clusters do have limited runtime resources, your data is still distributed!
How to set up your own CockroachDB Dedicated database
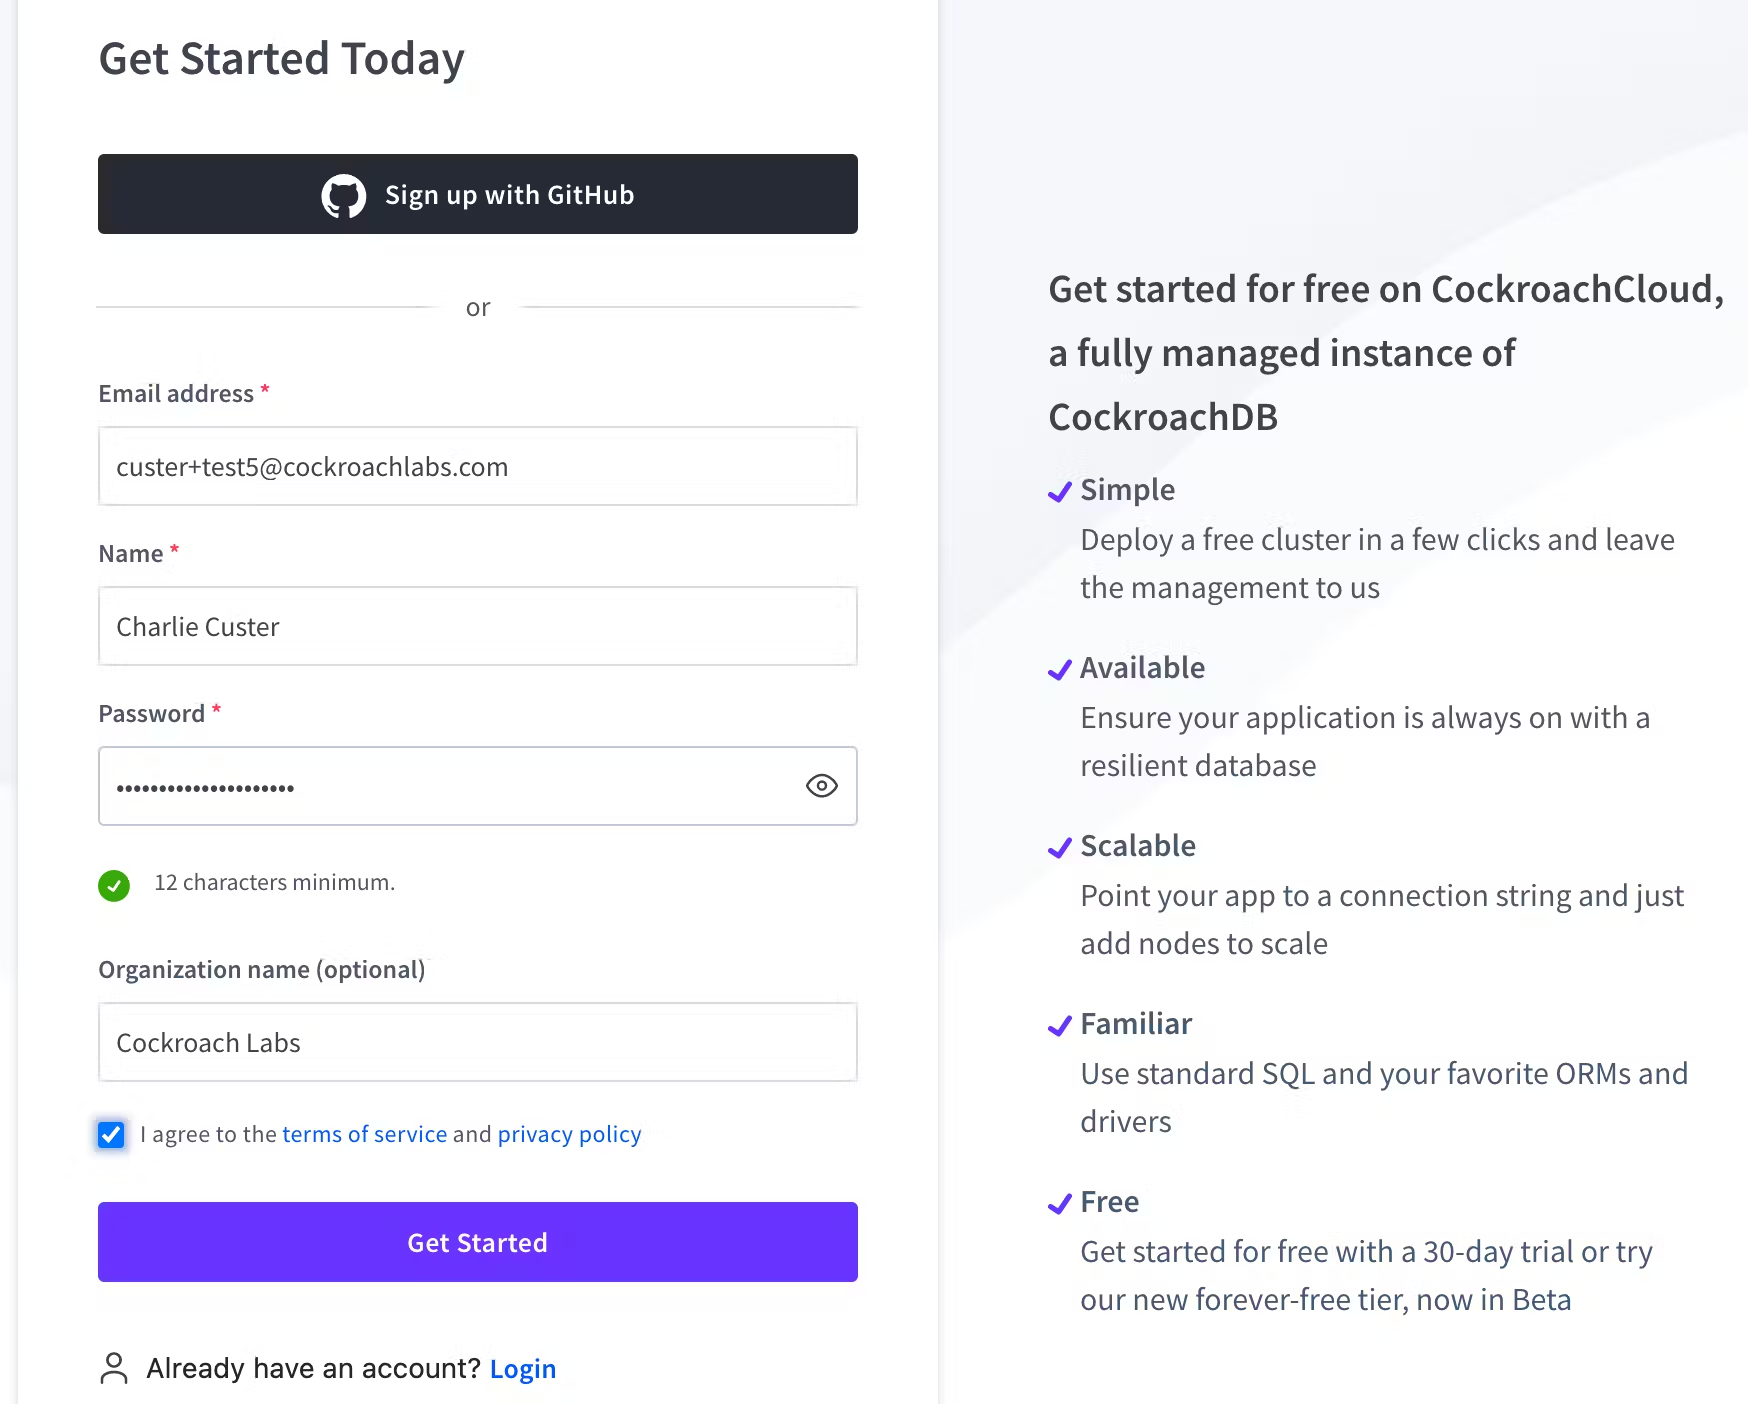
Step 1: Register for an account
Navigate to cockroachlabs.cloud/signup. You can choose to sign up using your Github account, or you can fill in your information into the form to create your CockroachDB Dedicated account.
Step 2: Verify your email
Open your email client and click the button in the email you receive from Cockroach Labs. This will open a new tab, and after a few seconds, it will forward you to cockroachlabs.cloud/cluster/create so that you can start creating your cluster.
Step 3: Select your database options
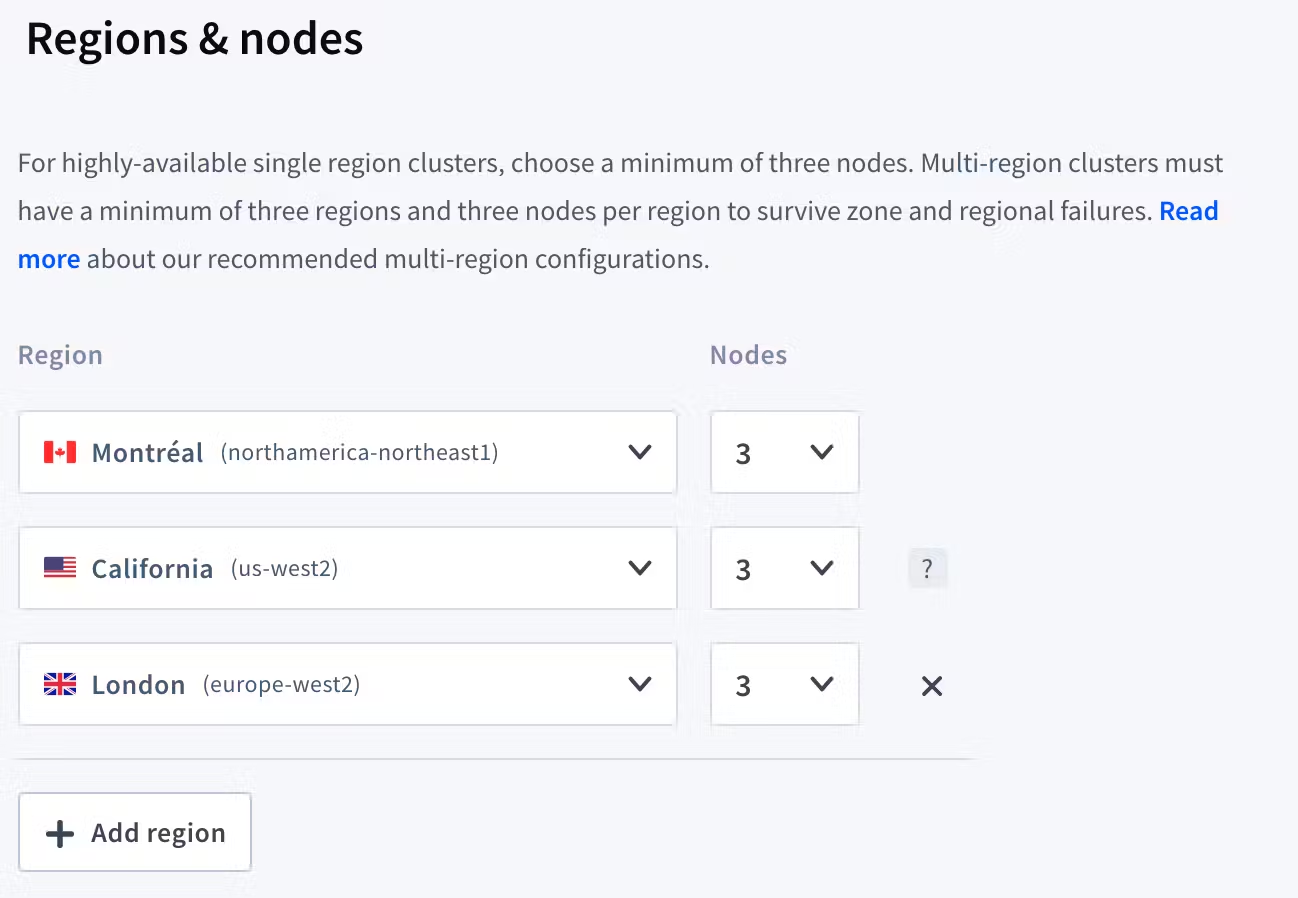
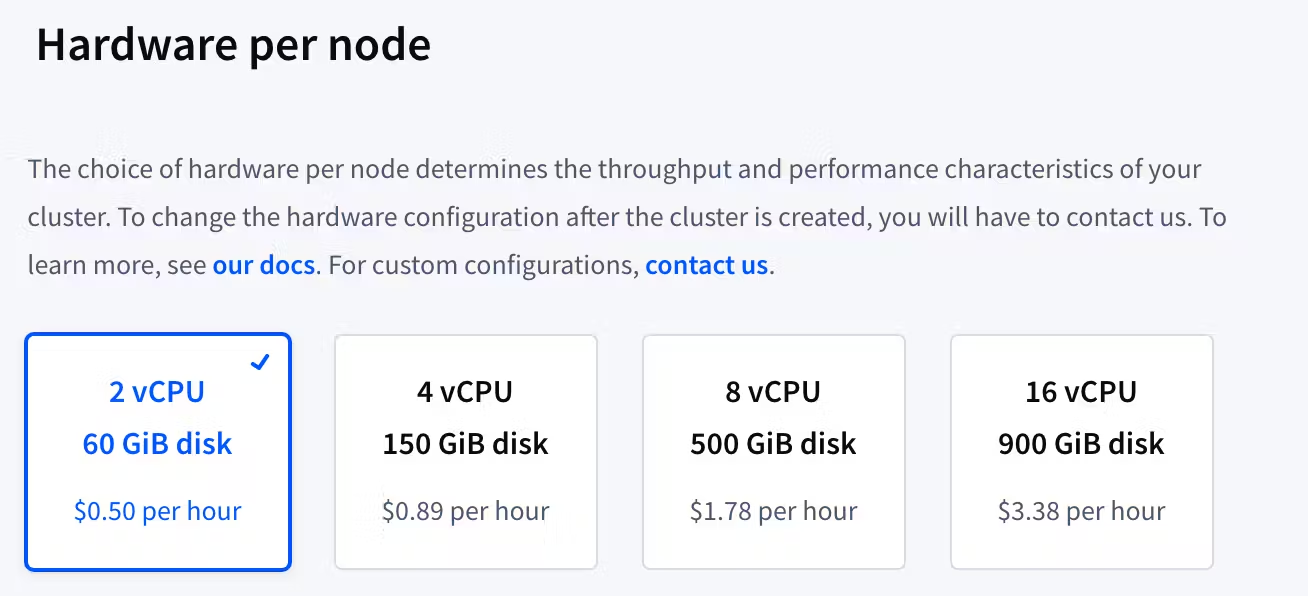
On the cluster creation page, you’ll be presented with a number of options for creating your cluster:
Free or paid. Cockroach Labs offers two versions of CockroachDB Dedicated: a free-forever version with up to 5 GiB of storage and some functionality limitations or a fully-featured, managed solution that begins with a 30-day free trial.
The free version is great for testing and development, and you can always opt to scale up to a paid cluster later when your use case requires it.

Cloud Provider. You can choose between GCP or AWS. Note that your choice does affect the price per node if you opt for a paid plan.
Regions and nodes. Choose the server regions you’d like, and the number of nodes you’d like per region. If you’ve chosen the free plan, your choice of regions will be limited and you will not be able to select the number of nodes.
Hardware per node. Choose the hardware configuration you’d like per node. Note that the free plan does not include this option.
Cluster name. Select the name for your cluster.
Additional settings. You can choose whether you’d like to set up VPC peering, and if so, whether you’d like to use the default IP range or configure an IP range. Note that the free plan does not include this option.
Once you’re ready, hit either “Create your free cluster” or “Next,” depending on which plan you chose. If you did not choose the free plan, you’ll be taken to another page where you can enter your payment information before starting your cluster.
Step 4: Download and install CockroachDB
When your cluster is created, you’ll see a screen like this one with connection information. Note that your password will only be displayed once, so you should immediately copy and save your connection string in a separate location.
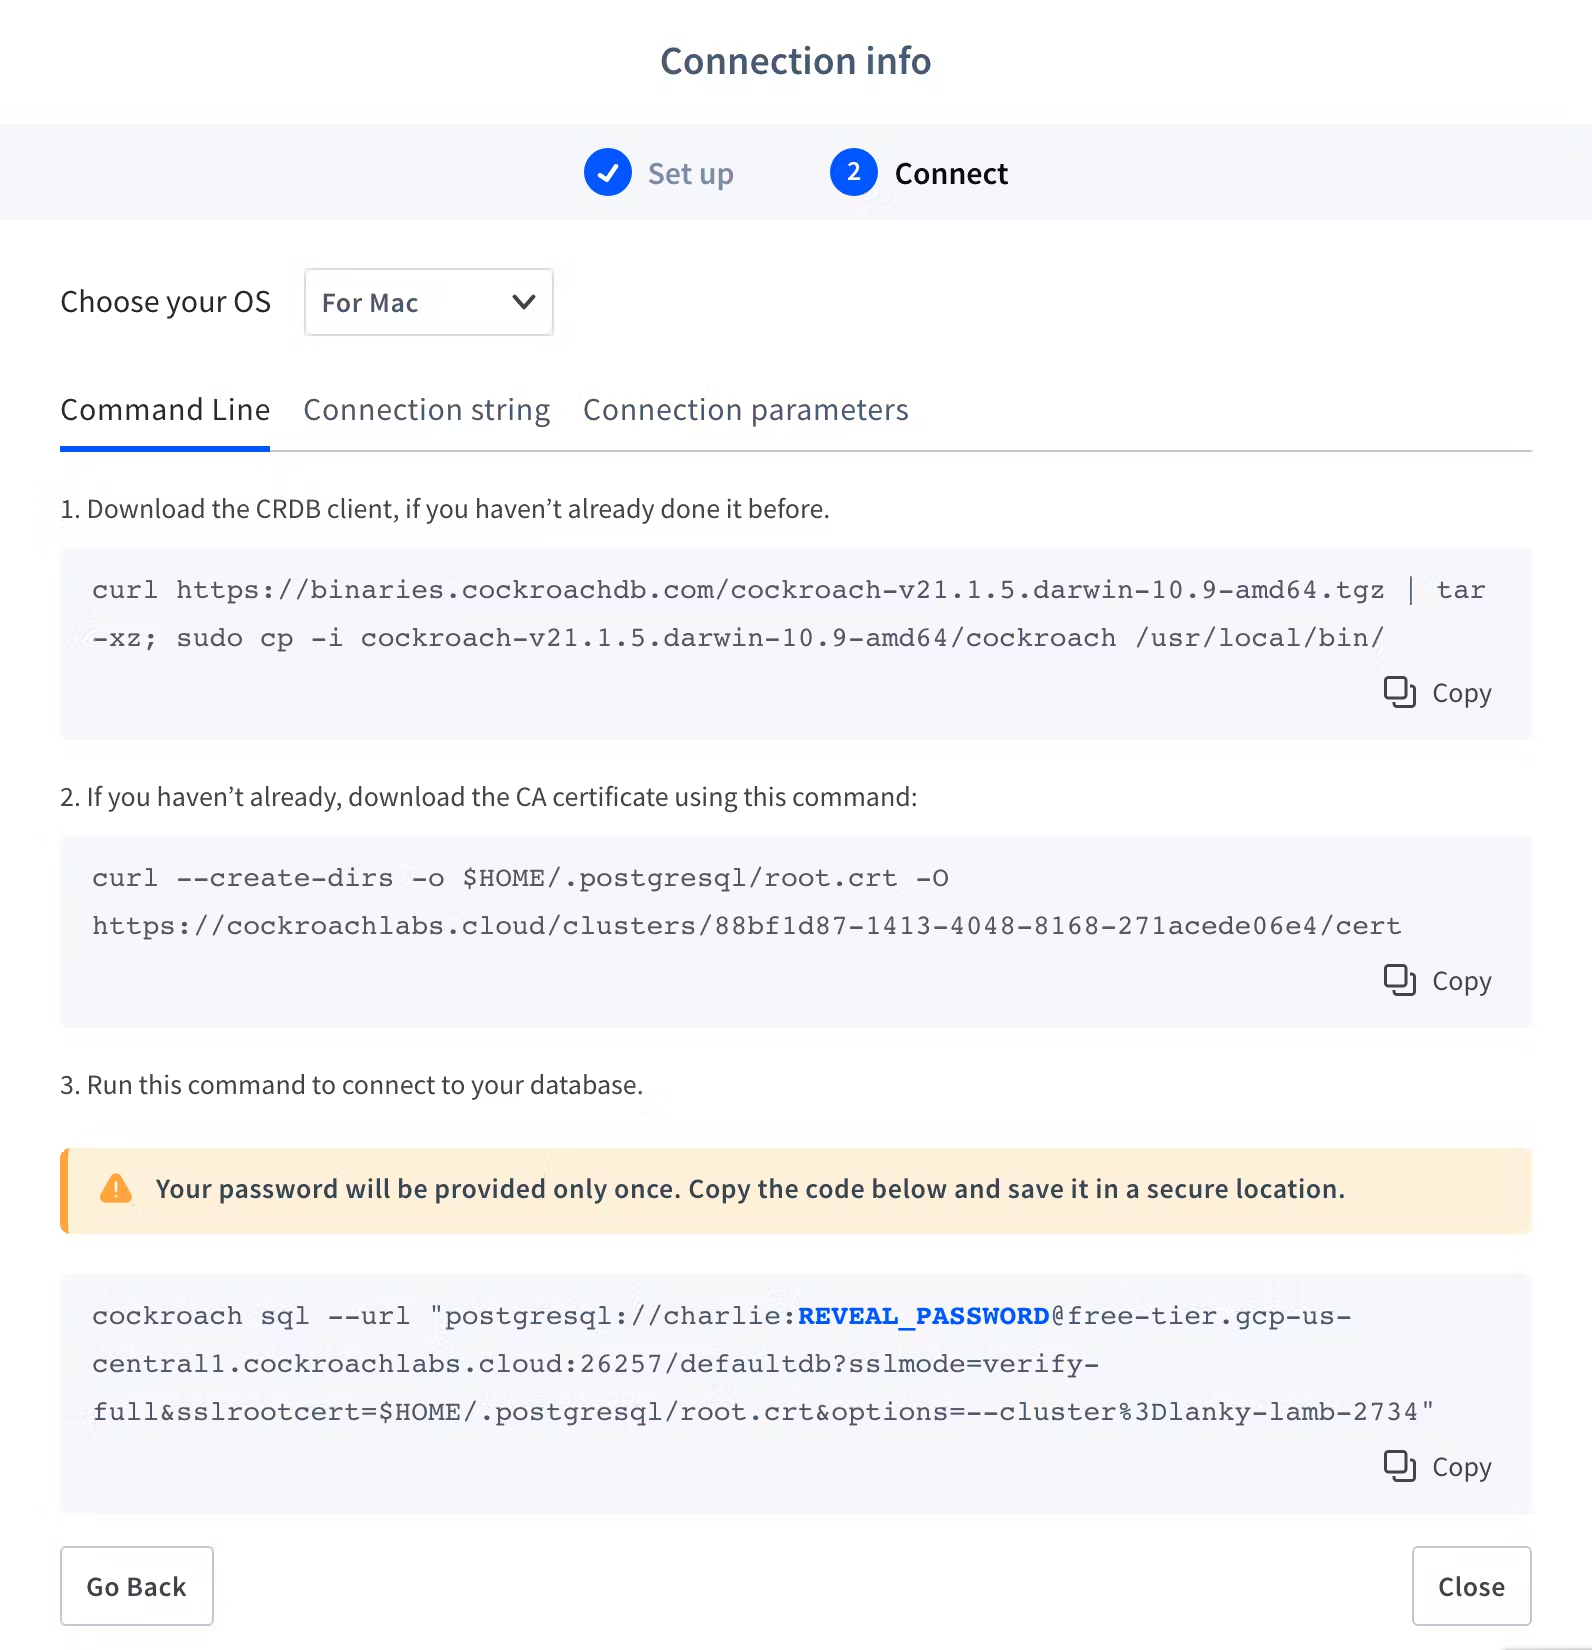
Then, select your operating system and follow the instructions, pasting code snippets into the shell to download the CockroachDB client and to add the CA certificate directory.
Finally, you can paste your connection string into the shell to launch CockroachDB Dedicated’s SQL shell.
Step 5: Start creating your database in the SQL shell
Once in the CockroachDB SQL shell, you can work with your database like you would any relational database.
By default, when the SQL shell launches you’ll be in the defaultdb, so your first step will probably be to create your own database using CREATE DATABASE.
From there, the sky’s the limit, and you can go about creating tables and building your schema just like you would with any other SQL database.
Resources for creating your database
Once you’ve got CockroachDB Dedicated up and running, the next step is to build your database and get it plugged into your application. Every use case is different, so we can’t provide step-by-step guidelines here, but here are some resources to help you get started:
Our schema design documentation is important to read, particularly if you’re going to be creating a new database from scratch rather than migrating one.
Our list of officially supported third-party tools and integrations will help you find the tools you need to connect your app to your new database quickly and use it more effectively.
Our community has also created some great tools an integrations that are worth looking into.
Cockroach University is our free online course platform, with lots of courses designed to help you get up and running fast!
The Cockroach Labs blog has lots of great content about building, running, and scaling a database with CockroachDB. For example, check out this recent post about how easy it is to encrypt only specific tables in your databasewith CockroachDB.