Have you ever wanted to stream data from your database without having to install additional resources that require more time and energy to maintain?
Just recently, I spoke with a {person who shall remain nameless} about how they wanted to dump new data to a file, move it from one cloud provider to another, and then place it in storage for consumption by downstream systems. There was more to it and it hurt my head to listen. I had only one question for {person to remain nameless} “When did you start hating your fellow coworkers?” I mean, really… other people will have to maintain that mess.
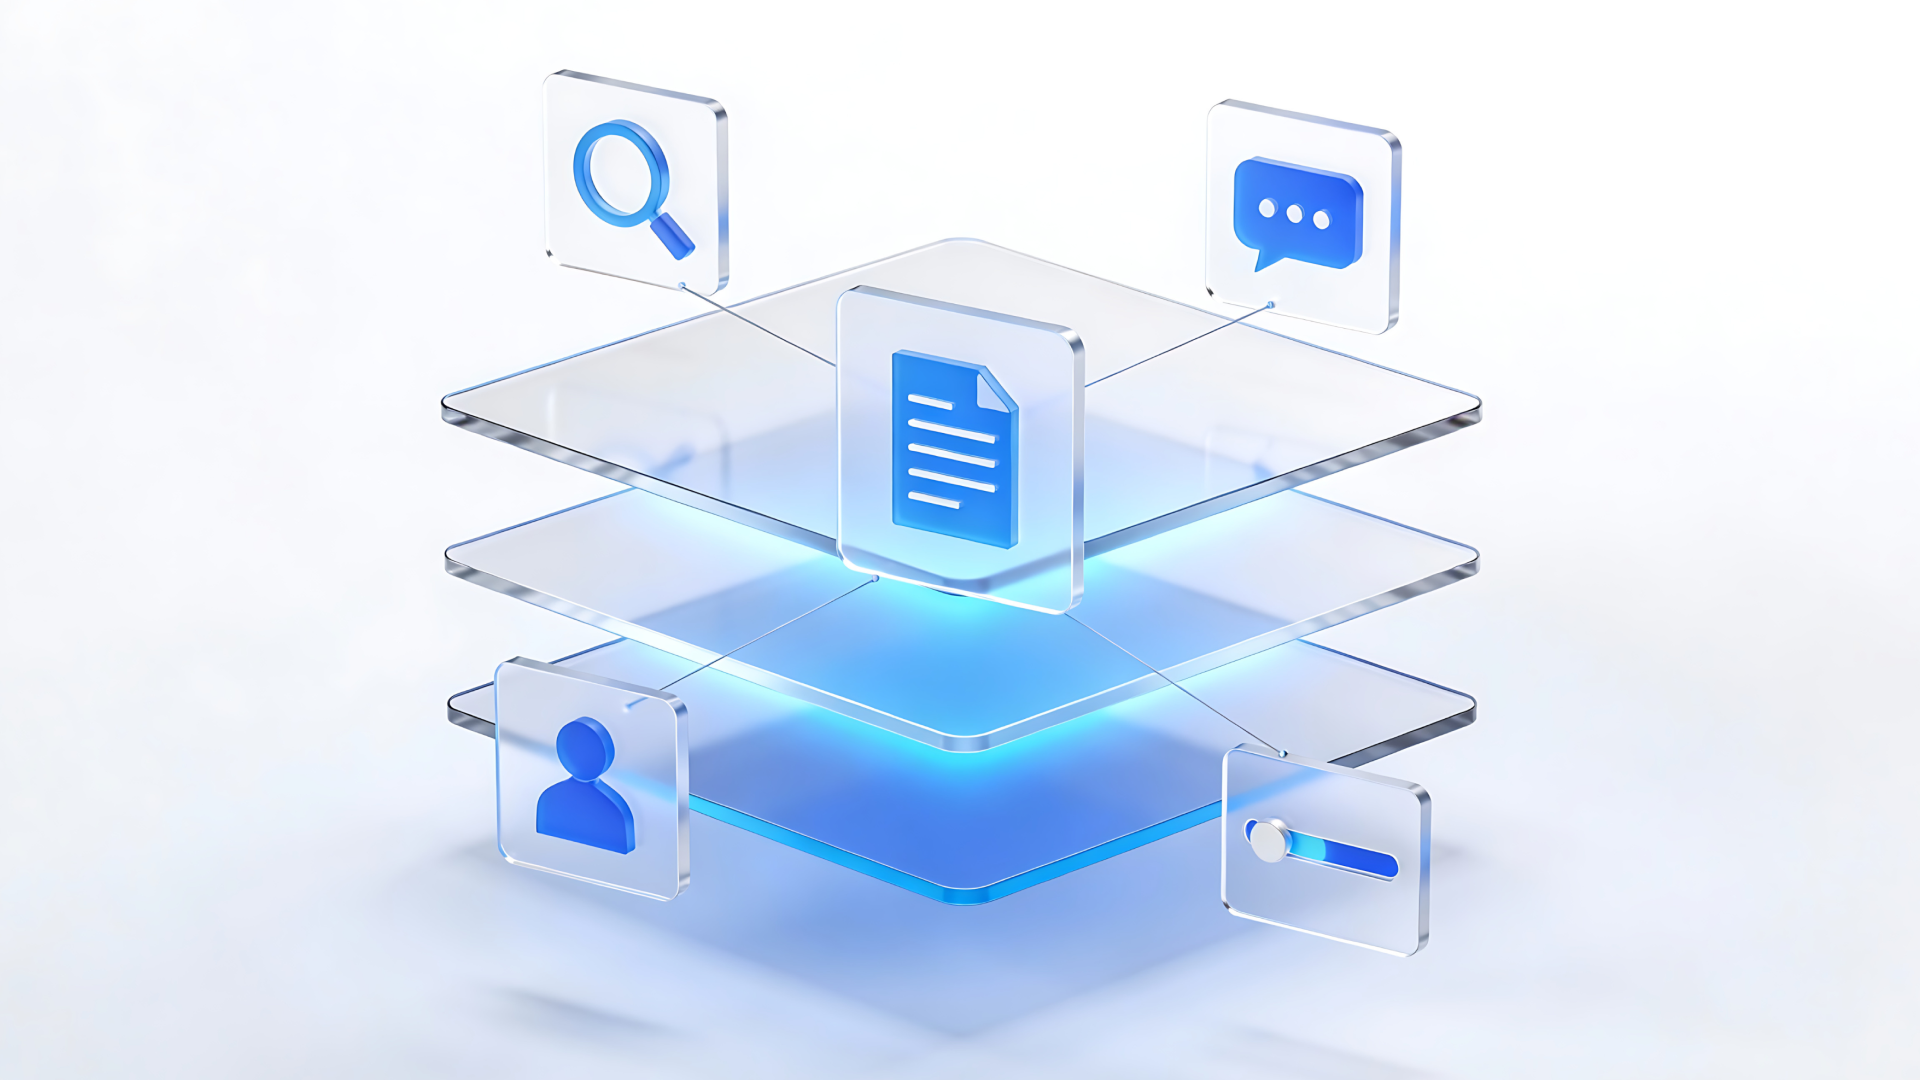
The point I am trying to make, admittedly in a slightly snarky way, is that it’s important to simplify your IT assets. And to avoid creating more hurdles or complexity. Why use Google pub/sub?
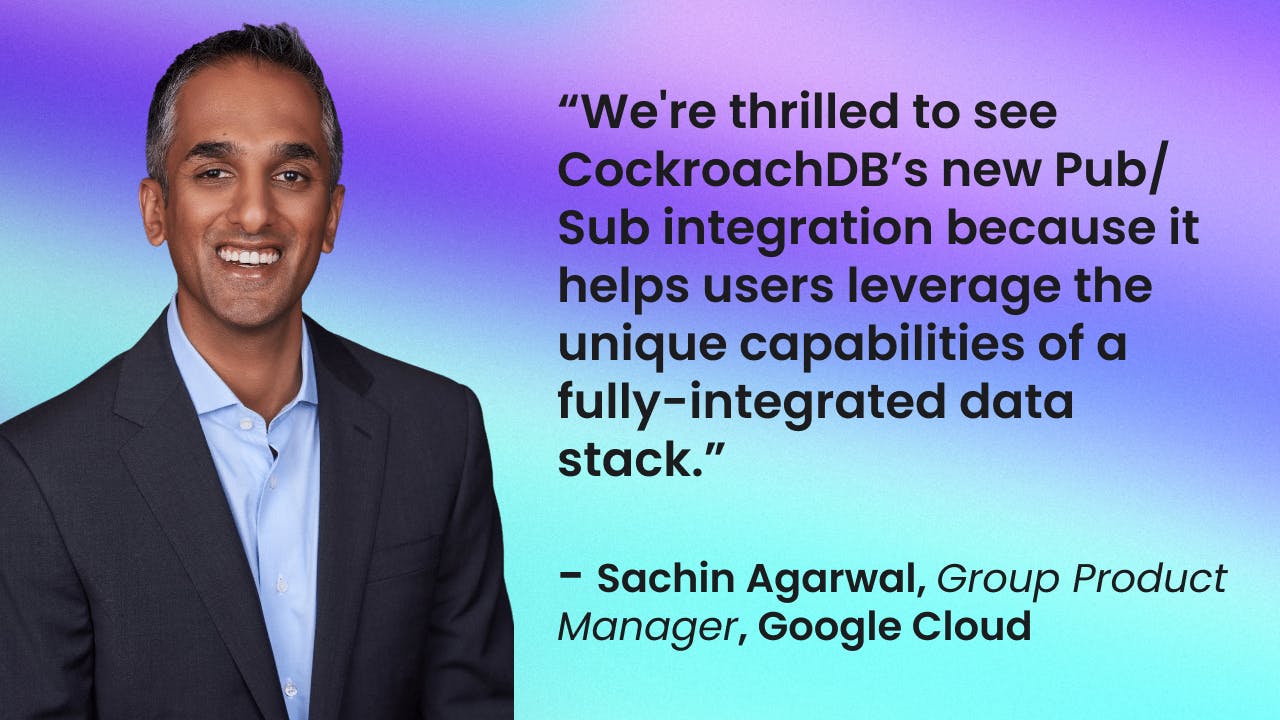
Google’s Pub/Sub integration unlocks an entire suite of Google Cloud tools that can be used in conjunction with it, including BigQuery, Cloud Dataflow, Cloud Storage, Cloud Functions, Cloud Dataproc, Firebase, EventArc and more.It just makes sense to integrate with Pub/Sub to get data from CockroachDB for downstream systems.
Google’s Pub/Sub allows enterprises the ability to:
No-ops, secure, scalable messaging or queue system
In-order and any-order at-least-once message delivery with pull and push modes
Secure data with fine-grained access controls and always-on encryption
CockroachDB is a distributed SQL database built on a transactional and strongly-consistent key-value store. It scales horizontally; survives disk, machine, rack, and even datacenter failures with minimal latency disruption and no manual intervention; supports strongly-consistent ACID transactions; and provides a familiar SQL API for structuring, manipulating, and querying data. CockroachDB is typically deployed via our managed service and can be deployed easily as a single logical database across multiple regions (and even clouds).
To get started with our managed service, which is free for the first 30 days, check out the following article: How to get started CockroachDB Dedicated. (However, if you prefer to deploy the database on prem or on your own cloud resources, you can get started using the directions below for CockroachDB Self Hosted.)
In this post, we will cover the Change Data Capture(CDC) capabilities of CockroachDB. CDC provides efficient, distributed, row-level changefeeds into a configurable sink for downstream processing such as reporting, caching, or full-text indexing.
Combining the CDC capability with Google’s Pub/Sub opens the entire Google Cloud platform, so that any application that can subscribe and receive change data feeds.
In this post we walk you through how to integrate CockroachDB into your Google Cloud architecture.
CDC & Google Pub/Sub Tutorial Overview
Setup a CockroachDB Dedicated cluster
Create a GCP instance to run our queries from
Create Google Pub/Sub Topic
Create an account database and tables
Enable the CDC feature of CockroachDB and stream data to Google Pub/sub
Stream data to Google Cloud Storage with Google Dataflow
Getting Started
Step 1: Create CockroachDB Dedicated cluster
Getting started with CockroachDB Dedicated is easy. In a few steps, you can get started on Google Cloud.
Navigate to: https://cockroachlabs.cloud/ Create an account
Several options are pre-filled when you choose a plan, such as cloud provider(GCP), region, number of nodes (we recommend 3 at a minimum) and a dynamically created cluster name. For the sake of this article we will not be covering topics, such as compute, storage and VPC peering. The defaults for these settings will be sufficient for the sake of this discussion.
Note: One can change the cluster name to something more meaningful, Unless you like the preset names for your clusters.
3. To approve your cluster settings click: create cluster.
Your cluster will be created in 10-15 minutes and the Connect dialog will display.
4. Once your cluster is ready, you will see a window with information on how to connect to your cluster.
5. The ‘Setup’ screen will walk you through the setting the ‘IP Allowlist’, SQL User and default database. A. Click on ‘allowlist an IP’ B. Choose your local IP (it should be listed as a default).
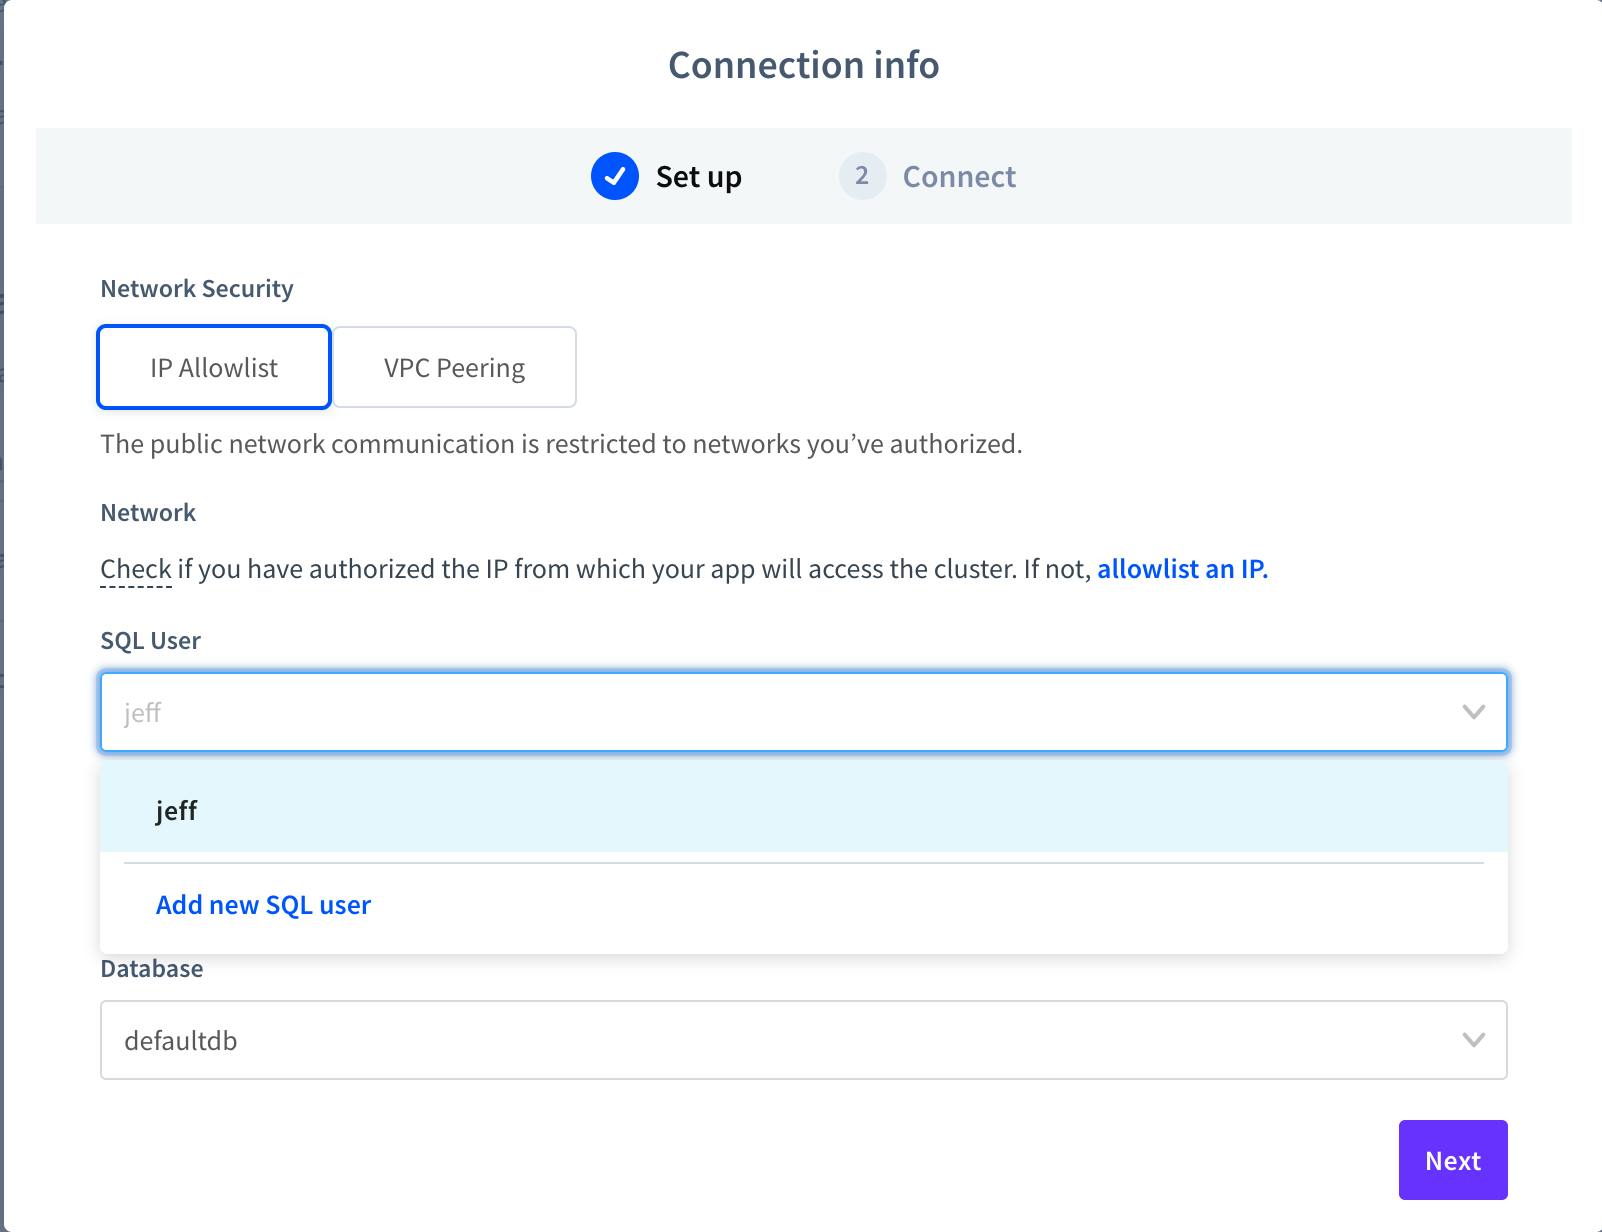
For this this blog, we are using the ‘For Mac’, you can use Linux or Windows.
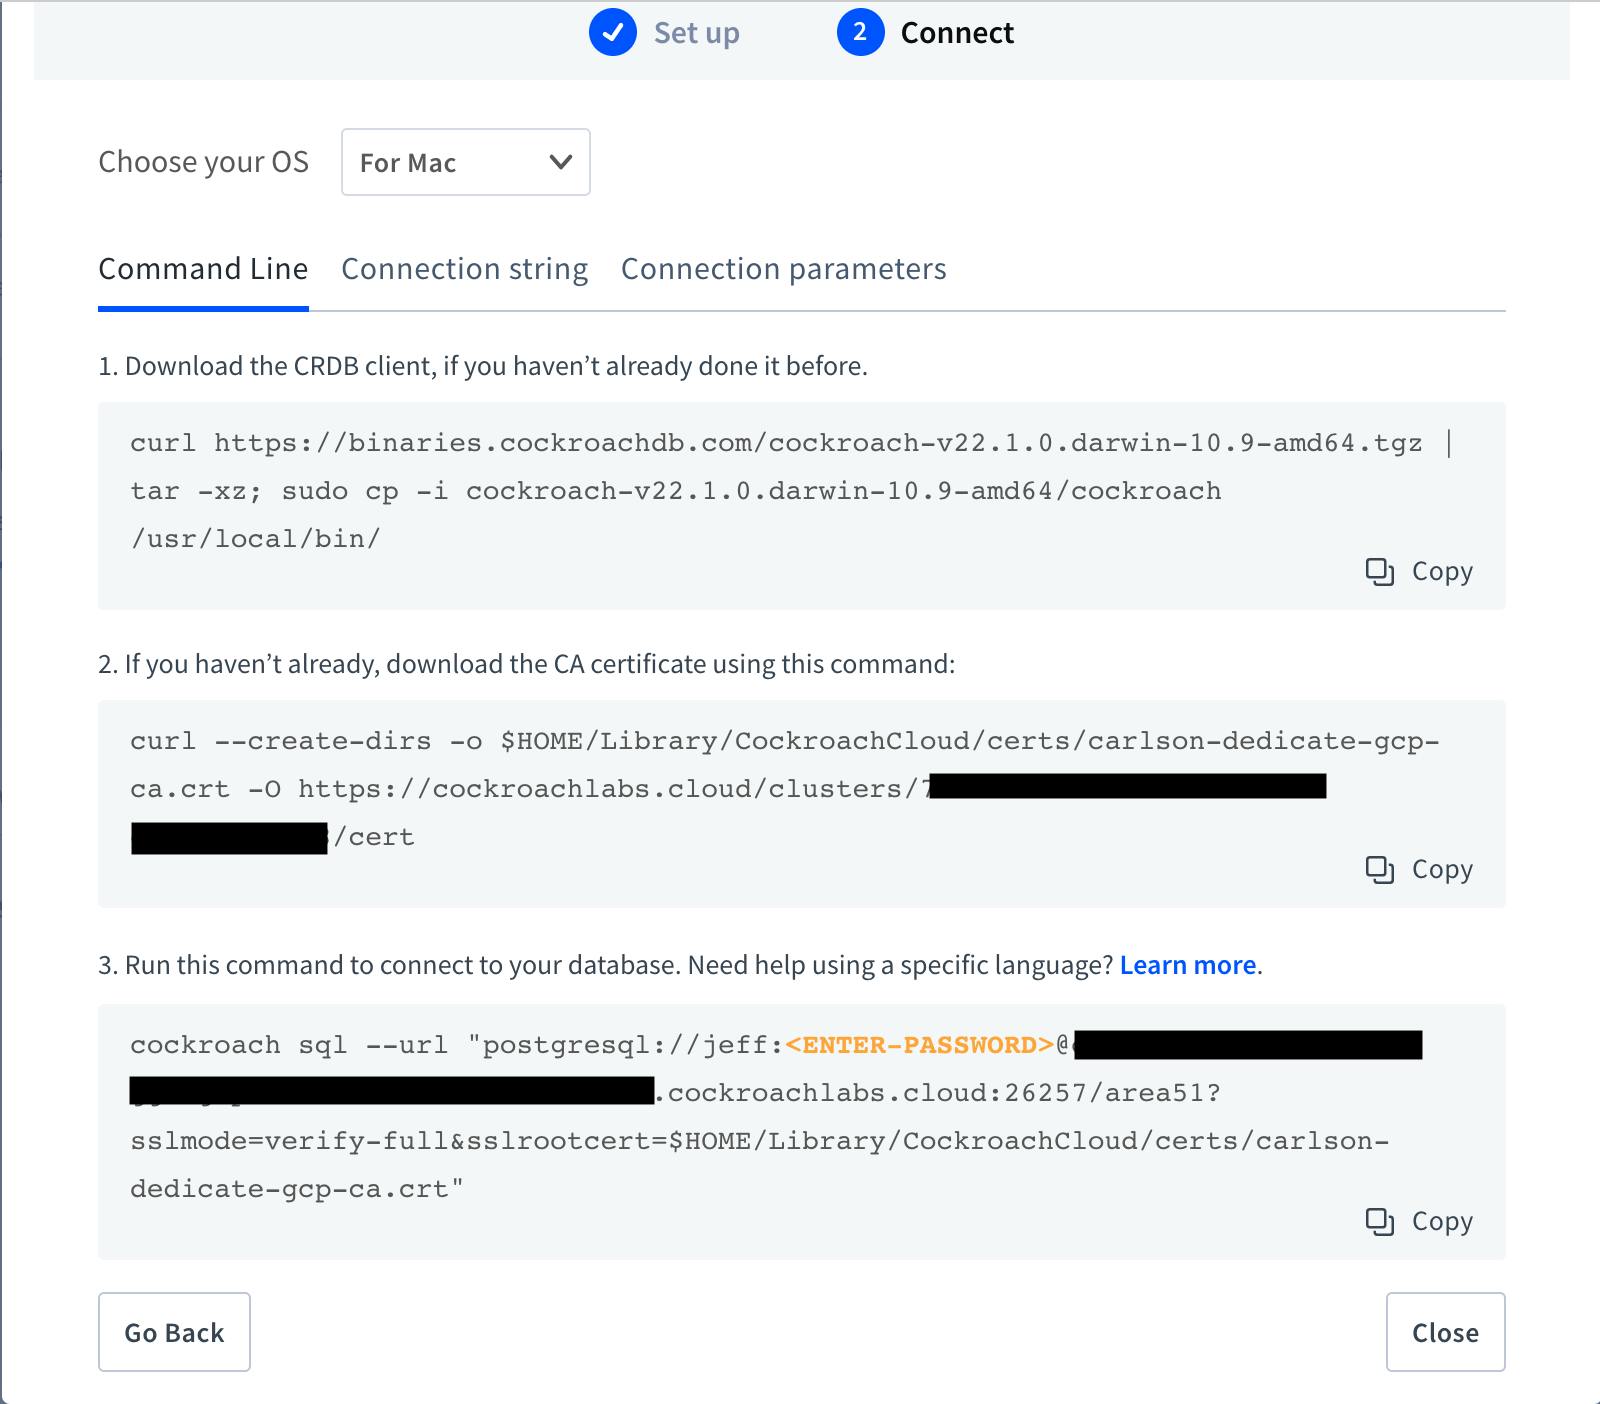
6. Copy each command-line prompt and the connection string (separate tab) to a separate notepad for use later in this lab.
Note: Make sure to label each command line command with its purpose: CRDB client, CA cert, DB connect and Connection String
Step 2: Configuring a Google Cloud Platform Account
Go to cloud.google.com and login with your google account. If you don’t have a google account, please create a free trial account by following the instructions at this link.
If not already there, go to https://console.cloud.google.com/
Create a new project, by selecting the following dropdown in the top left:

A new window will pop up. In it, select “New Project” in the top right.
Given your project a proper new project name. Let’s go with
cockroach-cdc-demoand click the “Create” button:After your new project is done being created, go back to the dropdown in Step 3, select your new project name.
When the right project is selected, the name will change to reflect this in the dropdown in the top left of your console.
Step 3: Configure a GCE Ubuntu VM Instance on GCP
We will be creating an VM instance. The purpose of the vm will be to utilize CockroachDB cli to connect to the database, run queries and maybe kick off a workload. Let’s go crazy and have fun!
Create a Ubuntu Linux GCE VM instance using the instructions given here. Note: Our instance is labeled: ‘cli-instance’ for the purposes of this lab.
Choose N2 Machine Family Series:

Click ‘Change’ under boot disk:

For ‘operating system’ change to ‘ubuntu’ and leave the defaults settings as shown then click ‘SELECT’:

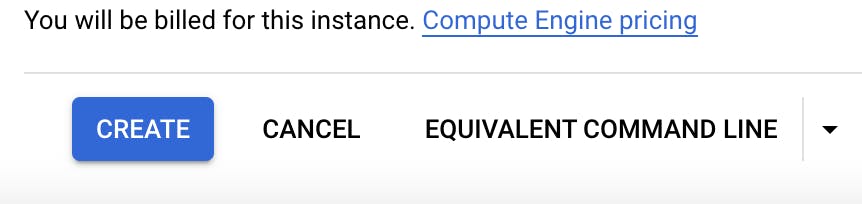
Click ‘Create’ to provision your instance.

2. After your instance is created, got to ‘Compute engine’ and SSH to your instance by clicking on the SSH button of your instance.
3. An SSH terminal will open similar to the following:

Step 4: Create Google Cloud Storage Bucket and Service Accounts
For a place to store our change data a good place to start is Google Cloud Storage.
Google Cloud Storage
In the Google Cloud console, and search for ‘Cloud Storage’. Click on the first entry.
Click Create bucket.
On the Create a bucket page, enter your bucket information. To go to the next step, click Continue.
For Name your bucket: enter example_crdb_bucket
Leave the remaining fields as defaulted for the purposes of this article.
Click Create.
Once the bucket has been created, click on the bucket name.
Once in the bucket click Create folder.
Enter crdb_pubsub_to_cs
Click Create
That is all! It’s that simple.
Google Service Accounts
To access the storage bucket with specified credentials, it’s necessary to create a service account and add the service account address to the permissions on the specific storage bucket. Don’t worry, we’ll hold your hand through this one.
We keep these steps as simple as possible.
1. Complete the steps in: Creating a Service Account
2. Add the service account address to the permissions on the specific storage bucket created above. A. Click on the ellipsis for your cloud storage bucket

3. The JSON credentials file for authentication can be downloaded from the Service Accounts page in the Google Cloud Console and then base64-encode.
Click on the bucket name
Click Permissions

Click on Permissions and click ADD.
Indicate the new principal(the service account you created) and choose what role it can have for Storage Object Creator.
For example:

Step 5: Connecting to CockroachDB Dedicated
Moving right along. Now that we have created a GCE VM and Cloud Storage Bucket, let’s verify that we can connect and run some queries. Use CloudShell for the following steps.
Note: You will need a copy of the DB connection information noted in Step 1.4 of this lab to proceed
As part of this blog we will be using the Command-line parameters.
1. First, we will need to download the CockroachDB linux binary. This will allow us to use the command line sql.
curl https://binaries.cockroachdb.com/cockroach-v22.1.0.darwin-10.9-amd64.tgz | tar -xz; sudo cp -i cockroach-v22.1.0.darwin-10.9-amd64/cockroach /usr/local/bin/
2. Second, download the certificate to access the cluster securely. This will be used for when we want to connect to our database.
Paste the CA Certificate copied from Step 1.4
Example:
curl --create-dirs -o $HOME/.postgresql/root.crt -O https://cockroachlabs.cloud/clusters/*******************/cert
3. Now, connect to the database using the command-line copied from Step 1.4. The result will show the sql command-line prompt. The database will be ‘defaultdb’. We will be creating a separate database for our application below.
Example:
cockroach sql --url
“postgresql://john_doe:{MY_SUPER_SECRET_PW}@carlson-dedicate-gcp-ggx.gcp-northamerica-northeast1.cockroachlabs.cloud:26257/defaultdb?sslmode=verify-full&sslrootcert=$HOME/Library/CockroachCloud/certs/carlson-dedicate-gcp-ca.crt”
#
# Welcome to the CockroachDB SQL shell.
# All statements must be terminated by a semicolon.
# To exit, type: \q.
#
# Client version: CockroachDB CCL v21.2.5 (x86_64-apple-darwin19, built 2022/02/07 21:04:05, go1.16.6)
# Server version: CockroachDB CCL v21.2.7 (x86_64-unknown-linux-gnu, built 2022/03/14 16:37:26, go1.16.6)
# Cluster ID: c0854300-2c35-44b4-a7d1-2af71acd3e4c
#
# Enter \? for a brief introduction.
#
john_doe@free-tier.gcp-us-central1.cockroachlabs.cloud:26257/defaultdb>
4. Using familiar ANSI SQL without having to learn a new language makes using CockroachDB quick and easy.
Let’s create a database to which we will add our tables and data.
The syntax is simple: CREATE DATABASE pubsubdb;
john_doe@free-tier.gcp-us-central1.cockroachlabs.cloud:26257/defaultdb>  CREATE DATABASE IF NOT EXISTS pubsubdb;
CREATE DATABASE
Time: 88ms total (execution 21ms / network 67ms)
Now that we created a database, lets connect to it, create a table and run a simple query.
To connect run: use pubsubdb;
Example output:
john_doe@free-tier.gcp-us-central1.cockroachlabs.cloud:26257/defaultdb> use pubsubdb;
SET

Time: 1ms total (execution 1ms / network 1
ms)
Ok, now to create a simple table called accounts:
CREATE TABLE IF NOT EXISTS accounts (
    id INT PRIMARY KEY,
    balance DECIMAL
);
Example output:
CREATE TABLE IF NOT EXISTS accounts (
    id INT PRIMARY KEY,
    balance DECIMAL
);
CREATE TABLE

Time: 14ms total (execution 13ms / network 1ms)
To show all of the columns from a table, use the SHOW COLUMNS FROM accounts; statement or the \d accounts shell command:
john_doe@free-tier.gcp-us-central1.cockroachlabs.cloud:26257/bank> show columns from accounts;
| column_name | data_type | is_nullable | column_default | generation_expression | indices   | is_hidden |       |
|-------------|-----------|-------------|----------------|-----------------------|-----------|-----------|-------|
|      id     |    INT8   |    false    |      NULL      |                       | {primary} |   false   |       |
| balance     | DECIMAL   | true        | NULL           |                       | {primary} | false     | false |

(2 rows)

Time: 31ms total (execution 31ms / network 1ms)
Ok, so now we have a database and empty tables. We now need to enable cdc (changefeed) on the tables to output any new data to our Google Pub/Sub.
In order for Changefeed to be started, we need to set a cluster setting kv.rangefeed.enabled to be true(active).
jeff@carlson-dedicate-gcp-ggx.gcp-northamerica-northeast1.cockroachlabs.cloud:26257/defaultdb> SET CLUSTER SETTING kv.rangefeed.enabled = true;
SET CLUSTER SETTING

Time: 66ms total (execution 18ms / network 48ms)
Changefeed for the cluster is now set. To verify if the setting has been enabled run the following:
jeff@carlson-dedicate-gcp-ggx.gcp-northamerica-northeast1.cockroachlabs.cloud:26257/pubsubdb> show cluster setting  kv.rangefeed.enabled;
  kv.rangefeed.enabled
------------------------
          true
The next step is to indicate which table we want to have changefeed output any new data for. Since we have one table, Accounts, it should be pretty easy.
We will need our service account key so that we can authenticate to the Google Cloud Platform.
A Pub/Sub sink URI follows this example:
'gcpubsub://{project name}?region={region}&topic_name={topic name}&AUTH=specified&CREDENTIALS={base64-encoded key}'The parameters are:
| URI Parameter | Description                                                                                                                                                                                                                                                                                                                                           |
|:-------------:|-------------------------------------------------------------------------------------------------------------------------------------------------------------------------------------------------------------------------------------------------------------------------------------------------------------------------------------------------------|
| project name  | The Google Cloud Project name.                                                                                                                                                                                                                                                                                                                        |
| region        | (Required) The single region to which all output will be sent.                                                                                                                                                                                                                                                                                        |
| topic_name    | (Optional) The topic name to which messages will be sent. See the following section on Topic Naming for detail on how topics are created.                                                                                                                                                                                                             |
| AUTH          | The authentication parameter can define either specified (default) or implicit authentication. To use specified authentication, pass your Service Account credentials with the URI. To use implicit authentication, configure these credentials via an environment variable. See Use Cloud Storage for Bulk Operations for examples of each of these. |
| CREDENTIALS   | (Required with AUTH=specified) The base64-encoded credentials of your Google Service Account credentials.  See Implicit authentication for Connecting CockroachDB with GCP.                                                                                                                                                                           |
Here is an example of creating a change feed job on the pubsubdb.accounts table:
CREATE CHANGEFEED FOR TABLE pubsubdb.accounts INTO 'gcpubsub://cockroach-jeffcarlson?region=us-east1&AUTH=specified&CREDENTIALS={mySecretCredentials}';
Note, common issues when running the command are issues with the credentials.
Sample output:
CREATE CHANGEFEED FOR TABLE pubsubdb.accounts INTO 'gcpubsub://cockroach-jeffcarlson?region=us-east1&AUTH=specified&CREDENTIALS={mySecretCredentials}';
        job_id
----------------------
  765507031908515842
(1 row)

NOTICE: changefeed will emit to topic pubsubdb-employee

Time: 3.242s total (execution 3.157s / network 0.086s)
When running a CREATE CHANGEFEED statement to Pub/Sub, it will try to create a topic automatically. When you do not specify the topic in the URI with the topic_name parameter, the changefeed will use the table name to create the topic name.
Once the job has been created we can validate it via running using the SHOW JOBS command. I am taking it a step further and choosing the jobs id, status and tables they are being processed against with command:
select job_id, status, full_table_names from \[show changefeed jobs];
jeff@carlson-dedicate-gcp-ggx.gcp-northamerica-northeast1.cockroachlabs.cloud:26257/area51> select job_id, status, full_table_names from [show changefeed jobs];
        job_id       | status  |      full_table_names
---------------------+---------+-----------------------------
  766617831804895233 | running | {pubsubdb.public.accounts}
(2 rows)
See Managing Changedfeeds for more commands and capabilities.
Step 6: Create a dataflow job to stream incoming data
Google Dataflow can subscribe to Pub/Sub to stream data directly to Google Cloud storage. Dataflow is a unified stream and batch data processing that’s serverless and fast. We will create a job that will watch for incoming data from CockroachdB.
To get started, open up the google cloud console. In the search menu enter ‘Dataflow’ and choose the first entry that is returned.
Once in the Google Dataflow menu, click: CREATE JOB FROM TEMPLATE
Enter the following values and click run job:
| Job Name                               | finance.account                                                           |
|----------------------------------------|---------------------------------------------------------------------------|
| Regional Endpoint                      | us-east4(Northern Virginia)  *use a region that is nearest your location. |
| Dataflow template                      | Pub/Sub to Text Files on Cloud Storage                                    |
| Input Pub/Sub topic                    | project/{your project name}/topics/accounts                               |
| Output file directory in Cloud Storage | gs://example_crdb_bucket/crdb_pubsub_to_cs                                |
| Temporary location                     | gs://example_crdb_bucket/crdb_pubsub_to_cs                                |
Step 7: Load data to CockroachDB to test end to end
Use CloudShell for the following steps (See 3.3 above). We will connect to CockroachDB(see 5.3 and 5.4 above)
Example:
cockroach sql --url “postgresql://john_doe:{MY_SUPER_SECRET_PW}@carlson-dedicate-gcp-ggx.gcp-northamerica-northeast1.cockroachlabs.cloud:26257/defaultdb?sslmode=verify-full&sslrootcert=$HOME/Library/CockroachCloud/certs/carlson-dedicate-gcp-ca.crt”#
# Welcome to the CockroachDB SQL shell.
# All statements must be terminated by a semicolon.
# To exit, type: \q.
#
# Client version: CockroachDB CCL v21.2.5 (x86_64-apple-darwin19, built 2022/02/07 21:04:05, go1.16.6)
# Server version: CockroachDB CCL v21.2.7 (x86_64-unknown-linux-gnu, built 2022/03/14 16:37:26, go1.16.6)
# Cluster ID: c0854300-2c35-44b4-a7d1-2af71acd3e4c
#
# Enter \? for a brief introduction.
#
john_doe@free-tier.gcp-us-central1.cockroachlabs.cloud:26257/defaultdb> 1. Using familiar ANSI SQL without having to learn a new language makes using CockroachDB quick and easy.
Let’s create a database to which we will add our tables and data.
The syntax is simple: CREATE DATABASE pubsubdb;
john_doe@free-tier.gcp-us-central1.cockroachlabs.cloud:26257/defaultdb>  CREATE DATABASE IF NOT EXISTS pubsubdb;
CREATE DATABASE
Time: 88ms total (execution 21ms / network 67ms)
Now to add some rows so that we can test our change feed is working and the pub/sub receives the resulting data.
To insert a row into a table, use INSERT INTO followed by the table name and then the column values listed in the order in which the columns appear in the table:
INSERT INTO accounts VALUES (1, 10000.50);
john_doe@free-tier.gcp-us-central1.cockroachlabs.cloud:26257/pubsubdb> INSERT INTO accounts VALUES (1, 10000.50);
INSERT 1

Time: 5ms total (execution 4ms / network 1
ms)
Add a few more values. Run the following statement several times to generate random data (run several times):
INSERT INTO accounts select max(id)+1 as id, round(random()*100,2) as balance from accounts;2. In the Google Cloud console, and search for ‘Cloud Storage’. Click on the first entry.
3. Go to the bucket that was created in step 4.
4. Click into the folder: crdb_pubsub_to_cs
5. CDC data will be represented as follows:
6. Each payload, or cdc output is received by pub/sub. Any subscriber, in our case Dataflow, results in a file that contains json data specific to the rows we inserted into CockroachDB.

You can click into the file to view the data.Now, go back to CockroachDB and insert more rows.
Summary
To close, we were able to stream data from CockroachDB to Google Pub/sub. The advantage is that by integrating with Pub/sub is that it allows for other downstream systems to subscribe and receive updated data quickly. The CockroachDB CDC and Pub/Sub integration simplifies the overall architecture while integrating with the Google Cloud Platform.
If you don’t like my writing you can watch my most excellent colleague show you streaming data to Google Cloud Pub/Sub. Stream Data to Google Cloud Pub/Sub
Technologies leveraged in this article:
CockroachDB Dedicated is a fully managed & hosted Distributed SQL database that is architected for modern cloud applications. CockroachDB was designed from the ground up to act as a shared-nothing, distributed SQL database. It guarantees full ACID compliance with serializable isolation between transactions.Build your next breakthrough application without worrying about database connections and complex query constructions. (Capabilities covered: CDC for Pub/Sub.)
Secure and customizable compute service that lets you create and run virtual machines on Google’s infrastructure.
Object storage for companies of all sizes. Store any amount of data. Retrieve it as often as you’d like.
Pub/Sub allows services to communicate asynchronously, with latencies on the order of 100 milliseconds.
Pub/Sub is used for streaming analytics and data integration pipelines to ingest and distribute data. It is equally effective as a messaging- oriented middleware for service integration or as a queue to parallelize tasks.
Pub/Sub enables you to create systems of event producers and consumers, called publishers and subscribers. Publishers communicate with subscribers asynchronously by broadcasting events, rather than by synchronous remote procedure calls (RPCs).
Unified stream and batch data processing that’s serverless, fast, and cost-effective.