
Cockroach Labs supports different levels of authentication to cloud storage. When running disaster recovery or change data capture operations to and from a storage bucket, authentication setup can vary depending on the cloud provider. Select the tab appropriate to your cloud storage provider to see the available authentication options for your platform.
We recommend using IAM roles for users to authenticate to cloud storage resources. For more detail, see the assume role and workload identity sections for Amazon S3 and Google Cloud Storage.
You can use the following authentication options for Amazon S3 storage buckets:
- Specified: You specify the AWS access key ID and secret access key in the URI when connecting.
- Implicit: You store the needed AWS credentials as environment variables, and may omit them when connecting.
To have users assume IAM roles to complete operations on an S3 bucket, you can also configure assume role authentication in addition to specified or implicit. If your CockroachDB cluster is deployed on Kubernetes, you can use workload identities with assume role authentication.
Amazon S3 specified
If the AUTH parameter is not provided, AWS connections default to specified and the access keys must be provided in the URI parameters.
Use these parameters to specify your credentials:
AWS_ACCESS_KEY_IDAWS_SECRET_ACCESS_KEY
As an example:
BACKUP DATABASE <database> INTO 's3://{bucket name}/{path in bucket}/?AWS_ACCESS_KEY_ID={access key ID}&AWS_SECRET_ACCESS_KEY={secret access key}';
See Amazon's documentation Managing access keys for IAM users for more details on S3 credentials.
Assume role authentication allows you to use temporary short-lived credentials to authenticate to an Amazon S3 buckets. For more detail, see Amazon S3 assume role.
Amazon S3 implicit
To use implicit authentication on a CockroachDB Cloud cluster, it is necessary to authenticate using assume role authentication. See Amazon S3 assume role for more details.
If the AUTH parameter is implicit, the access keys can be omitted and the credentials will be loaded from the environment (i.e., the machines running the backup).
BACKUP DATABASE <database> INTO 's3://{bucket name}/{path}?AUTH=implicit';
You can associate an EC2 instance with an IAM role to provide implicit access to S3 storage within the IAM role's policy. In the following command, the instance example EC2 instance is associated with the example profile instance profile, giving the EC2 instance implicit access to any example profile S3 buckets.
aws ec2 associate-iam-instance-profile --iam-instance-profile Name={example profile} --region={us-east-2} --instance-id {instance example}
New in v22.2:
You can grant a user the EXTERNALIOIMPLICITACCESS system-level privilege to interact with external resources that require implicit access.
If the use of implicit credentials is disabled with the --external-io-disable-implicit-credentials flag, you will receive an error when you access external cloud storage services with AUTH=implicit.
Amazon S3 assume role
CockroachDB supports assume role authentication on clusters running v22.2+. Authenticating to cloud storage with ASSUME_ROLE on clusters running versions v22.1 and earlier, or mixed versions, is not supported and will result in failed bulk operations.
New in v22.2: To limit the control access to your Amazon S3 buckets, you can create IAM roles for users to assume. IAM roles do not have an association to a particular user. The role contains permissions that define the operations a user (or Principal) can complete. An IAM user can then assume a role to undertake a CockroachDB backup, restore, import, etc. As a result, the IAM user only has access to the assigned role, rather than having unlimited access to an S3 bucket.
New in v22.2.6:
You can use the external_id option with ASSUME_ROLE to specify an external ID for third-party access to your Amazon S3 bucket. The external ID is a unique ID that the third party provides you along with their ARN. For guidance on external_id usage in CockroachDB, refer to the following example.
Role assumption applies the principle of least privilege rather than directly providing privilege to a user. Creating IAM roles to manage access to AWS resources is Amazon's recommended approach compared to giving access directly to IAM users.
The following section demonstrates setting up assume role authentication between two users. To see examples of assume role authentication for more than two roles, see Role chaining for additional detail.
Set up Amazon S3 assume role
For example, to configure a user to assume an IAM role that allows a bulk operation to an Amazon S3 bucket, take the following steps:
Create a role that contains a policy to interact with the S3 buckets depending on the operation your user needs to complete. See the Storage permissions section for details on the minimum permissions each CockroachDB bulk operation requires. You can create an IAM role in Amazon's Management console, under the IAM and then Roles menu. Alternately, you can use the AWS CLI.
If you do not already have the user that needs to assume the role, create the user. Under IAM in the Amazon console, navigate to Users and Add users. You can then add the necessary permissions by clicking on the Permissions tab. Ensure that the IAM user has
sts:AssumeRolepermissions attached. The following policy will give the user assume role permissions:{ "Version": "2012-10-17", "Statement": { "Effect": "Allow", "Action": "sts:AssumeRole", "Resource": "arn:aws:iam::{account ID}:role/{role name}" } }The
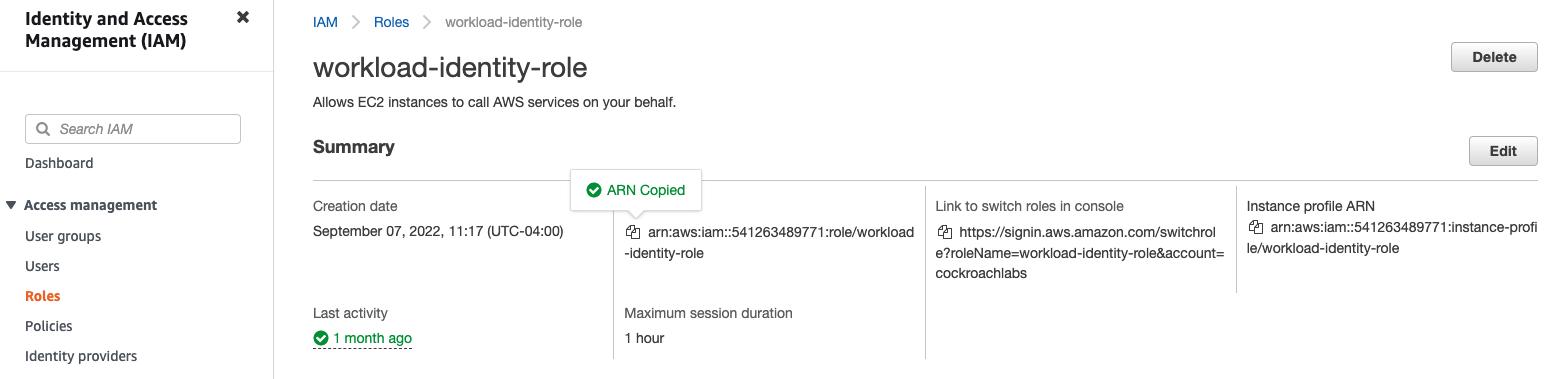
Resourcehere is the Amazon Resource Name (ARN) of the role you created in step 1. You can copy this from the role's Summary page.The
sts:AssumeRolepermission allows the user to obtain a temporary set of security credentials that gives them access to an S3 bucket to which they would not have access with their user-based permissions.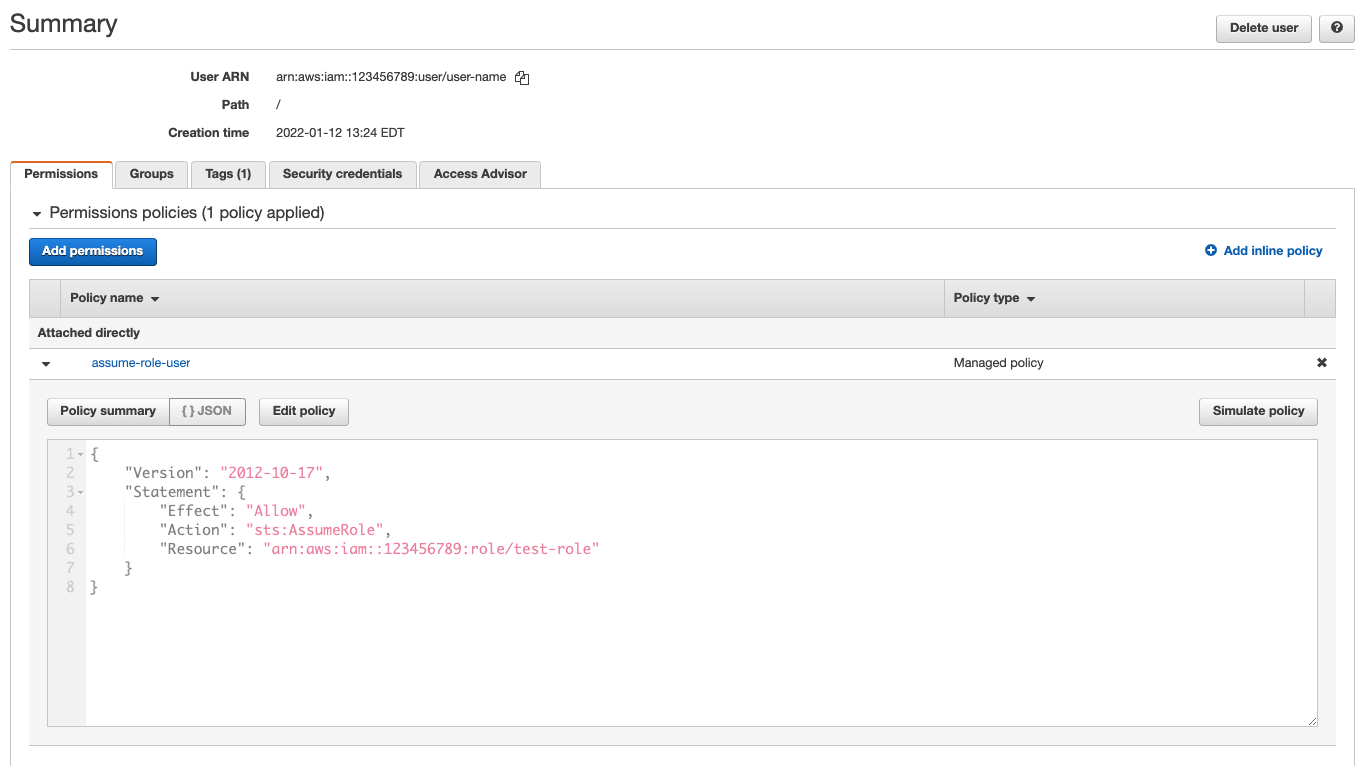
Return to your IAM role's Summary page, and click on the Trust Relationships tab. Add a trust policy into the role, which will define the users that can assume the role.
The following trust policy provides the user the privilege to assume the role:
{
    "Version": "2012-10-17",
    "Statement": [
        {
            "Effect": "Allow",
            "Principal": {
                "AWS": "arn:aws:iam::123456789123:user/{user}"
            },
            "Action": "sts:AssumeRole"
        }
    ]
}
When creating a trust policy consider the following:
In the trust policy you need to include the ARN of the user that you want to assume the role under
Principal. You can also include theConditionattribute to further control access to the Amazon S3 bucket. For example, this could limit the operation to a specified date range, to users with multi-factor authentication enabled, or to specific IP addresses.The
Conditionattribute allows you to specify an external ID that the user has provided with their ARN. For example:"Condition": {"StringEquals": {"sts:ExternalId": "Unique ID Assigned by the user"}}For more detail on creating and implementing external IDs in your AWS account, refer to Amazon's documentation How to use an external ID when granting access to your AWS resources to a third party.
If you set the
PrincipalARN toroot, this will allow any IAM user in the account with theAssumeRolepermission to access the Amazon S3 bucket as per the defined IAM role permissions.When the IAM user takes on the role to perform a bulk operation, they are temporarily granted the permissions contained in the role. That is, not the permissions specified in their user profile.
Run the bulk operation. If using specified authentication, pass in the S3 bucket's URL with the IAM user's
AWS_ACCESS_KEY_IDandAWS_SECRET_ACCESS_KEY. If using implicit authentication, specifyAUTH=IMPLICITinstead. For assuming the role, pass the assumed role's ARN, which you can copy from the IAM role's summary page:BACKUP DATABASE movr INTO 's3://{bucket name}?AWS_ACCESS_KEY_ID={user key}&AWS_SECRET_ACCESS_KEY={user secret key}&ASSUME_ROLE=arn:aws:iam::{account ID}:role/{role name}' AS OF SYSTEM TIME '-10s';If your user also has an external ID, you can pass that with
ASSUME_ROLE:BACKUP DATABASE movr INTO 's3://{bucket name}?AWS_ACCESS_KEY_ID={user key}&AWS_SECRET_ACCESS_KEY={user secret key}&ASSUME_ROLE=arn:aws:iam::{account ID}:role/{role name};external_id={Unique ID}' AS OF SYSTEM TIME '-10s';CockroachDB also supports authentication for assuming roles when taking encrypted backups. To use with an encrypted backup, pass the
ASSUME_ROLEparameter to the KMS URI as well as the bucket's:BACKUP INTO 's3://{bucket name}?AWS_ACCESS_KEY_ID={user key}&AWS_SECRET_ACCESS_KEY={user secret key}&ASSUME_ROLE={ARN}' WITH kms = 'aws:///{key}?AWS_ACCESS_KEY_ID={user key}&AWS_SECRET_ACCESS_KEY={user secret key}®ION={region}&ASSUME_ROLE={ARN}';For more information on AWS KMS URI formats, see Take and Restore Encrypted Backups.
Amazon S3 role chaining
Role chaining allows a user to assume a role through an intermediate role(s) instead of the user directly assuming a role. In this way, the role chain passes the request for access to the final role in the chain. Role chaining could be useful when a third-party organization needs access to your Amazon S3 bucket to complete a bulk operation. Or, your organization could grant roles based on limited-privilege levels.
You can configure role chaining across multiple roles in the same way you configure assume role authentication for one role, except across all roles that will participate in the chain. For example, to configure role A to assume role B, ensure that the ARN of role A is present in role B's trust policy with the sts:AssumeRole action.
The role B's trust policy must contain:
{
  "Version": "2012-10-17",
  "Statement": [
    {
      "Effect": "Allow",
      "Principal": {
        "AWS": "arn:aws:iam::{account-A-ID}:role/{role A name}"
      },
      "Action": "sts:AssumeRole"
    }
  ]
}
Then, to allow role B to assume a third role, role C, role C's trust policy needs to include role B in the same way. For example, to chain three roles so that a user could assume role C, it is necessary to verify the following:
| User → | Role A → | Role B → | Role C |
|---|---|---|---|
| Has permission to assume role A. See step 2. | Has a trust policy that permits the user to assume role A. See step 3. | Has a trust policy that permits role A to assume role B. | Has a trust policy that permits role B to assume role C. |
| Needs permission to assume role B. | Needs permission to assume role C. |
When passing a chained role into BACKUP, it will follow this pattern:
BACKUP DATABASE movr INTO "s3://{bucket name}?AWS_ACCESS_KEY_ID={user's key}&AWS_SECRET_ACCESS_KEY={user's secret key}&ASSUME_ROLE={role A ARN},{role B ARN},{role C ARN}" AS OF SYSTEM TIME '-10s';
Each chained role is listed separated by a , character. You can copy the ARN of the role from its summary page in the AWS Management console.
You can also specify a different external ID for each chained role. For example:
BACKUP DATABASE movr INTO "s3://{bucket name}?AWS_ACCESS_KEY_ID={user's key}&AWS_SECRET_ACCESS_KEY={user's secret key}&ASSUME_ROLE={role A ARN};external_id={ID A},{role B ARN};external_id={ID B},{role C ARN};external_id={ID C}" AS OF SYSTEM TIME '-10s';
Amazon S3 workload identity
With a CockroachDB cluster deployed on Kubernetes, you can allow your pods to authenticate as an IAM role that you have associated to a Kubernetes service account. You can then use assume role authentication to allow that IAM role to assume another role that has permissions to perform bulk operations to an S3 bucket.
This means that a CockroachDB node will only be able to access credentials for the IAM role associated with the Kubernetes service account.
You can use workload identities with assume role authentication to run the following operations:
To use assume role authentication, you will need at least two IAM roles:
- An identity role: the IAM role associated with your Kubernetes service account.
- An operation role: the IAM role to be assumed. This contains the permissions required to complete a CockroachDB operation.
For a walkthrough on how to set this up for CockroachDB self-hosted and CockroachDB Dedicated clusters, see the following steps.
Step 1. Set up the identity role
The first step to setting up workload identity authentication is different for CockroachDB self-hosted and CockroachDB Dedicated clusters. As you work through the step, ensure you use the relevant section for your cluster:
Set up the identity role for CockroachDB Dedicated clusters
Each CockroachDB Dedicated cluster has a pre-configured IAM role for Amazon EKS service accounts that acts as the cluster's identity. In addition, the clusters have a unique built-in, functionality IAM role, which you can configure as a trusted identity within the Trust Policy of your cloud IAM roles. This allows you to have the built-in IAM role assume another role (or roles as part of a chain). This section will refer to the built-in IAM role as the "identity role".
The prefixes for the built-in IAM identity roles are as follows:
| IAM role name | Operation |
|---|---|
crl-dr-store-user |
Backup, Restore, Import, Export |
crl-cdc-sink-user |
Changefeeds |
crl-kms-user |
Encrypted backups and restores |
Construct the ARN for your identity role. You will need this to add into the Trust Policy of an operation role or intermediary role. The IAM role's ARN follows this pattern (in this example the crl-dr-store-user role name is used for a backup):
arn:aws:iam::{AWS account ID}:role/crl-dr-store-user-{cluster ID suffix}
You can find the AWS account ID and your cluster's ID using the Cloud API:
curl --request GET --url https://cockroachlabs.cloud/api/v1/clusters --header "Authorization: Bearer {secret key}"
Combine the last 12 digits of your cluster's id and the full 12-digit account_id in the following fashion to form the ARN:
arn:aws:iam::{123456789123}:role/crl-dr-store-user-{123456789123}
See Step 2. Trust the identity role to add this ARN to an operation role's Trust Policy.
Set up the identity role for CockroachDB Self-hosted clusters
First, create an IAM role for your Kubernetes service account to assume, and then configure your CockroachDB pods to use the service account. We will refer to this IAM role as an "identity role". You can complete all of these steps with Amazon's guide on IAM roles for service accounts.
Once you have an identity role that your CockroachDB nodes can assume, you can configure the identity role to assume another IAM role that contains the permissions to perform a bulk operation.
Copy the ARN of the identity role. In the Amazon management console, click on IAM, then Roles, and select the name of your identity role. From the Summary page, copy your ARN. You will need this when configuring the Trust Policy for the IAM role to be assumed.
See Step 2. Trust the identity role to add this ARN to an operation role's Trust Policy.
Step 2. Trust the identity role
Create or open the operation role that your identity role will assume.
If you already have the role that contains permissions for the operation, ensure that you add the identity role ARN to the role's Trust Relationships tab on the Summary page.
To create an operation role, click Create Role under the Roles menu. Select Custom trust policy and then add the ARN of your identity role (from Step 1) to the JSON by clicking
Principal. This will open a dialog box. Select IAM Roles for Principal Type and paste the ARN. Click Add Principal and then Next.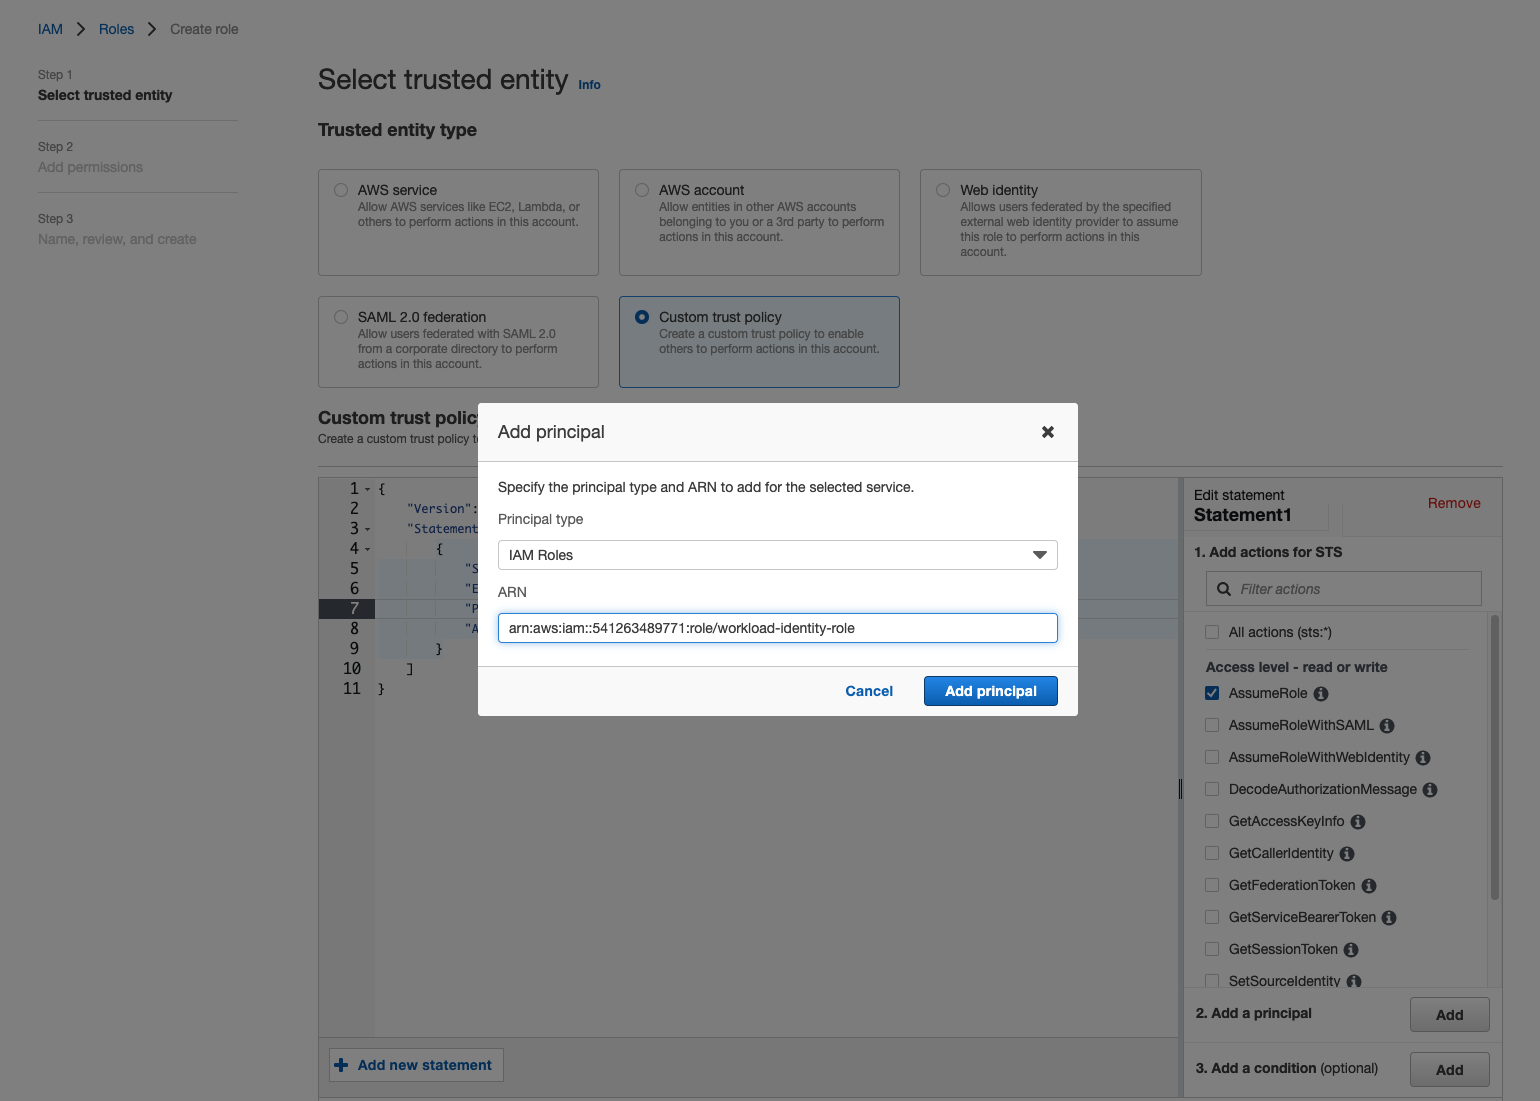
On the Add Permissions page, search for the permission policies that the role will need to complete the bulk operation.
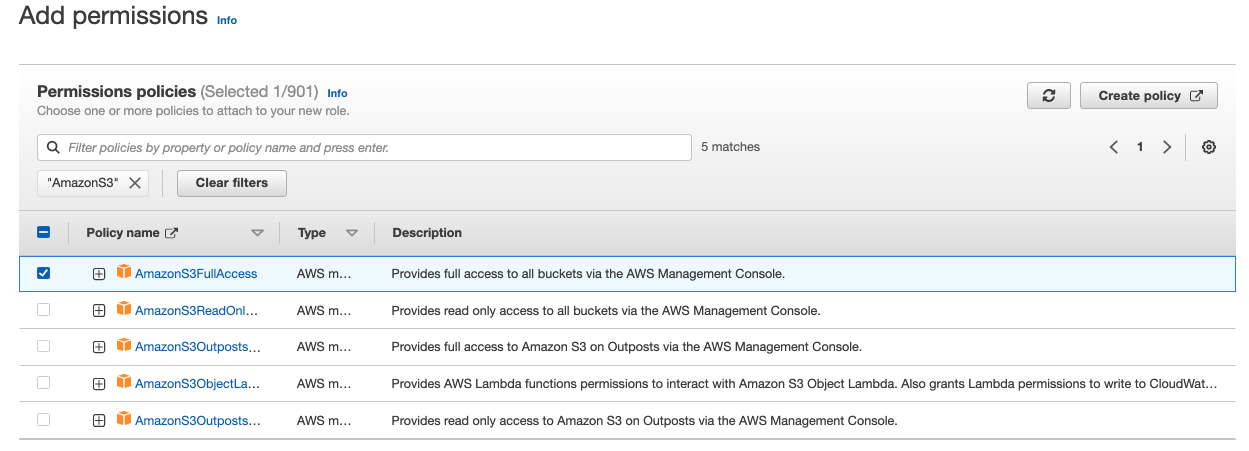
Or, use the Create Policy button to define the required permissions. You can use the visual editor to select the service, actions, and resources.
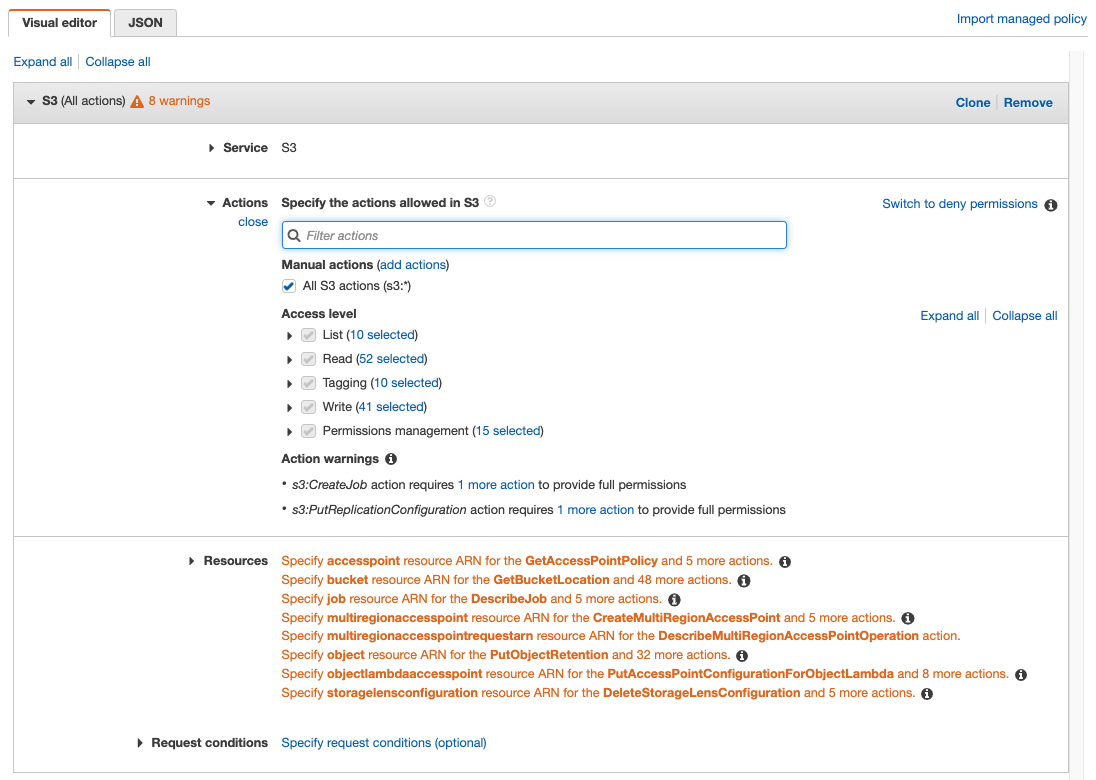
Or, use the JSON tab to specify the policy. For the JSON editor, see Storage Permissions for an example and detail on the minimum permissions required for each operation to complete. Click Next.
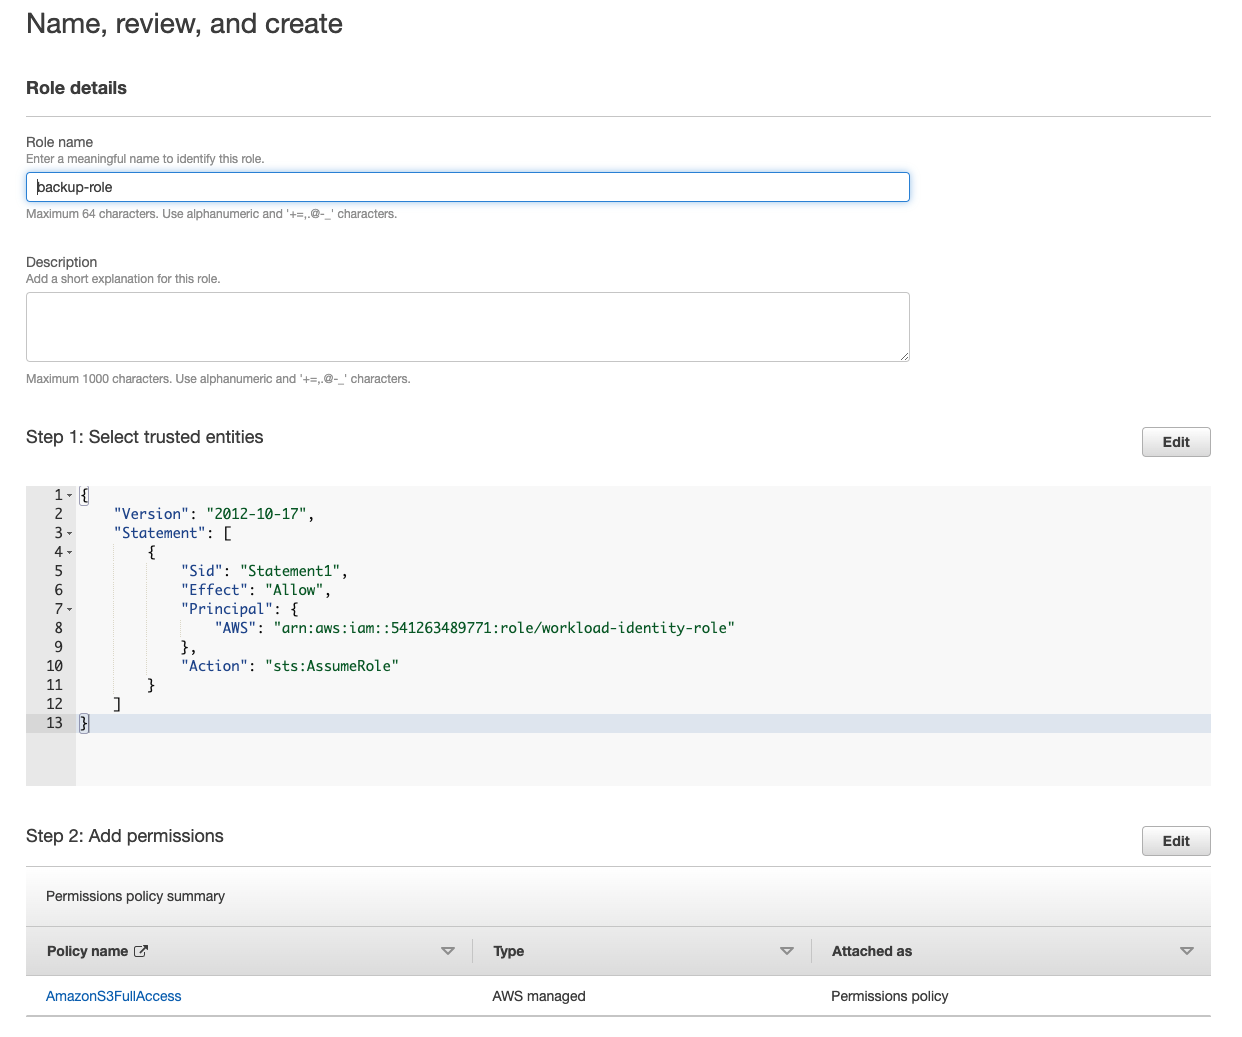
Finally, give the role a name on the Name, review, and create page. The following screenshot shows the selected trust policy and permissions:
Step 3. Run the operation by assuming the role
Finally, you'll use the ASSUME_ROLE parameter in your SQL statement to assume a role that contains the necessary permissions. In this step, ensure you read the section for your cluster type:
Run the operation from a CockroachDB Dedicated cluster
To run an operation, use implicit authentication so that your AWS cluster can authenticate directly. To the ASSUME_ROLE parameter, pass the pre-configured identity role from Step 1 followed by a comma, and finally the operation role(s) you need the identity to assume.
For a backup to Amazon S3:
BACKUP DATABASE {database} INTO 's3://{bucket name}/{path}?AUTH=implicit&ASSUME_ROLE=arn:aws:iam::{AWS account ID}:role/crl-dr-store-user-{cluster ID suffix},arn:aws:iam::{account ID}:role/{operation role name}' AS OF SYSTEM TIME '-10s';
In this SQL statement, the identity role assumes the operation role that has permission to write a backup to the S3 bucket.
Run the operation from a CockroachDB Self-hosted cluster
To run an operation, you can use implicit authentication for your identity role and pass the ASSUME_ROLE parameter for your operation role.
For a backup to Amazon S3:
BACKUP DATABASE {database} INTO 's3://{bucket name}/{path}?AUTH=implicit&ASSUME_ROLE=arn:aws:iam::{account ID}:role/{operation role name}' AS OF SYSTEM TIME '-10s';
In this SQL statement, AUTH=implicit uses the identity role to authenticate to the S3 bucket. The identity role then assumes the operation role that has permission to write a backup to the S3 bucket.
You can use the following authentication options for Google Cloud Storage buckets:
- Specified: You specify the Google Cloud credentials key in the URI when connecting.
- Implicit: You store the needed Google Cloud credentials as environment variables, and may omit them when connecting.
To have users assume IAM roles to complete operations on a Google Cloud Storage bucket, you can also configure assume role authentication in addition to specified or implicit. If your CockroachDB cluster is deployed on Kubernetes, you can use workload identities with assume role authentication.
Google Cloud Storage specified
To access the storage bucket with specified credentials, it's necessary to create a service account and add the service account address to the permissions on the specific storage bucket.
The JSON credentials file for authentication can be downloaded from the Service Accounts page in the Google Cloud Console and then base64-encoded:
cat gcs_key.json | base64
Include AUTH=specified and pass the encoded JSON object to the CREDENTIALS parameter:
BACKUP DATABASE <database> INTO 'gs://{bucket name}/{path}?AUTH=specified&CREDENTIALS={encoded key}';
Google Cloud Storage implicit
To use implicit authentication on a CockroachDB Cloud cluster, it is necessary to authenticate using assume role authentication. See Google Cloud Storage assume role for more details.
For CockroachDB instances that are running within a Google Cloud Environment, environment data can be used from the service account to implicitly access resources within the storage bucket.
New in v22.2:
You can grant a user the EXTERNALIOIMPLICITACCESS system-level privilege to interact with external resources that require implicit access.
For CockroachDB clusters running in other environments, implicit authentication access can still be set up manually with the following steps:
Create a service account and add the service account address to the permissions on the specific storage bucket.
Download the JSON credentials file from the Service Accounts page in the Google Cloud Console to the machines that CockroachDB is running on. (Since this file will be passed as an environment variable, it does not need to be base64-encoded.) Ensure that the file is located in a path that CockroachDB can access.
Create an environment variable instructing CockroachDB where the credentials file is located. The environment variable must be exported on each CockroachDB node:
export GOOGLE_APPLICATION_CREDENTIALS="/{cockroach}/gcs_key.json"Alternatively, to pass the credentials using
systemd, usesystemctl edit cockroach.serviceto add the environment variableEnvironment="GOOGLE_APPLICATION_CREDENTIALS=gcs-key.json"under[Service]in thecockroach.serviceunit file. Then, runsystemctl daemon-reloadto reload thecockroach.serviceunit file with the updated configuration. Restart thecockroachprocess on each of the cluster's nodes withsystemctl restart cockroach, which will reload the configuration files.To pass the credentials using code, see Google's Authentication documentation.
Run a backup (or other bulk operation) to the storage bucket with the
AUTHparameter set toimplicit:BACKUP DATABASE <database> INTO 'gs://{bucket name}/{path}?AUTH=implicit';
If the use of implicit credentials is disabled with the --external-io-disable-implicit-credentials flag, you will receive an error when you access external cloud storage services with AUTH=implicit.
Google Cloud Storage assume role
CockroachDB supports assume role authentication on clusters running v22.2. Authenticating to cloud storage with ASSUME_ROLE on clusters running versions v22.1 and earlier, or mixed versions, is not supported and will result in failed bulk operations.
New in v22.2: To limit the control access to your Google Cloud Storage buckets, you can create service accounts for another service account to assume. Service accounts do not necessarily have an association to a particular user. The service account contains permissions that define the operations a user, who has access to the service account, can complete. A service account can then assume another service account to undertake a CockroachDB backup, restore, import, etc. As a result, a service account with limited privileges only has access to the roles of the assumed service account, rather than having unlimited access to a GCS bucket.
The access is also limited by the generated short-lived credentials. The service account/role that is assuming another role will issue the request for the short-lived credentials. If there are multiple roles in the chain, then each role defined in the chain will issue the request for credentials for the next role in the chain.
The following section demonstrates setting up assume role authentication between two service accounts A and B. You can also chain an arbitrary number of roles, see the Role chaining section for additional detail.
Set up Google Cloud Storage assume role
In the following example, we will configure service account A to assume service account B. In this way, service account A will be able to assume the role of service account B to complete a bulk operation to a GCS bucket.
For this example, both service accounts have already been created. If you need to create your own service accounts, see Google Cloud's Creating and managing service accounts page.
First, you'll create a role that contains a policy to interact with the Google Cloud Storage bucket depending on the bulk operation your user needs to complete. This role will be attached to service account B in order that service account A can assume it.
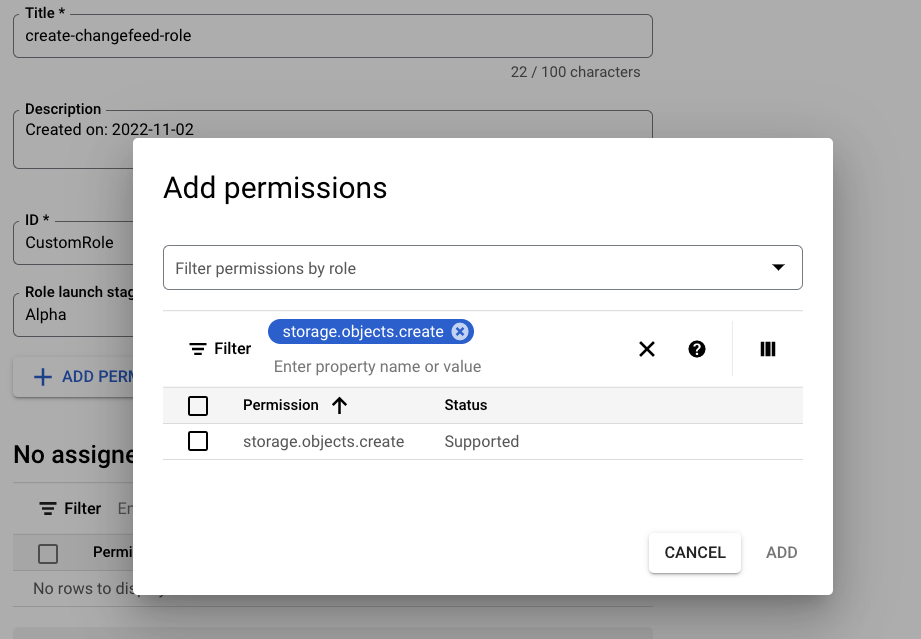
- In Google's Cloud console, click IAM & Admin, Roles, and then Create Role.
- Add a title for the role and then click Add Permissions. Filter for the permissions required for the bulk operation. For example, if you want to enable service account B to run a changefeed, your role will include the
storage.objects.createpermission. See the Storage permissions section on this page for details on the minimum permissions each CockroachDB bulk operation requires.
 Tip:
Tip:Alternately, you can use the gcloud CLI to create roles.
The service account that will be assumed (B in this case) must be granted access to the storage bucket with the role assigned from step 1.
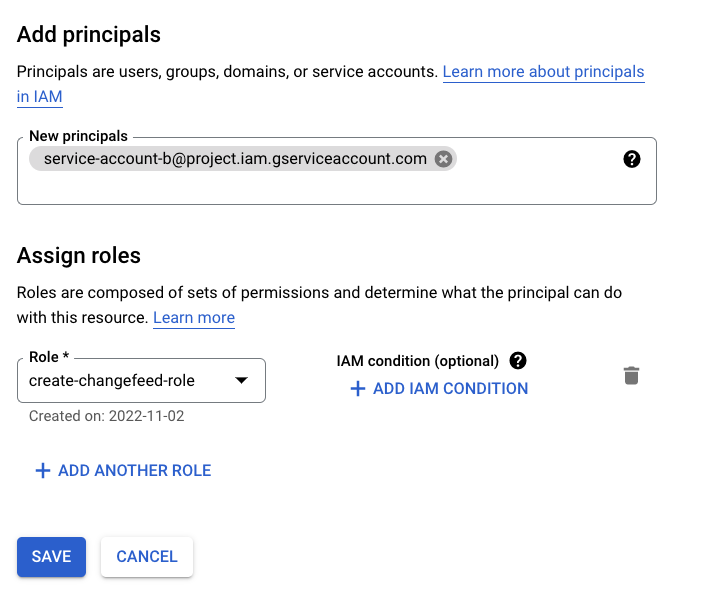
- Go to the Cloud Storage menu and select the bucket. In the bucket's menu, click Grant Access.
- Add the service account to the Add principals box and select the name of the role you created in step 1 under Assign roles.
Next, service account B needs the "Service Account Token Creator" role for service account A. This enables service account B to create short-lived tokens for A.
- Go to the Service Accounts menu in the Google Cloud Console.
- Select service account B from the list, then the Permissions tab, and click Grant Access under Principals with access to this service account.
- Enter the name of service account A into the New principals box and select "Service Account Token Creator" under the Assign roles dropdown. Click Save to complete.

Finally, you will run the bulk operation from your CockroachDB cluster. If you're using specified authentication, pass in the GCS bucket's URL with the IAM user's
CREDENTIALS. If you're using implicit authentication, specifyAUTH=IMPLICITinstead. For assuming the role, pass the assumed role's service account name, which you can copy from the Service Accounts page:BACKUP DATABASE <database> INTO 'gs://{bucket name}/{path}?AUTH=implicit&ASSUME_ROLE={service account name}@{project name}.iam.gserviceaccount.com';CockroachDB also supports authentication for assuming roles when taking encrypted backups. To use with an encrypted backup, pass the
ASSUME_ROLEparameter to the KMS URI as well as the bucket's:BACKUP DATABASE <database> INTO 'gs://{bucket name}/{path}?AUTH=implicit&ASSUME_ROLE={service account name}@{project name}.iam.gserviceaccount.com' WITH kms = 'gs:///projects/{project name}/locations/us-east1/keyRings/{key ring name}/cryptoKeys/{key name}?AUTH=IMPLICIT&ASSUME_ROLE={service account name}@{project name}.iam.gserviceaccount.com';For more information on Google Cloud Storage KMS URI formats, see Take and Restore Encrypted Backups.
Note:CockroachDB supports assume role authentication for changefeeds emitting to Google Cloud Pub/Sub sinks. The process to set up assume role for Pub/Sub works in a similar way, except that you will provide the final service account with the "Pub/Sub Editor" role at the project level. See the Changefeed Sinks page for more detail on the Pub/Sub sink.
Google Cloud Storage role chaining
Role chaining allows a service account to assume a role through an intermediate service account(s) instead of the service account directly assuming a role. In this way, the role chain passes the request for access to the final role in the chain. Role chaining could be useful when a third-party organization needs access to your Google Cloud Storage bucket to complete a bulk operation. Or, your organization could grant roles based on limited-privilege levels.
Following from the previous setup section, if you want to add an intermediate account to the chain of roles, it is necessary to ensure each service account has granted the "Service Account Token Creator" role to the previous account in the chain. See step 3 in the previous section to add this role on a service account.
In a chain of three roles, A, B, C:
| Service Account A | ← Service Account B (intermediate accounts) | ← Service Account C (final account) |
|---|---|---|
Credentials included in AUTH=implicit or specified |
Grants access to A with the Service Account Token Creator role | Grants access to B with the Service Account Token Creator role Access to the resource e.g., storage bucket |
- The initial account (A) requests permissions from account B.
- The intermediate account (B) will delegate the request to account C.
- The final service account (C) will request the credentials that account A requires.
When passing a chained role into BACKUP, it will follow this pattern with each chained role separated by a , character:
BACKUP DATABASE <database> INTO 'gs://{bucket name}/{path}?AUTH=implicit&ASSUME_ROLE={intermediate service account name}@{project name}.iam.gserviceaccount.com,{final service account name}@{project name}.iam.gserviceaccount.com'; AS OF SYSTEM TIME '-10s';
Google Cloud Storage workload identity
With a CockroachDB cluster deployed on Kubernetes, you can allow your pods to authenticate as an IAM service account that you have associated to a Kubernetes service account. You can then use assume role authentication to allow the IAM service account to assume another service account that has permissions to perform bulk operations to a Google Cloud Storage bucket.
This means that a CockroachDB node will only be able to access credentials for the IAM service account associated with the Kubernetes service account.
You can use workload identities with assume role authentication to run the following operations:
Service accounts in Google and Kubernetes refer to different resources. See Google's documentation for definitions.
To use assume role authentication, you will need at least two IAM roles:
- An identity service account: the IAM service account associated with your Kubernetes service account.
- An operation service account: the IAM service account to be assumed. This contains the permissions required to complete a CockroachDB operation.
For a walkthrough on how to set this up for CockroachDB self-hosted and CockroachDB Dedicated clusters, see the following steps.
Step 1. Set up the Google Cloud workload identity
The first step to setting up workload identity authentication is different for CockroachDB self-hosted and CockroachDB Dedicated clusters. As you work through the step, ensure you use the relevant section for your cluster:
Set up the identity service account for Dedicated clusters
Each CockroachDB Dedicated cluster has a pre-configured IAM role for Google Kubernetes Engine service accounts that acts as the cluster's identity. In addition, the clusters have a unique, built-in functionality IAM role, which you can configure as a trusted identity by giving it access to an operation service account. This allows you to have the built-in IAM role assume another role (or roles as part of a chain). This section will refer to the built-in IAM role as the "identity service account".
The prefixes for the built-in IAM identity roles are as follows, which become part of your Google identity service account name:
| IAM role name | Operation |
|---|---|
crl-dr-store-user |
Backup, Restore, Import, Export |
crl-cdc-sink-user |
Changefeeds |
crl-kms-user |
Encrypted backups and restores |
Construct the service account name for your identity service account. You will need this to add to the operation role or intermediary role. The identity service account name follows this pattern (in this example the crl-dr-store-user role name is used for a backup):
crl-dr-store-user-{cluster id suffix}@{project id}.iam.gserviceaccount.com
You can find the GCP project ID and your cluster's ID using the Cloud API:
curl --request GET --url https://cockroachlabs.cloud/api/v1/clusters --header "Authorization: Bearer {secret key}"
Use the last 12 digits of your cluster's id and the account_id to form the service account. (Note that the account_id in your cluster's details becomes the GCP {project id}.)
This will look similar to:
crl-dr-store-user-d1234567891d@crl-prod-6tc.iam.gserviceaccount.com
See Step 2 to create an operation service account that your identity role can assume.
If you already have the service account that contains permissions for the operation, ensure that you give the identity service account access to this service account. Click on your service account and navigate to the Permissions tab. Then, use the process in step 3 to complete this.
Set up the identity service account for Self-hosted clusters
Before completing the steps to run a bulk operation with assume role, it is necessary to create an identity service account for your Kubernetes service account to assume. Then, you must configure your CockroachDB pods to use the Kubernetes service account. You can complete all of these steps with Google's guide Use Workload Identity.
Once you have an identity service account that your CockroachDB nodes can assume, you can configure the identity role to assume another service account role that contains the permissions to perform the bulk operation.
Before moving on to the next step, copy the service account name of the identity service account. In the Google Cloud Console, navigate to the IAM section, Service Accounts, and then the name of your identity service account. From the list view, copy the name of your identity service account. You will need to add this to the operation service account to be assumed.
See Step 2 to create an operation service account that your identity role can assume.
If you already have the service account that contains permissions for the operation, ensure that you give the identity service account access to this service account. Click on your service account and navigate to the Permissions tab. Then, use the process in step 3 to complete this.
Step 2. Create the operation service account
Create the operation service account that your identity service account will assume.
a. To create a service account, click Create Service Account under the Service Accounts menu. Enter a name for the service account and click Create and Continue.
b. In the Grant this service account access to project section, select the role you require for the bulk operation, e.g., "Storage Object Creator". See Storage Permissions for detail on the minimum permissions required for each operation to complete. Click Continue.
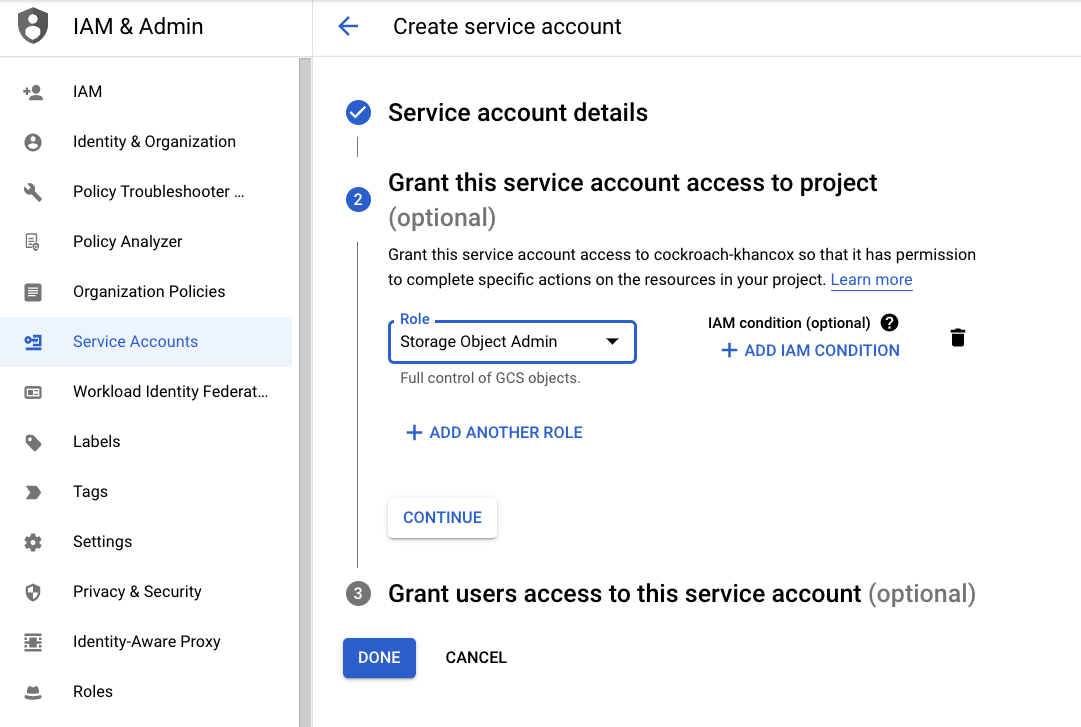
c. In the Grant users access to this service account section, paste the name of the identity service account. Then, click Done.

Step 3. Give the identity service account the token creator role
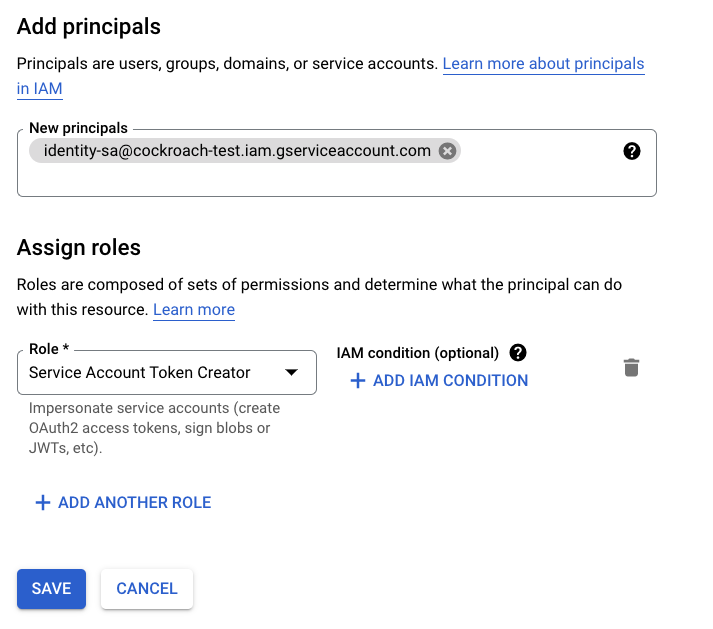
Next, the operation service account needs to contain the "Service Account Token Creator" role for the identity service account. This enables the operation service account to create short-lived tokens for the identity service account.
- Go to the Service Accounts menu in the Google Cloud Console.
- Select the operation service account from the list, then the Permissions tab, and click Grant Access under Principals with access to this service account.
Enter the name of the identity service account into the New principals box and select "Service Account Token Creator" under the Assign roles dropdown. Click Save to complete.
Step 4. Run the operation by assuming the service account
Finally, you'll use the ASSUME_ROLE parameter in your SQL statement to assume a role that contains the necessary permissions. In this step, ensure you read the section for your cluster type:
Run the operation from a CockroachDB Dedicated cluster on GCP
To run an operation, use implicit authentication so that your GCP cluster can authenticate directly. To the ASSUME_ROLE parameter, pass the pre-configured identity role from Step 1 followed by a comma, and finally the operation role(s) you need the identity to assume.
For a backup to Google Cloud Storage:
BACKUP DATABASE defaultdb INTO "gs://{bucket name}?AUTH=implicit&ASSUME_ROLE=crl-dr-store-user-{cluster ID suffix}@{project ID}.iam.gserviceaccount.com,{operation service account name}@{project name}.iam.gserviceaccount.com" AS OF SYSTEM TIME '-10s';
In this SQL statement, the identity service account assumes the operation service account that has permission to write a backup to the GCS bucket.
Run the operation from a CockroachDB Self-hosted cluster on GCP
To run the bulk operation, you can use implicit authentication for your identity service account and pass the ASSUME_ROLE parameter for your operation service account.
For a backup to your Google Cloud Storage bucket:
BACKUP DATABASE {database} INTO 'gs://{bucket name}/{path}?AUTH=implicit&ASSUME_ROLE={operation service account}@{project name}.iam.gserviceaccount.com'; AS OF SYSTEM TIME '-10s';
In this SQL statement, AUTH=implicit uses the workload identity service account to authenticate to the bucket. The workload identity role then assumes the operation service account that has permission to write a backup to the bucket.
Azure Storage authentication
To access Azure storage containers, use the following parameters:
AZURE_ACCOUNT_NAMEAZURE_ACCOUNT_KEY- (optional)
AZURE_ENVIRONMENT
It is necessary to url encode the account key since it is base64-encoded and may contain +, /, = characters.
For example:
BACKUP DATABASE <database> INTO 'azure://{container name}/{path}?AZURE_ACCOUNT_NAME={account name}&AZURE_ACCOUNT_KEY={url-encoded key}&AZURE_ENVIRONMENT=AZUREUSGOVERNMENTCLOUD';
HTTP authentication
If your environment requires an HTTP or HTTPS proxy server for outgoing connections, you can set the standard HTTP_PROXY and HTTPS_PROXY environment variables when starting CockroachDB. You can create your own HTTP server with NGINX. A custom root CA can be appended to the system's default CAs by setting the cloudstorage.http.custom_ca cluster setting, which will be used when verifying certificates from HTTPS URLs.
If you cannot run a full proxy, you can disable external HTTP(S) access (as well as custom HTTP(S) endpoints) when importing by using the --external-io-disable-http flag.
S3-compatible services authentication
While Cockroach Labs actively tests Amazon S3, Google Cloud Storage, and Azure Storage, we do not test S3-compatible services (e.g., MinIO, Red Hat Ceph).
A custom root CA can be appended to the system's default CAs by setting the cloudstorage.http.custom_ca cluster setting, which will be used when verifying certificates from an S3-compatible service.
