
Other tutorials in this section feature the ways that CockroachDB automates operations for you. On top of this built-in automation, you can use a third-party orchestration system to simplify and automate even more of your operations, from deployment to scaling to overall cluster management.
This page walks you through a simple demonstration, using the open-source Kubernetes orchestration system. Starting with a few configuration files, you'll quickly create an insecure 3-node local cluster. You'll run a load generator against the cluster and then simulate node failure, watching how Kubernetes auto-restarts without the need for any manual intervention. You'll then scale the cluster with a single command before shutting the cluster down, again with a single command.
Before You Begin
Before getting started, it's helpful to review some Kubernetes-specific terminology:
| Feature | Description |
|---|---|
| minikube | This is the tool you'll use to run a Kubernetes cluster inside a VM on your local workstation. |
| pod | A pod is a group of one of more Docker containers. In this tutorial, all pods will run on your local workstation, each containing one Docker container running a single CockroachDB node. You'll start with 3 pods and grow to 4. |
| StatefulSet | A StatefulSet is a group of pods treated as stateful units, where each pod has distinguishable network identity and always binds back to the same persistent storage on restart. StatefulSets are considered stable as of Kubernetes version 1.9 after reaching beta in version 1.5. |
| persistent volume | A persistent volume is a piece of local storage mounted into a pod. The lifetime of a persistent volume is decoupled from the lifetime of the pod that's using it, ensuring that each CockroachDB node binds back to the same storage on restart. When using minikube, persistent volumes are external temporary directories that endure until they are manually deleted or until the entire Kubernetes cluster is deleted. |
| persistent volume claim | When pods are created (one per CockroachDB node), each pod will request a persistent volume claim to “claim” durable storage for its node. |
Step 1. Start Kubernetes
Follow Kubernetes' documentation to install
minikube, the tool used to run Kubernetes locally, for your OS. This includes installing a hypervisor andkubectl, the command-line tool used to managed Kubernetes from your local workstation.Note:Make sure you installminikubeversion 0.21.0 or later. Earlier versions do not include a Kubernetes server that supports themaxUnavailabilityfield andPodDisruptionBudgetresource type used in the CockroachDB StatefulSet configuration.Start a local Kubernetes cluster:
$ minikube start
Step 2. Start CockroachDB nodes
When starting a cluster manually, you run the cockroach start command multiple times, once per node. In this step, you use a Kubernetes StatefulSet configuration instead, reducing the effort of starting 3 nodes to a single command.
From your local workstation, use our
cockroachdb-statefulset.yamlfile to create the StatefulSet that automatically creates 3 pods, each with a CockroachDB node running inside it:$ kubectl create -f https://raw.githubusercontent.com/cockroachdb/cockroach/master/cloud/kubernetes/cockroachdb-statefulset.yamlservice "cockroachdb-public" created service "cockroachdb" created poddisruptionbudget "cockroachdb-budget" created statefulset "cockroachdb" createdAlternatively, if you'd rather start with a configuration file that has been customized for performance:
Download our performance version of
cockroachdb-statefulset-insecure.yaml:$ curl -O https://raw.githubusercontent.com/cockroachdb/cockroach/master/cloud/kubernetes/performance/cockroachdb-statefulset-insecure.yamlModify the file wherever there is a
TODOcomment.Use the file to create the StatefulSet and start the cluster:
$ kubectl create -f cockroachdb-statefulset-insecure.yaml
Confirm that three pods are
Runningsuccessfully. Note that they will not be consideredReadyuntil after the cluster has been initialized:$ kubectl get podsNAME READY STATUS RESTARTS AGE cockroachdb-0 0/1 Running 0 2m cockroachdb-1 0/1 Running 0 2m cockroachdb-2 0/1 Running 0 2mConfirm that the persistent volumes and corresponding claims were created successfully for all three pods:
$ kubectl get persistentvolumesNAME CAPACITY ACCESSMODES RECLAIMPOLICY STATUS CLAIM REASON AGE pvc-52f51ecf-8bd5-11e6-a4f4-42010a800002 1Gi RWO Delete Bound default/datadir-cockroachdb-0 26s pvc-52fd3a39-8bd5-11e6-a4f4-42010a800002 1Gi RWO Delete Bound default/datadir-cockroachdb-1 27s pvc-5315efda-8bd5-11e6-a4f4-42010a800002 1Gi RWO Delete Bound default/datadir-cockroachdb-2 27s
Step 3. Initialize the cluster
Use our
cluster-init.yamlfile to perform a one-time initialization that joins the nodes into a single cluster:$ kubectl create -f https://raw.githubusercontent.com/cockroachdb/cockroach/master/cloud/kubernetes/cluster-init.yamljob "cluster-init" createdConfirm that cluster initialization has completed successfully. The job should be considered successful and the CockroachDB pods should soon be considered
Ready:$ kubectl get job cluster-initNAME DESIRED SUCCESSFUL AGE cluster-init 1 1 2m$ kubectl get podsNAME READY STATUS RESTARTS AGE cockroachdb-0 1/1 Running 0 3m cockroachdb-1 1/1 Running 0 3m cockroachdb-2 1/1 Running 0 3m
The StatefulSet configuration sets all CockroachDB nodes to log to stderr, so if you ever need access to a pod/node's logs to troubleshoot, use kubectl logs <podname> rather than checking the log on the persistent volume.
Step 4. Test the cluster
To test the cluster, launch a temporary pod for using the built-in SQL client, and then use a deployment configuration file to run a high-traffic load generator against the cluster from another pod.
Launch a temporary interactive pod and start the built-in SQL client inside it:
$ kubectl run cockroachdb -it --image=cockroachdb/cockroach --rm --restart=Never \
-- sql --insecure --host=cockroachdb-public
Run some basic CockroachDB SQL statements:
> CREATE DATABASE bank;> CREATE TABLE bank.accounts (id INT PRIMARY KEY, balance DECIMAL);> INSERT INTO bank.accounts VALUES (1, 1000.50);> SELECT * FROM bank.accounts;+----+---------+ | id | balance | +----+---------+ | 1 | 1000.5 | +----+---------+ (1 row)Exit the SQL shell and delete the temporary pod:
> \qUse our
example-app.yamlfile to launch a pod and run a load generator against the cluster from the pod:$ kubectl create -f https://raw.githubusercontent.com/cockroachdb/cockroach/master/cloud/kubernetes/example-app.yamldeployment "example" createdVerify that the pod for the load generator was added successfully:
$ kubectl get podsNAME READY STATUS RESTARTS AGE cockroachdb-0 1/1 Running 0 28m cockroachdb-1 1/1 Running 0 27m cockroachdb-2 1/1 Running 0 10m example-545f866f5-2gsrs 1/1 Running 0 25m
Step 5. Monitor the cluster
To access the Admin UI and monitor the cluster's state and the load generator's activity:
Port-forward from your local machine to one of the pods:
$ kubectl port-forward cockroachdb-0 8080Forwarding from 127.0.0.1:8080 -> 8080Go to http://localhost:8080 and click Metrics on the left-hand navigation bar.
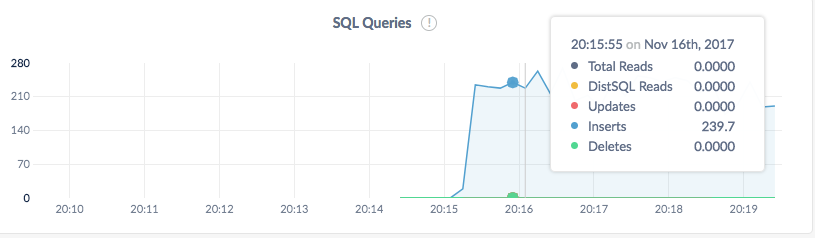
On the Overview dashboard, note that there are 3 healthy nodes with many SQL inserts executing per second across them.
Click the Databases tab on the left to verify that the
bankdatabase you created manually, as well as thekvdatabase created by the load generated, are listed.
Step 6. Simulate node failure
Based on the replicas: 3 line in the StatefulSet configuration, Kubernetes ensures that three pods/nodes are running at all times. When a pod/node fails, Kubernetes automatically creates another pod/node with the same network identity and persistent storage.
To see this in action:
Terminate one of the CockroachDB nodes:
$ kubectl delete pod cockroachdb-2pod "cockroachdb-2" deletedIn the Admin UI, the Summary panel will soon show one node as Suspect. As Kubernetes auto-restarts the node, watch how the node once again becomes healthy.
Back in the terminal, verify that the pod was automatically restarted:
$ kubectl get pod cockroachdb-2NAME READY STATUS RESTARTS AGE cockroachdb-2 1/1 Running 0 12s
Step 7. Scale the cluster
Use the
kubectl scalecommand to add a pod for another CockroachDB node:$ kubectl scale statefulset cockroachdb --replicas=4statefulset "cockroachdb" scaledVerify that the pod for a fourth node,
cockroachdb-3, was added successfully:$ kubectl get podsNAME READY STATUS RESTARTS AGE cockroachdb-0 1/1 Running 0 28m cockroachdb-1 1/1 Running 0 27m cockroachdb-2 1/1 Running 0 10m cockroachdb-3 1/1 Running 0 5s example-545f866f5-2gsrs 1/1 Running 0 25m
Step 8. Stop the cluster
If you plan to restart the cluster, use the
minikube stopcommand. This shuts down the minikube virtual machine but preserves all the resources you created:$ minikube stopStopping local Kubernetes cluster... Machine stopped.You can restore the cluster to its previous state with
minikube start.If you do not plan to restart the cluster, use the
minikube deletecommand. This shuts down and deletes the minikube virtual machine and all the resources you created, including persistent volumes:$ minikube deleteDeleting local Kubernetes cluster... Machine deleted.Tip:To retain logs, copy them from each pod'sstderrbefore deleting the cluster and all its resources. To access a pod's standard error stream, runkubectl logs <podname>.
See Also
Use a local cluster to explore these other core CockroachDB features:
- Data Replication
- Fault Tolerance & Recovery
- Automatic Rebalancing
- Cross-Cloud Migration
- Follow-the-Workload
- JSON Support
You might also want to learn how to orchestrate a production deployment of CockroachDB with Kubernetes.
