
This page walks you through a simple demonstration of how CockroachDB automatically rebalances data as you scale. Starting with a 3-node local cluster, you'll lower the maximum size for a single range, the unit of data that is replicated in CockroachDB. You'll then download and run the block_writer example program, which continuously inserts data into your cluster, and watch the replica count quickly increase as ranges split. You'll then add 2 more nodes and watch how CockroachDB automatically rebalances replicas to efficiently use all available capacity.
Before You Begin
In this tutorial, you'll use an example Go program to quickly insert data into a CockroachDB cluster. To run the example program, you must have a Go environment with a 64-bit version of Go 1.7.1.
- You can download the Go binary directly from the official site.
- Be sure to set the
$GOPATHand$PATHenvironment variables as described here.
Step 1. Start a 3-node cluster
# In a new terminal, start node 1:
$ cockroach start --insecure \
--store=scale-node1 \
--host=localhost

# In a new terminal, start node 2:
$ cockroach start --insecure \
--store=scale-node2 \
--host=localhost \
--port=26258 \
--http-port=8081 \
--join=localhost:26257

# In a new terminal, start node 3:
$ cockroach start --insecure \
--store=scale-node3 \
--host=localhost \
--port=26259 \
--http-port=8082 \
--join=localhost:26257
In a new terminal, connect the built-in SQL shell to any node to verify that the cluster is live:
$ cockroach sql --insecure
# Welcome to the cockroach SQL interface.
# All statements must be terminated by a semicolon.
# To exit: CTRL + D.
> SHOW DATABASES;
+--------------------+
|      Database      |
+--------------------+
| crdb_internal      |
| information_schema |
| pg_catalog         |
| system             |
+--------------------+
(4 rows)
Exit the SQL shell:
> \q
Step 2. Lower the max range size
In CockroachDB, you use replication zones to control the number and location of replicas. Initially, there is a single default replication zone for the entire cluster that is set to copy each range of data 3 times. This default replication factor is fine for this demo.
However, the default replication zone also defines the size at which a single range of data spits into two ranges. Since you want to create many ranges quickly and then see how CockroachDB automatically rebalances them, reduce the max range size from the default 67108864 bytes (64MB) to cause ranges to split more quickly:
$ echo -e "range_min_bytes: 1\nrange_max_bytes: 262144" | cockroach zone set .default --insecure -f -
range_min_bytes: 1
range_max_bytes: 262144
gc:
  ttlseconds: 86400
num_replicas: 3
constraints: []
Step 3. Download and run the block_writer program
CockroachDB provides a number of example programs in Go for simulating client workloads. The program you'll use for this demonstration is called block_writer. It will simulate multiple clients inserting data into the cluster.
Download and install the program:
$ go get github.com/cockroachdb/examples-go/block_writer
Then run the program for 1 minute, long enough to generate plenty of ranges:
$ block_writer -duration 1m
Once it's running, block_writer will output the number of rows written per second:
 1s:  776.7/sec   776.7/sec
 2s:  696.3/sec   736.7/sec
 3s:  659.9/sec   711.1/sec
 4s:  557.4/sec   672.6/sec
 5s:  485.0/sec   635.1/sec
 6s:  563.5/sec   623.2/sec
 7s:  725.2/sec   637.7/sec
 8s:  779.2/sec   655.4/sec
 9s:  859.0/sec   678.0/sec
10s:  960.4/sec   706.1/sec
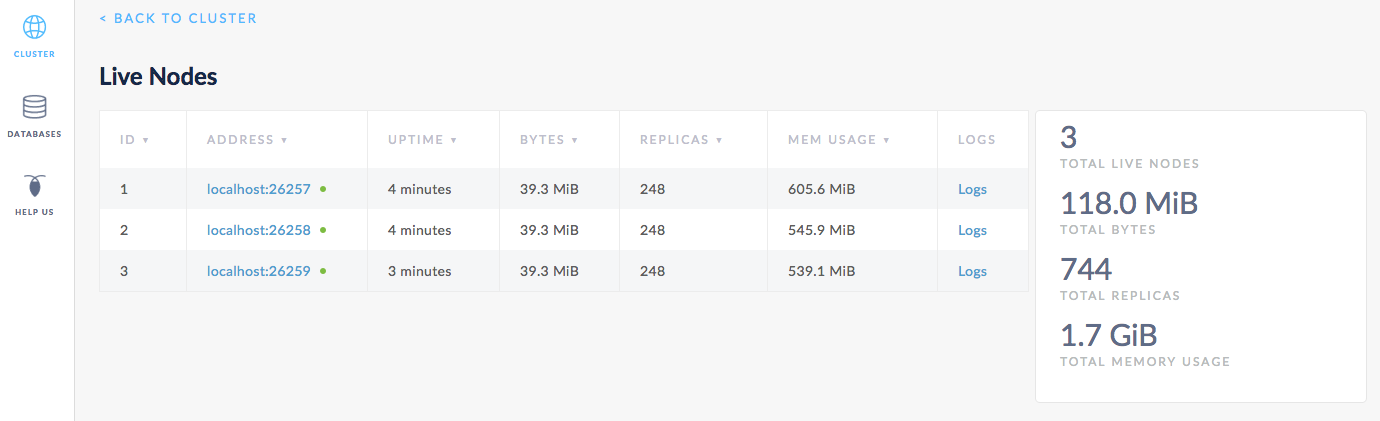
Step 4. Watch the replica count increase
Open the Admin UI at http://localhost:8080, click View nodes list on the right, and you’ll see the bytes, replica count, and other metrics increase as the block_writer program inserts data.
Step 5. Add 2 more nodes
Adding capacity is as simple as starting more nodes and joining them to the running cluster:
# In a new terminal, start node 4:
$ cockroach start --insecure \
--store=scale-node4 \
--host=localhost \
--port=26260 \
--http-port=8083 \
--join=localhost:26257

# In a new terminal, start node 5:
$ cockroach start --insecure \
--store=scale-node5 \
--host=localhost \
--port=26261 \
--http-port=8084 \
--join=localhost:26257
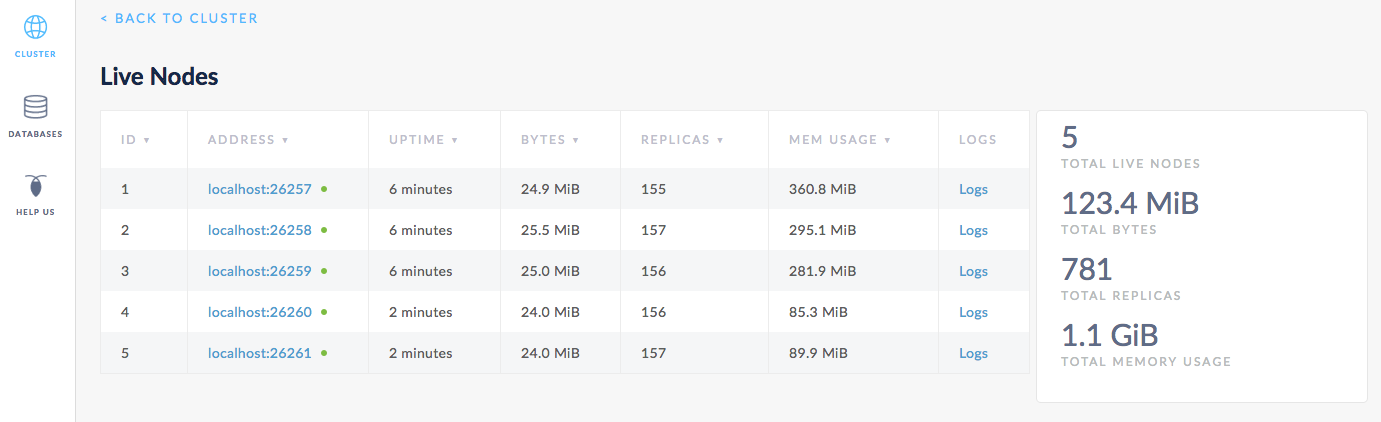
Step 6. Watch data rebalance across all 5 nodes
Back in the Admin UI, you'll now see 5 nodes listed. At first, the bytes and replica count will be lower for nodes 4 and 5. Very soon, however, you'll see those metrics even out across all nodes, indicating that data has been automatically rebalanced to utilize the additional capacity of the new nodes.
Step 7. Stop the cluster
Once you're done with your test cluster, stop each node by switching to its terminal and pressing CTRL-C.
If you do not plan to restart the cluster, you may want to remove the nodes' data stores:
$ rm -rf scale-node1 scale-node2 scale-node3 scale-node4 scale-node5
What's Next?
Use a local cluster to explore these other core CockroachDB features:
