
This article starts entirely from scratch to build a simple app with Node.js, Express.js, and CockroachDB Serverless to collect and display contact information.
To follow this tutorial, you just need to know some JavaScript. You can v*iew complete code here on GitHub.*
Before we dive in, you should also take a look at this Node.js cheet sheet (downloadable version here).

Getting Started
Begin by installing the latest version of Node.js on your computer. For this tutorial, we use Node.js 14.17.0 with npm 6.14.13.
Once you have Node.js and npm installed, create a new folder for your app called roachApp and navigate to it:
mkdir roachApp
cd roachApp
Next, let us create our new Node.js project:
npm initYou will be prompted for some information on your project. In this case, we can leave everything default, except we change the entry point to app.js:
package name: (roachapp)
version: (1.0.0)
description:
entry point: (index.js) app.js
test command:
git repository:
keywords:
author:
license: (ISC)
Create the file that will hold the code for your app:
touch app.js
We rely on the Express.js framework for our app. So install that now:
npm install nodejs expressLet’s add some basic code to app.js that we will build on later. First, let’s set up our main function variable to call the Express module and require it as a dependency.
Then, let’s define the port and host Express needs for its output.
//Setup Express

const express = require('express') //Set up our main function variable for calling the Express module and require it as a dependency
const app = express() //Object returned by express()

//Express needs a port and host for its output. We'll define these here and change them later.
const port = 3000;
const host = 'localhost';
Finally, we will connect to our specified host and port and output the console via Express’s app.listen().
Note that this app.listen() code should remain at the bottom of our app.js file, so as not to conflict with other asynchronous code in our script. As we make additions to the file, keep this code snippet on the final lines.
//Output to console via our Express object “app”

app.listen(port, host, () => {
    console.log(`Server started at ${host} port ${port}`);
});
Creating Your CockroachDB Serverless Database
To store the data for our contact list, create a free CockroachDB Serverless cluster.
After creating an account, download and install CockroachDB on your machine. With CockroachDB installed, we can now connect via the command line to create our new database.
From your Cluster page, click the Connect button at the top right to get your connection details. The Connect page is displayed.
Download the CA certificate from there. Next, create a folder named certs within your roachApp directory and move the downloaded CA certificate into it.
mkdir certs
mv YOURPATH/cc-ca.crt YOURPATH/roachApp/certs
Copy the connection string and update <your_certs_directory> with the proper path to your CA certificate.
We are ready to connect. Paste your updated connection string into the command line:
cockroach sql \ --url='postgres://<username>:<password>@<global host>:26257/<cluster_name>.defaultdb?sslmode=verify-full&sslrootcert=<certs_dir>/cc-ca.crt'Once connected, we create the database we will use for our app:
CREATE DATABASE contacts;
That is it. We have created our database, and it is waiting for us to put it to use. Pretty simple, right?
Connecting Your App To CockroachDB Serverless With Sequelize
To connect our Node.js app to CockroachDB Serverless, we use the Sequelize ORM.
Sequelize makes communicating with CockroachDB Serverless simple. It enables us to integrate CockroachDB into just about any web app with minimal hassle.
Let us install it in a new terminal tab:
npm install sequelize sequelize-cockroachdbConnect to CockroachDB Serverless from inside your app.js file:
const Sequelize = require("sequelize-cockroachdb");

// For secure connection to CockroachDB
const fs = require('fs');

// Connect to CockroachDB through Sequelize
var sequelize = new Sequelize({
  dialect: "postgres",
  username: "USERNAME",
  password: "PASSWORD",
  host: "HOST",
  port: PORT,
  database: "DATABASE",
  dialectOptions: {
    ssl: {

      //For secure connection:
      ca: fs.readFileSync('YOURPATH/root.crt')
              .toString()
    },
  },
  logging: false
,
});
Update the path to your CA certificate to establish a secure connection. You also need to update the username, password, host, port, and database fields. You can find these details under the Connection Parameters tab in the CockroachDB Serverless menu that provided your connection string earlier.
We also need to define the database table we will use. Since we are making a simple contact list, we will create a basic table with three rows: one for a unique ID, one for name, and one for phone number.
//Define the table we'll be working with in CockroachDB

const People = sequelize.define("people", {
    id: {
        type: Sequelize.INTEGER,
        autoIncrement: true,
        primaryKey: true,
    },
    name: {
        type: Sequelize.TEXT,
    },
    phoneNumber: {
        type: Sequelize.INTEGER
,
    },
});
Adding Data To CockroachDB Serverless With Sequelize
Now we are ready to create our contact list. First, let us create an input form to send contact names and phone numbers to the database.
To do this, we use Pug templates. First, install them:
npm install pugNext, create a simple template. Make a new folder within your roachApp directory called views and a new file called index.pug:
mkdir views
cd views
touch index.pug
Within index.pug, add the following template:
doctype=html

html
   head
      title A Simple Input Form
   body
      h1 Input Your Name and Phone Number

      block inputForm
         form(id="info" action="/submit" method="post")
            div Name:
               input(type="text", name="name", value="", placeholder="Name")
            br
            div Phone Number:
               input(type="text", name="phone", value="", placeholder="Phone Number")
            br
            input(type="submit" value="Submit")
Now, within our app.js file, let us set up Pug templates and generate our page:
//Set up our PUG templates

app.set('views', './views');
app.set('view engine', 'pug');

//Render our index page where users can submit contact info

app.get('/', (req, res) => {
    res.render('index');
});
We now have an input form, but it is not doing anything yet. So let us take the data from this form and add it to our contacts database.
To do that, we need a little help from the body-parser middleware. To install it:
npm install body-parserThen require it near the top of your app.js file:
//Call body-parser for POST data handling
var bodyParser = require("body-parser");
app.use(bodyParser.urlencoded({ extended: false}));
Now we are ready to handle our POST data and insert it into CockroachDB Serverless via Sequelize:
//Handle submitted form data

app.post('/submit', function (req, res) {

    //Get our values submitted from the form
    var fromName = req.body.name;
    var fromPhone = req.body.phone;

    //Add our POST data to CockroachDB via Sequelize
    People.sync({
        force: false,
    })
        .then(function () {
        // Insert new data into People table
        return People.bulkCreate([
            {
            name: fromName,
            phoneNumber: fromPhone,
            },
        ]);
        })

    	  //Error handling for database errors
        .catch(function (err) {
        console.error("error: " + err.message);
        });

        //Tell them it was a success
        res.send('Submitted Successfully!<br /> Name:  ' + fromName + '<br />Phone:  ' + fromPhone
);
});
Reading Data From CockroachDB Serverless With Sequelize
We are now able to populate our contact list with names and phone numbers. However, for this to be of any use, we also need to fetch data from CockroachDB Serverless and display it to the user as our contact list.
Once again, Sequelize and CockroachDB Serverless make short work of this.
We begin by creating a Pug template to format the output from our database.
In the views folder, create list.pug:
touch list.pugAnd add the following:
doctype=html

html
   head
      title Your Contacts
   body
    h1 Contact List
    table(style='width:100%', border='1')
      tr
         th Name
         th Phone
      each val in people
         tr
            td #{val.name}
            td #{val.phoneNumber}
Now, within our app.js file, we fetch the information from CockroachDB Serverless and send it to our Pug template:
//Create a page that lists our contacts already in the database

app.get('/list', (req, res) => {

    //Get our data from CockroachDB
    People.sync({
         force:false,
    })
    .then(function() {
       return People.findAll();
    })

    .then(function (people) {
        //Render output from CockroachDB using our PUG template
        res.render('list', { people : people
 });
    })

});
Deploying on Heroku
And finally, we will deploy our app using Heroku.
You may be wondering why we do not simply use Heroku Postgres for our database if we are ultimately deploying on Heroku. While Heroku Postgres is helpful for many applications, it does not provide a relational database built for scalability. CockroachDB Serverless does.
To deploy your app on Heroku, you need to create a free Heroku account. After logging in, create a new app and name it roachapp.
Download the Heroku CLI and Git. We will use these to upload our project to Heroku. But first, we need to make a few changes to our code to ensure it plays nicely with Heroku.
Open app.js and change the host and port variables you set at the beginning of the tutorial:
//Port and host for Heroku
const port = process.env.PORT; //Port assigned by Heroku
const host = '0.0.0.0';
Now, open your package.json file and add the following:
 "scripts": {
    "start": "node app.js"
  },
  "engines": {
    "node": "14.17.0",
    "npm": "6.14.13"

  }
Create a file simply named Procfile (with no extensions) in the root of your roachApp directory:
touch Procfile
Procfile tells Heroku how to start our app. Add the following inside your Procfile and save it with no file extension:
web: node app.js
Now let us log in to Heroku from the command line:
heroku login
Now all that is left to do is create our Git repository and deploy it to Heroku:
 heroku git:clone -a roachApp
 git add .
 git commit -am "Deploying app"

 git push heroku master
That is it! Our app should now be live on Heroku. This shortcut opens our browser to our new Heroku app:
heroku openYou should see a page like this one:
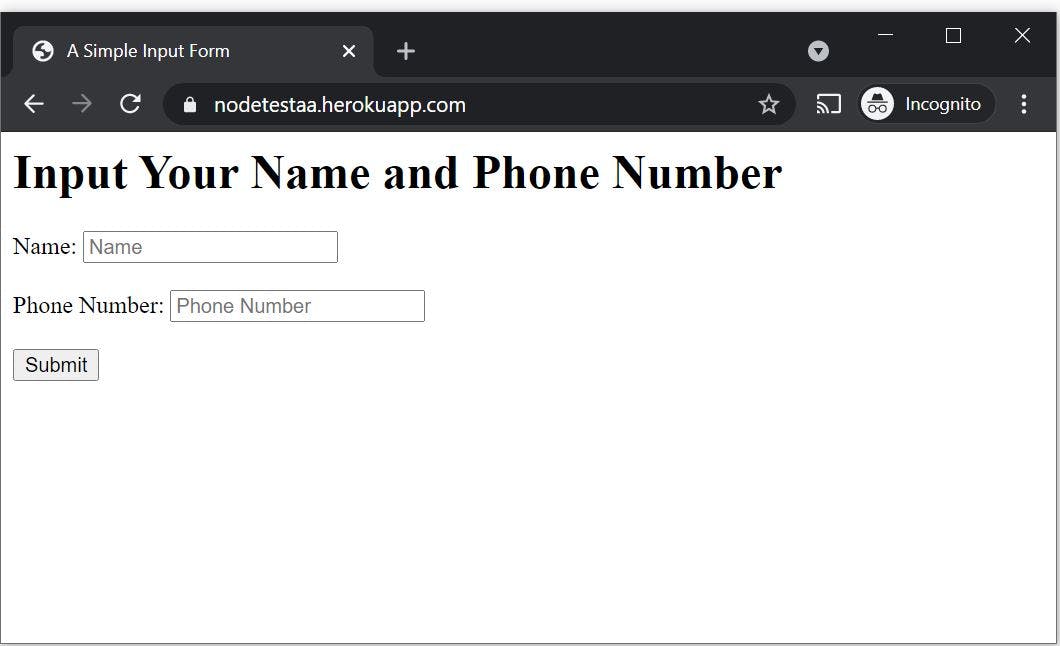
Type in some contact details and submit them.

To view the contacts in the list, navigate to /list.
Next Steps
As we have seen, adding CockroachDB Serverless' robust relational database to your Node.js apps is painless. Moreover, with help from Sequelize, any web app can take advantage of CockroachDB Serverless and other CockroachDB services.
Can your web apps benefit from a bit of CockroachDB Serverless integration? Sign up for a free CockroachDB Serverless cluster and get experimenting. The only limit is your imagination.
The Code
Here is our complete app.js file:
//Setup Express

const express = require('express') //Set up our main function variable for calling the Express module and require it as a dependency
const app = express() //Object returned by express()

//Port and host for Heroku
const port = process.env.PORT;
const host = '0.0.0.0';

//Call body-parser for POST data handling
var bodyParser = require("body-parser");
app.use(bodyParser.urlencoded({ extended: false }));

//CockroachDB
const Sequelize = require("sequelize-cockroachdb");

// For secure connection to CockroachDB
const fs = require('fs');

// Connect to CockroachDB through Sequelize
var sequelize = new Sequelize({
  dialect: "postgres",
  username: "USERNAME",
  password: "PASSWORD",
  host: "HOST",
  port: PORT,
  database: "DATABASE",
  dialectOptions: {
    ssl: {

      //For secure connection:
      ca: fs.readFileSync('YOURPATH/root.crt')
              .toString()
    },
  },
  logging: false,
});

//Define the table we'll be working with in CockroachDB

const People = sequelize.define("people", {
    id: {
        type: Sequelize.INTEGER,
        autoIncrement: true,
        primaryKey: true,
    },
    name: {
        type: Sequelize.TEXT,
    },
    phoneNumber: {
        type: Sequelize.INTEGER,
    },
});

//Set up our PUG templates

app.set('views', './views');
app.set('view engine', 'pug');

//Render our index page where users can submit contact info

app.get('/', (req, res) => {
    res.render('index');
});

//Create a page that lists our contacts already in the database

app.get('/list', (req, res) => {

    //Get our data from CockroachDB
    People.sync({
         force:false,
    })
    .then(function() {
       return People.findAll();
    })

    .then(function (people) {
        //Render output from CockroachDB using our PUG template
        res.render('list', { people : people });
    })

});

//Handle submitted form data

app.post('/submit', function (req, res) {

    //Get our values submitted from the form
    var fromName = req.body.name;
    var fromPhone = req.body.phone;

    //Add our POST data to CockroachDB via Sequelize
    People.sync({
        force: false,
    })
        .then(function () {
        // Insert new data into People table
        return People.bulkCreate([
            {
            name: fromName,
            phoneNumber: fromPhone,
            },
        ]);
        })

        .catch(function (err) {
        console.error("error: " + err.message);
        });

        //Tell them it was a success
        res.send('Submitted Successfully!<br /> Name:  ' + fromName + '<br />Phone:  ' + fromPhone);
});

//Output to console
app.listen(port, host, () => {
    console.log(`Server started at ${host} port ${port}`);
});